How to Connect adsfox with Wix?
The Wix integration with adsfox enables automatic capture and sending of leads from forms created on your website, then sending them to the adsfox system in server-side tracking / Conversion API mode.
After adding the dedicated script as Custom Code in the site settings (or via GTM), adsfox starts automatically registering every submitted form. This allows you to analyze lead quality, tag them in the panel, and the system forwards this data to Meta, Google Ads, TikTok, LinkedIn, and Google Analytics 4.
The integration is quick and simple, but requires an active premium plan in Wix, this is the condition enabling the addition of custom scripts. Once implemented, you gain full visibility of the conversion path and the ability to optimize ad campaigns based on real customer value data, not just form cost.
How to Connect adsfox with Wix?
1. Log in to the administrator account of your site:
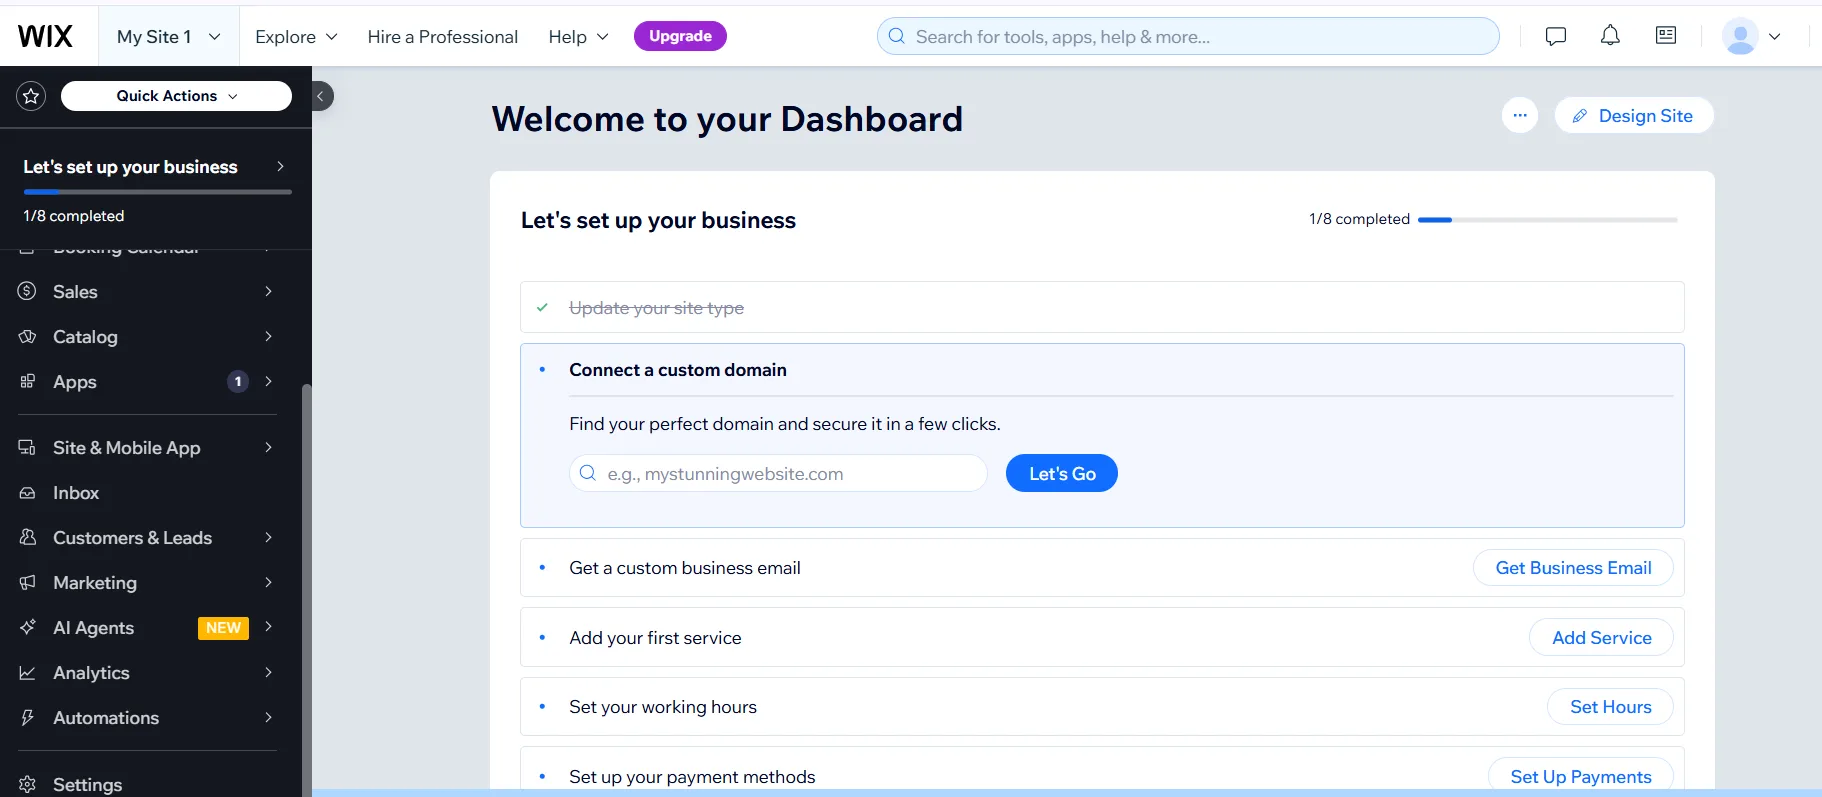
2. Go to settings.
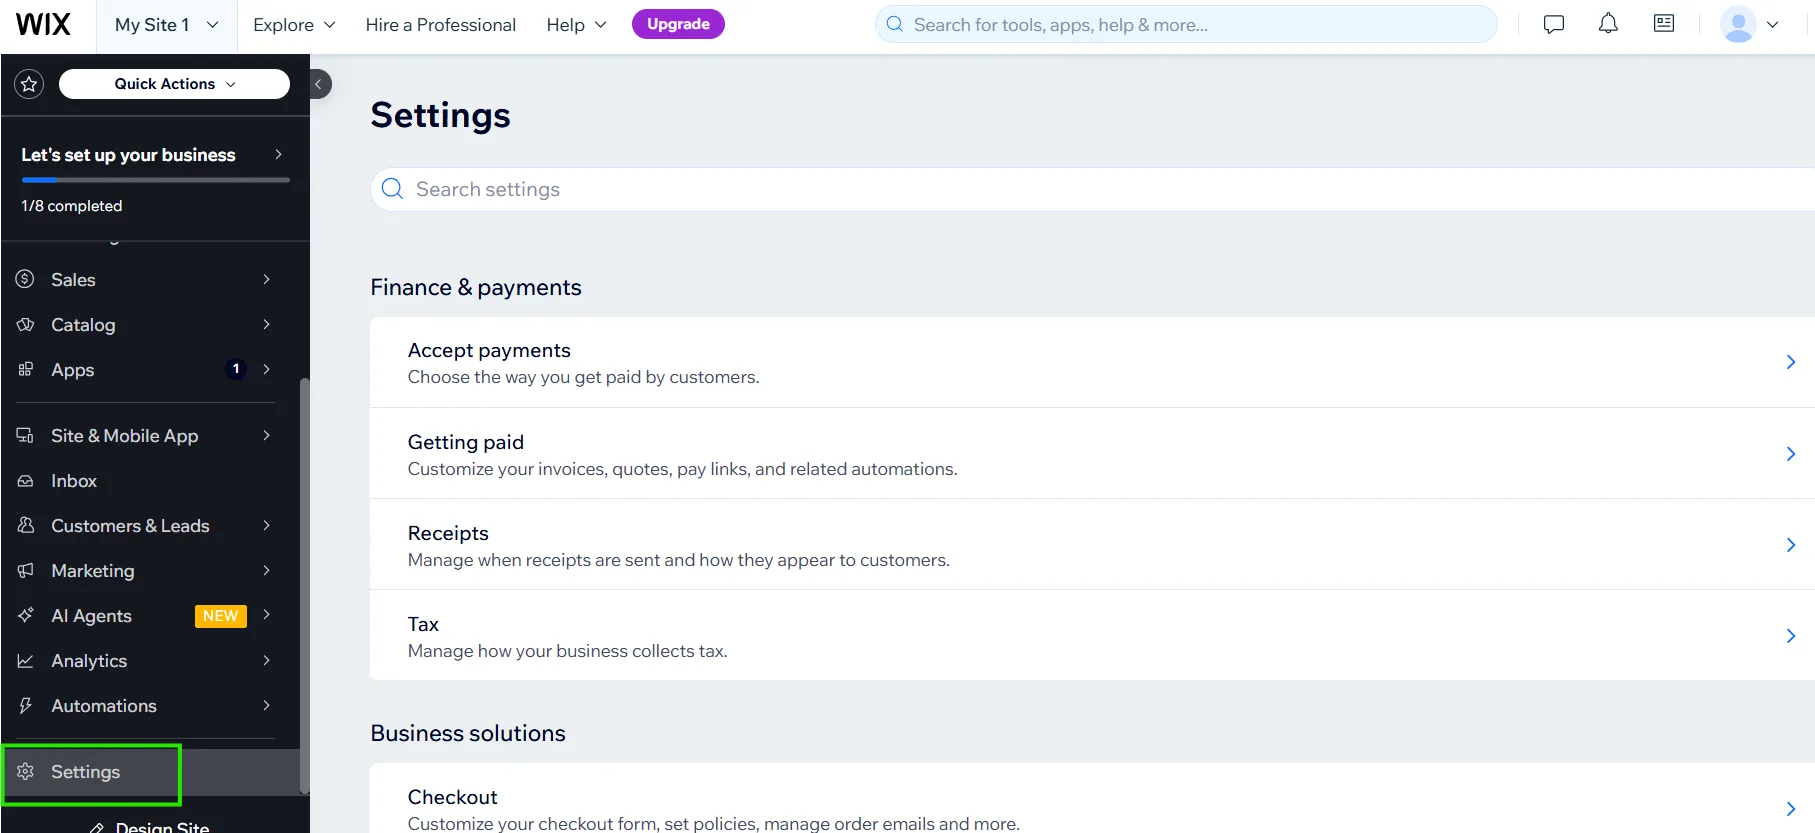
3. In settings, search for “Custom code”.
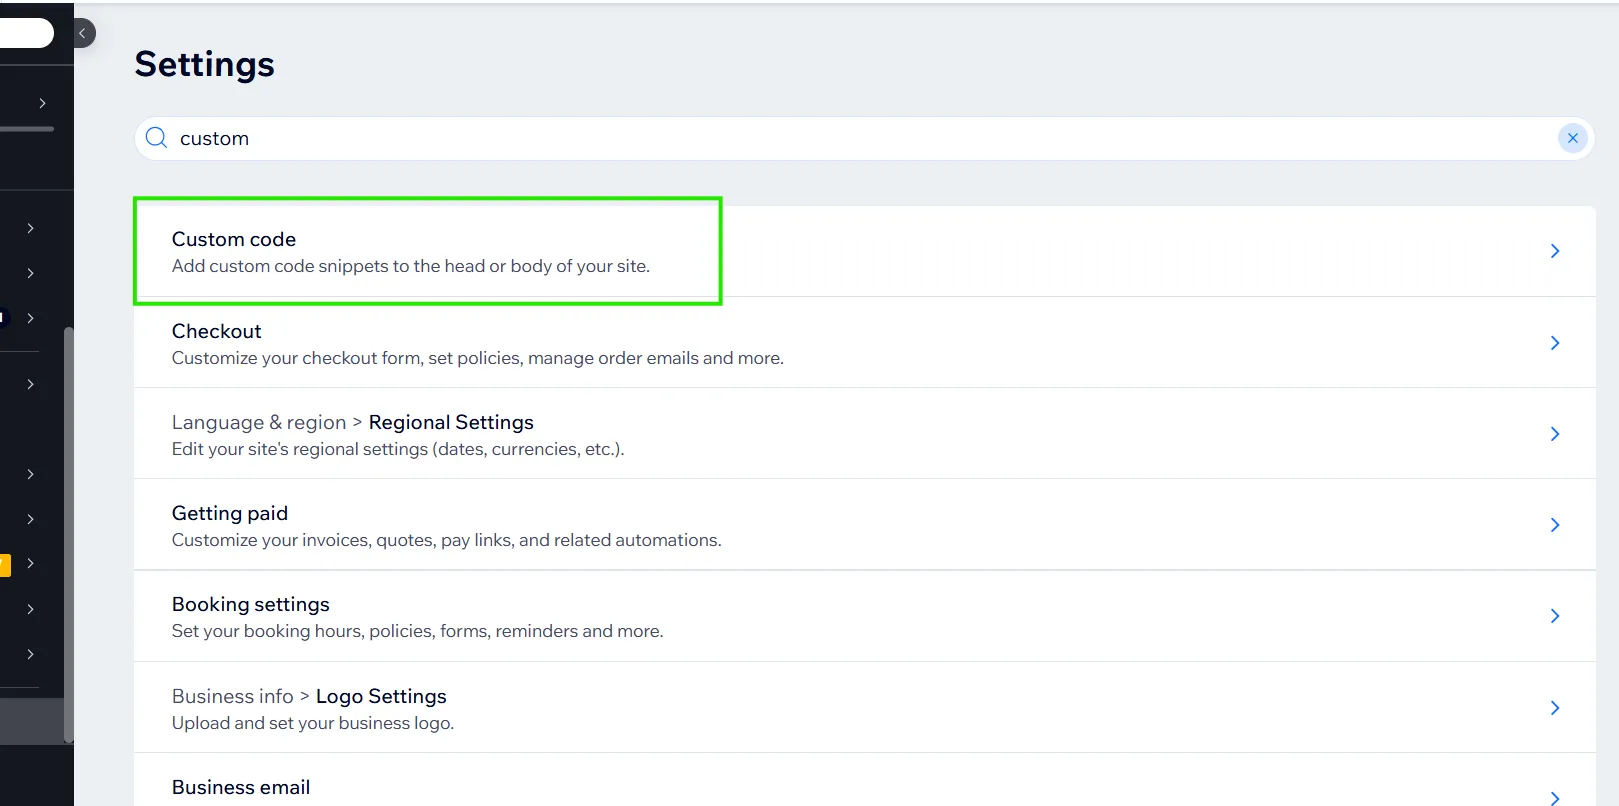
4. In this place, by clicking “add custom code”, you can add the script from the adsfox tool. Adding it requires premium access on the WIX platform.
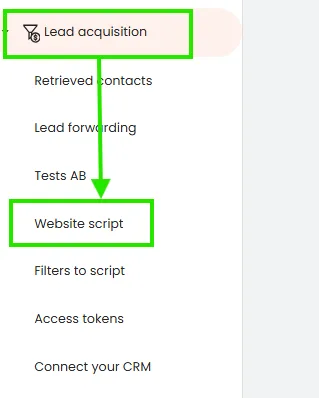
You can find the dedicated adsfox script in your adsfox panel under the Lead Acquisition tab, then website script:
Next, from the list, select the platform you use to manage your website. For Wix, this will be “others”. If your site uses reCAPTCHA or GA4, check that option before downloading the script.
If you’re using multiple domains or your form is on a subdomain, also check the 3rd option, i.e., Cross-domain:
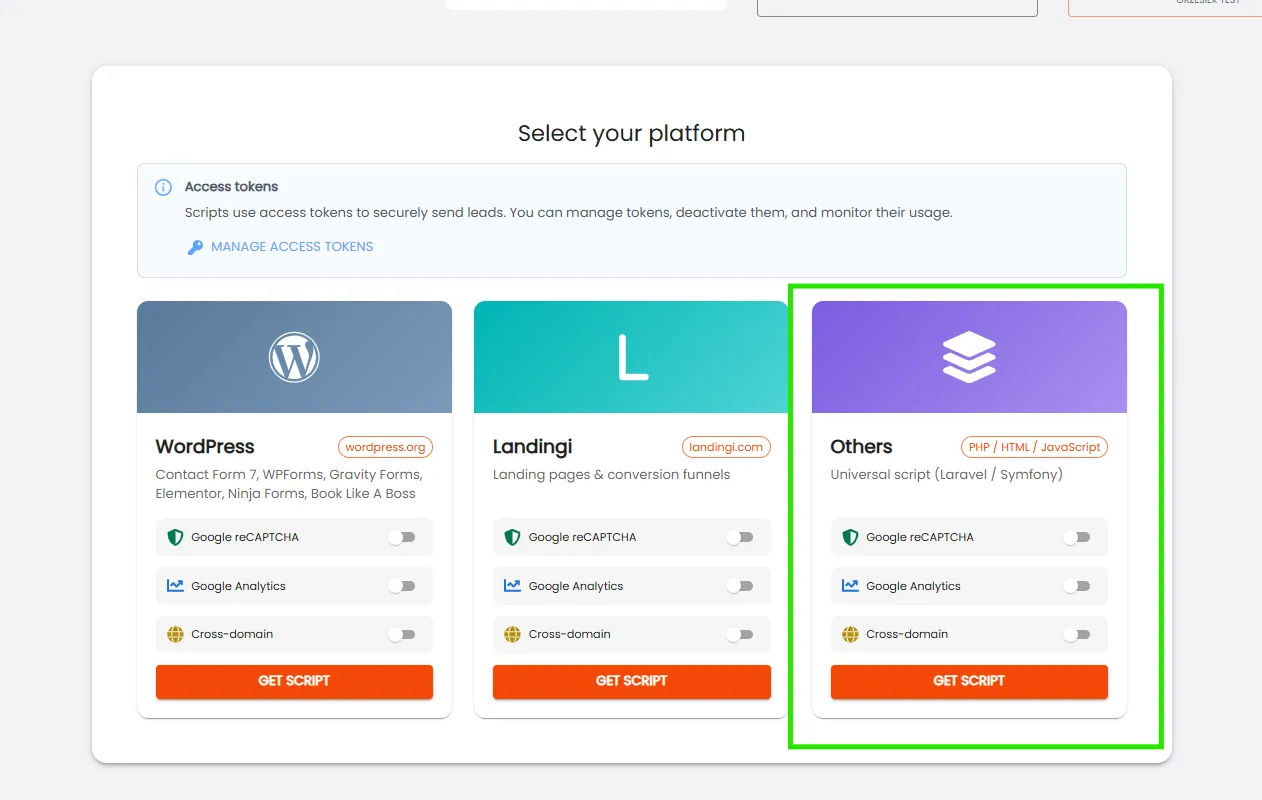
After clicking “download script”, the following view will appear:
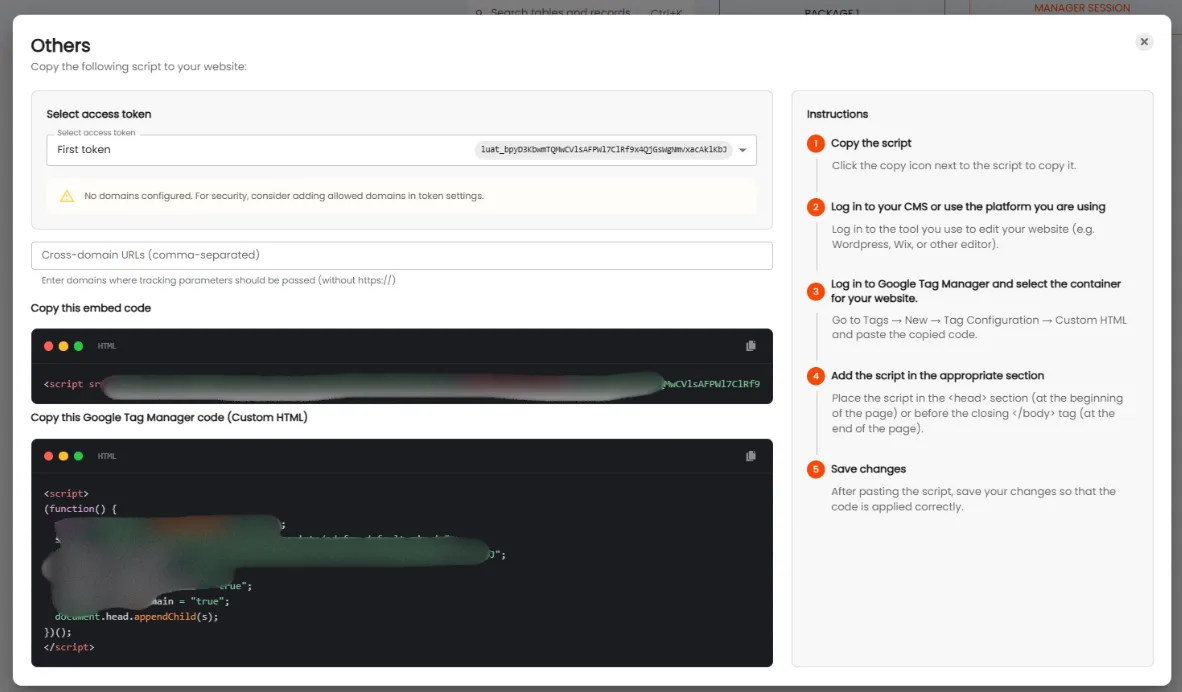
In the case of using multiple domains or a subdomain, enter them according to the panel view (separated by commas).
Then download the appropriate script. You have two options:
- Copy the embed and add it directly in your system (in this case, Wix—as described in the previous steps).
- You can implement Custom HTML via Google Tag Manager added to your page.
Regardless of which option you choose, remember to save the changes.
After adding the adsfox script as Custom Code and saving changes (as per the process shown on pages 3–5 of the PDF), the integration on your Wix site becomes active. From that moment, all new leads will be automatically:
- Registered in the adsfox panel (Retrieved contacts tab),
- Synchronized with CRM,
- Marked as new lead / qualified / non-qualified / sales/lost,
- Sent server-side to Meta CAPI, Google Ads CAPI, TikTok API, LinkedIn API, and GA4.
This allows you to monitor contact quality, eliminate low-value leads, and optimize ad campaigns based on the real value of acquired customers, not just the number of forms (CPL).
To confirm the integration is working correctly, submit a test form on the site and check if the contact was displayed in adsfox under the Retrieved contacts tab.
The Wix + adsfox integration is a quick, simple, and key element of a professional lead generation process and full campaign optimization based on lead quality.
The Wix integration with adsfox ensures accurate conversion tracking of the website, even with cookie restrictions, and enables effective campaign optimization based on lead quality and value.
What next?
After connecting your page with your CRM, it’s worth learning how to Connect adsfox with Meta. This way, all leads from ad campaigns will automatically go to your tables in adsfox.
In the next post, you’ll learn how to configure this integration step by step.