Team Management and Permissions in adsfox CRM
Adding Team Members
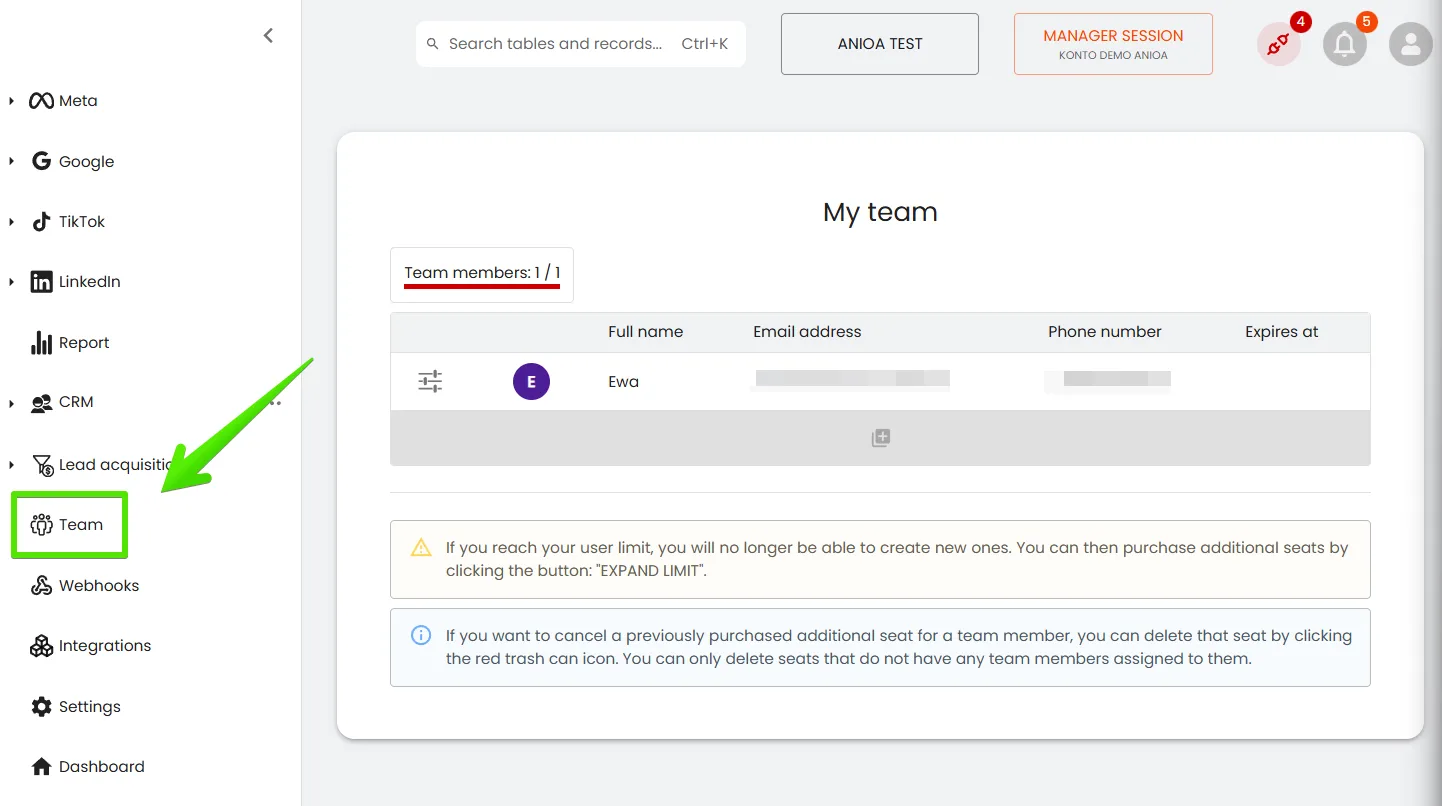
You can invite employees responsible for handling contacts and supporting work with clients to CRM. The first team member is added for free, and each subsequent one requires an additional fee. This solution provides flexibility and enables scaling the system along with the company’s development.
Location of the “Team” Module
The team management function is located in the navigation panel on the left side, under the icon depicting three people. Click the “Team” tab to go to settings regarding adding users and granting them appropriate roles and permissions.
Setting Team Access
When adding a new user, you can precisely define their permissions in the CRM system. For example, a user might have access:
- Only to the CRM module,
- Without the ability to publish ads,
- Without access to sensitive data.
- This lets you tailor permission levels to each employee’s role, protecting your company’s strategic information.
Below is a step-by-step guide on how to add a new team member in adsfox—from opening the “My team” section, filling in user details, to advancing to further permission settings.
Go to the “My team” Section
Open the adsfox panel.
In the menu, select the tab for team management (e.g., My team).
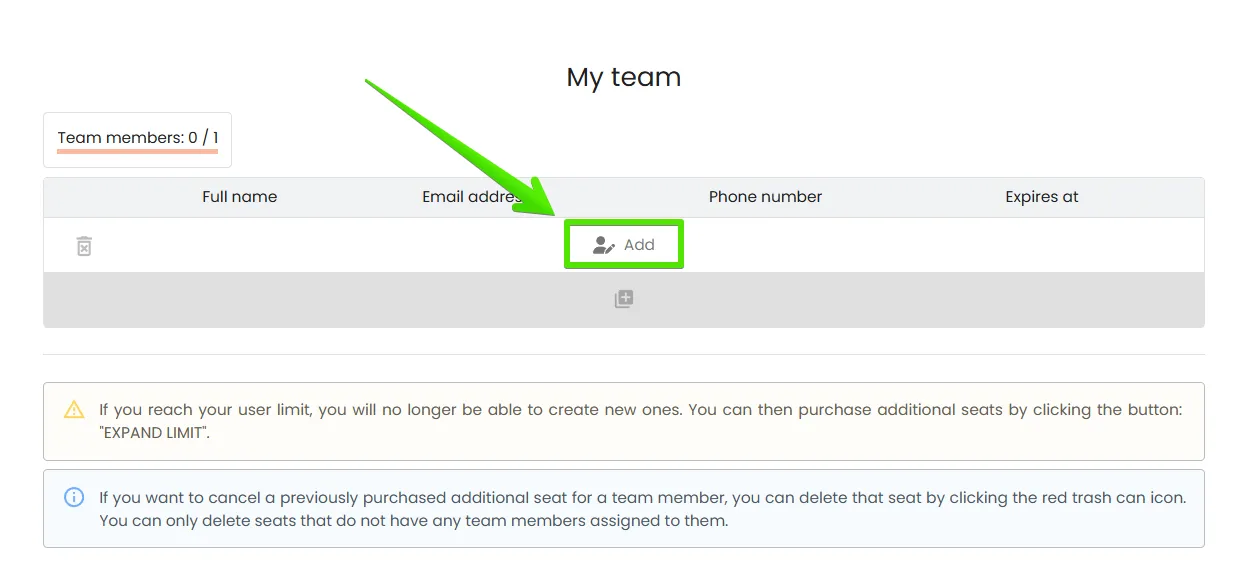
In the user list table, click the “Add” button.
**
**
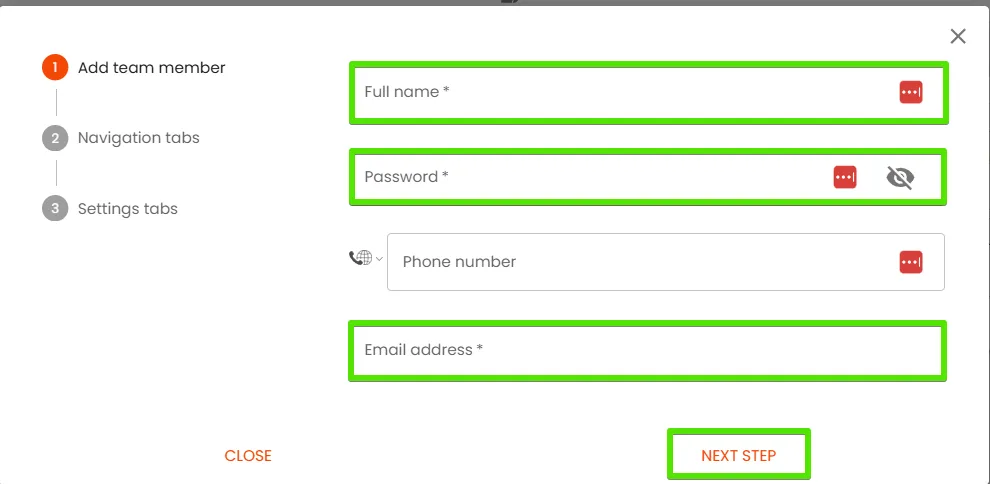
Fill in User Details in the “Add team member” Window
In the “Full name” field, enter the employee’s first and last name.
In the “Password” field, set a password for the new user.
In the “Phone number” field, enter a phone number (optional, if required).
In the “Email address” field, enter the user’s work email this will be used for login.
Select Modules Visible in the Menu for This User, e.g.:
Meta,
CRM,
(Optionally) Google, TikTok, LinkedIn, Lead acquisition.
Leave unchecked any channels the user shouldn’t access.
Click NEXT STEP to proceed.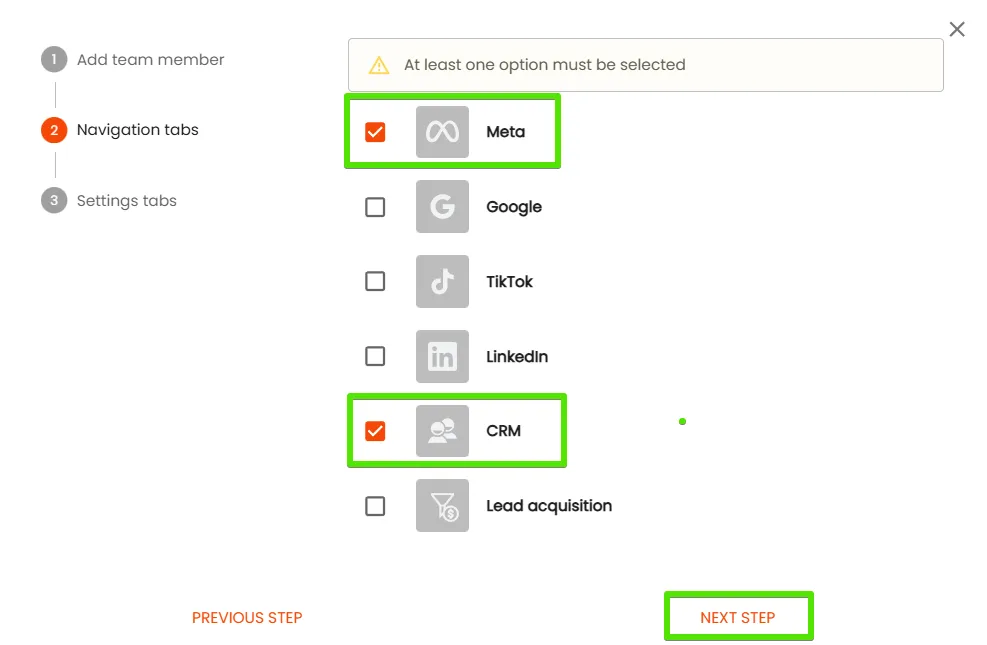
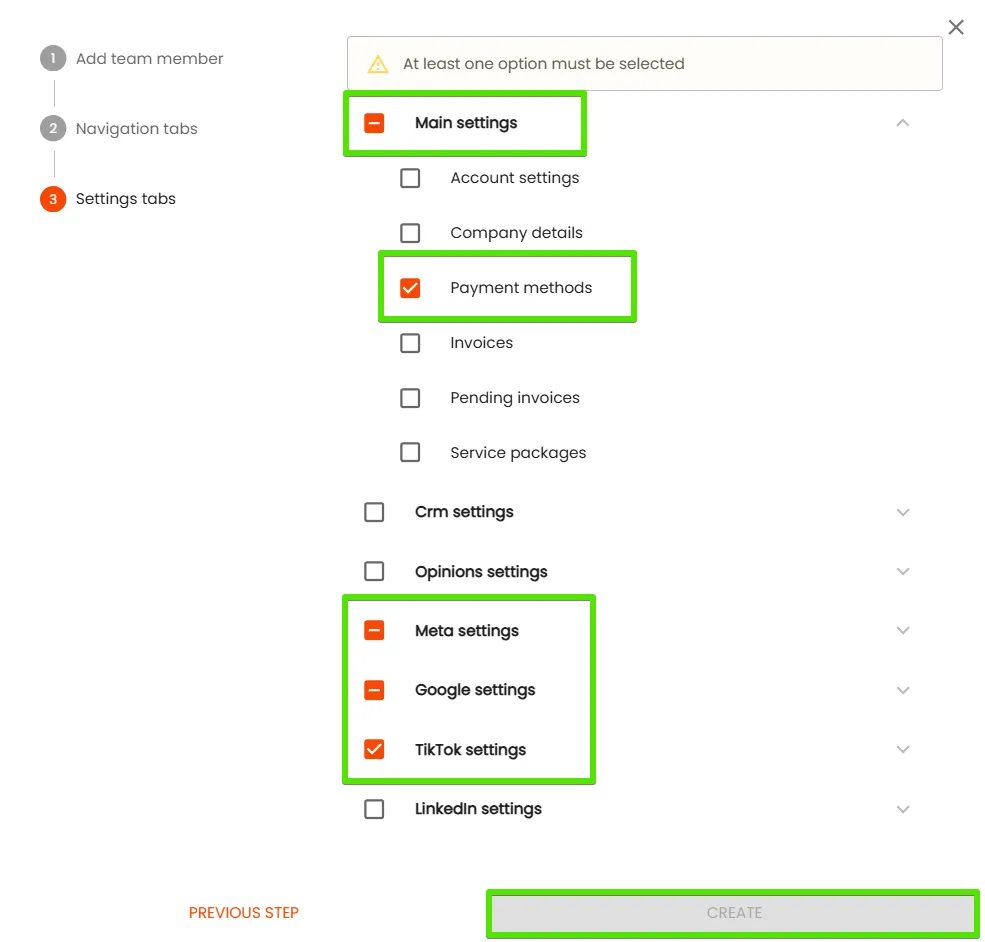
Selecting Settings Tabs
In the third step—Settings tabs—decide which configuration areas the user can access.
In the Main settings section, you can check options like Payment methods if the person handles payments or invoices.
Below, select settings for individual ad channels, e.g.:
- Meta settings,
- Google settings,
- TikTok settings,
- LinkedIn settings—only where the user will actually work.
Once you’ve chosen the relevant sections, click CREATE to save the new user with assigned permissions.
Assigning Access to Tables
In the CRM module, in the “Sharing and Permissions” section, you can assign individual team members access to selected tables or entire workspaces. Thanks to this, each employee has insight only into the data that is necessary for them to perform their duties.
This solution is particularly useful in larger organizations where different teams implement separate projects or serve different client groups.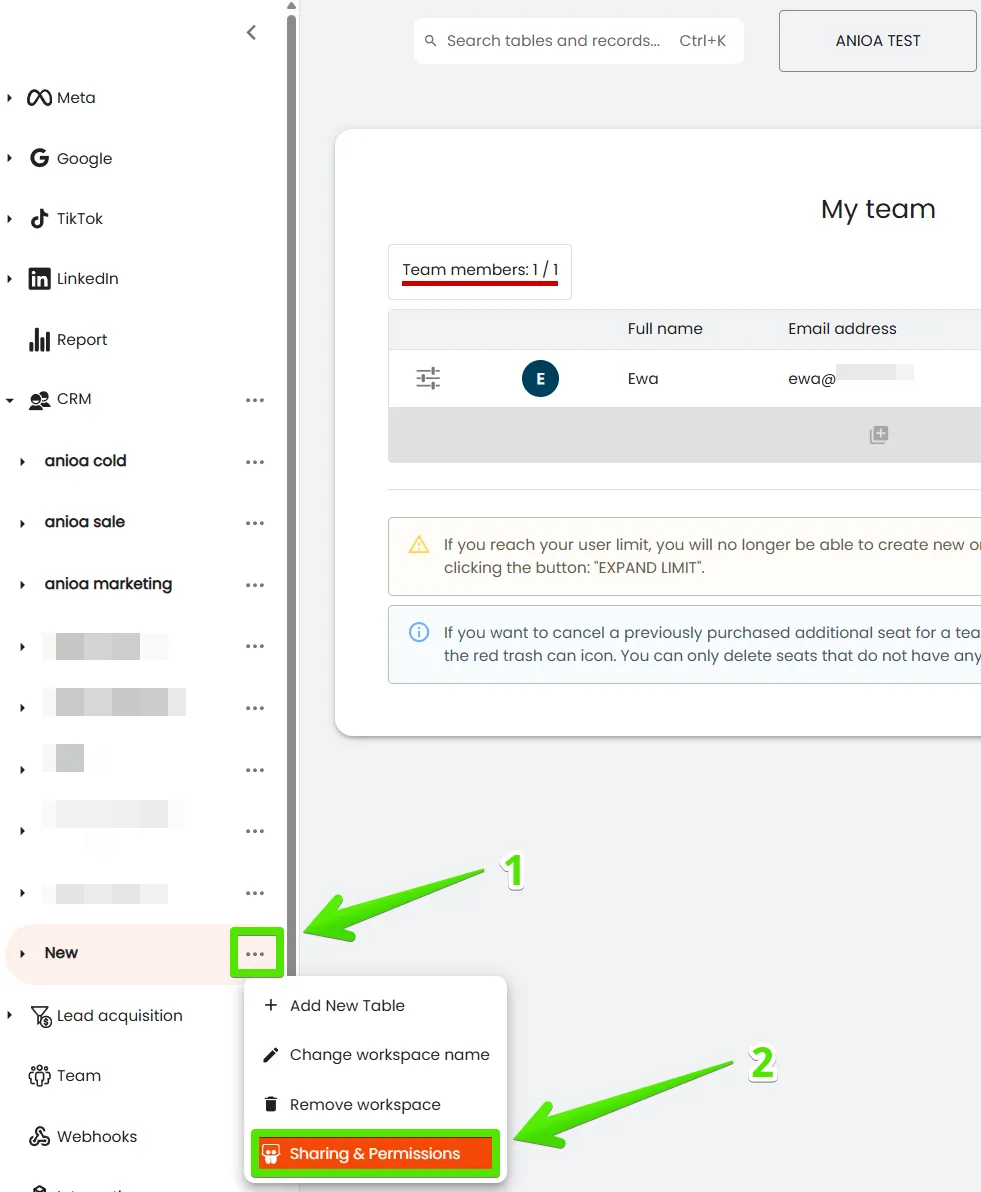
adsfox stands out with its seamless CRM integration and ad platform integration, allowing you to tag and optimize leads based on their value. This conversion optimization ensures you’re focusing on high-quality leads that drive real revenue.
This integration addresses key pain points for performance marketers, agencies, and businesses reliant on lead generation campaigns, such as improving lead quality, enhancing campaign reporting, and streamlining CRM integration.
With adsfox, you gain a complete view of the customer journey, from ad spend to signed contracts, making it a powerful tool for performance marketing.
What Next?
After configuring the team and assigning appropriate permissions, the next step is familiarizing yourself with the general principles of operation and support system in adsfox CRM.
In the next post, it is presented how to use the tool both in the online and mobile version, as well as how to report suggestions regarding its development, so that the system even better supports daily work.