General Procedure for Connecting CRMs to adsfox

This universal guide works seamlessly no matter your CRM setup, whether it’s HubSpot, Pipedrive, Zoho, Livespace, ClickUp, Salesforce, Bitrix24, Monday, Dynamics, a custom-built system, or any other platform that supports webhooks.
Connecting your CRM is the first step of lead generation optimization with adsfox: once lead statuses flow in, quality signals flow back to Google and Meta.
Step 1. Preparing the Integration on the adsfox Side
Log in to adsfox.
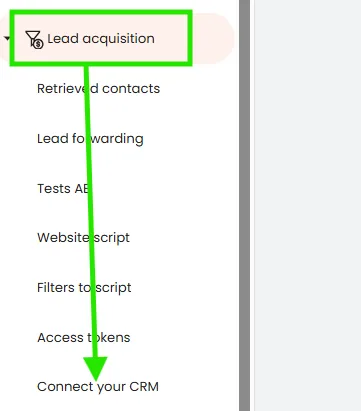
Head to Lead Acquisition, then select Connect Your CRM:
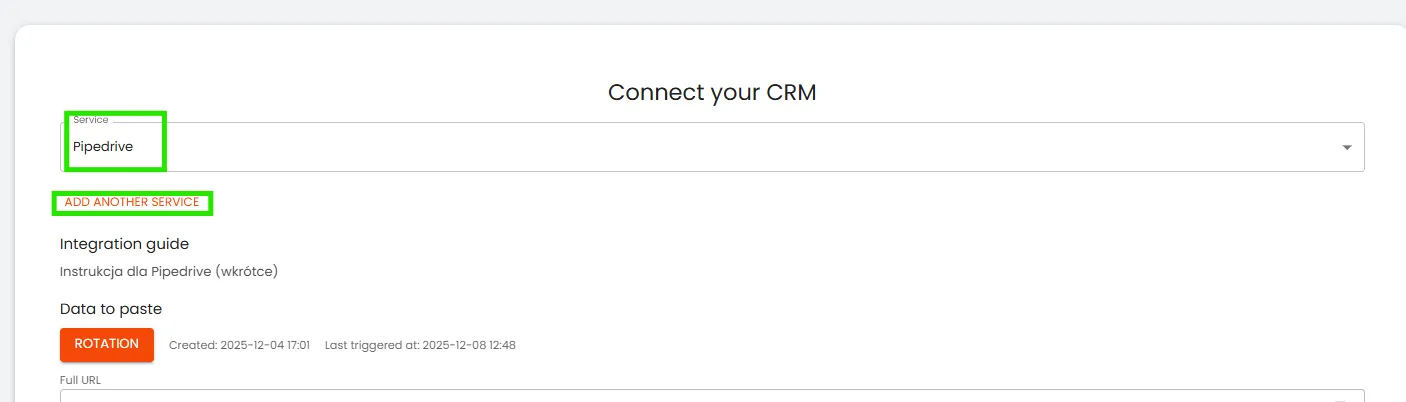
Choose a dedicated webhook for Pipedrive, Zoho, or create a fresh module tailored to your CRM:
Copy these essentials:
- Webhook URL,
- Public Token,
- Optional JSON payload (if your system requires it, like in Zoho).
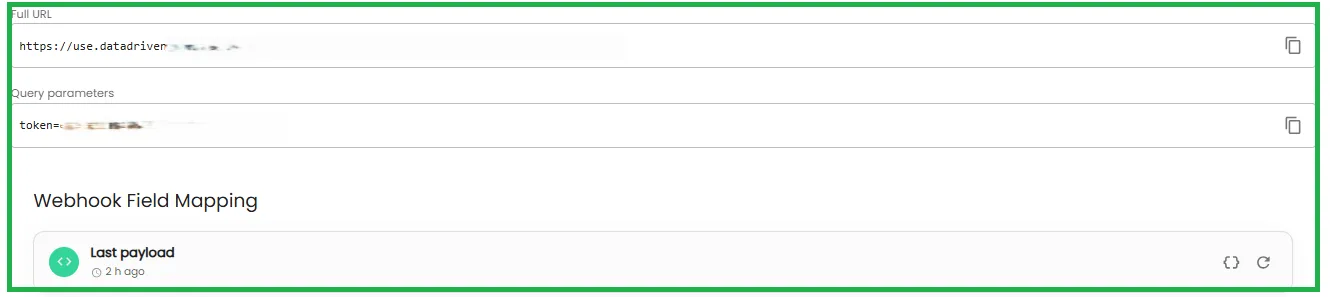
You’ll need these to configure your CRM to fire events straight to adsfox.
Step 2. Launching Data Sending from CRM (Core of Integration)
Your CRM needs to trigger the adsfox webhook whenever a lead or deal updates its status or value.
CRMs generally fall into three categories:
Type A
CRMs that send all data automatically (e.g., ClickUp), just add the webhook, and your CRM pushes the full payload. Then, map it effortlessly in adsfox.
Type B
CRMs that require you to define which fields to send (e.g., Pipedrive, Zoho, Livespace), set up an extra automation, rule, or process that:
- Selects specific fields,
- Chooses the trigger moment (like update or create),
- Sends data via webhook.
Type C
CRMs without built-in webhooks but with API or tools like Make/Zapier
- CRM → (Make/Zapier) → adsfox
In this case:
- Trigger an event (e.g., “Watch Modified Deals”).
- Add a second module for adsfox: Send Conversion Event.
- Map your fields.
Example: Livespace → Make → adsfox
Step 3. Sending Events and Field Mapping in adsfox
Once you’ve added the webhook and Token in your CRM and triggered the configured event, check back in adsfox (right where you copied the webhook) to confirm the payload arrived:
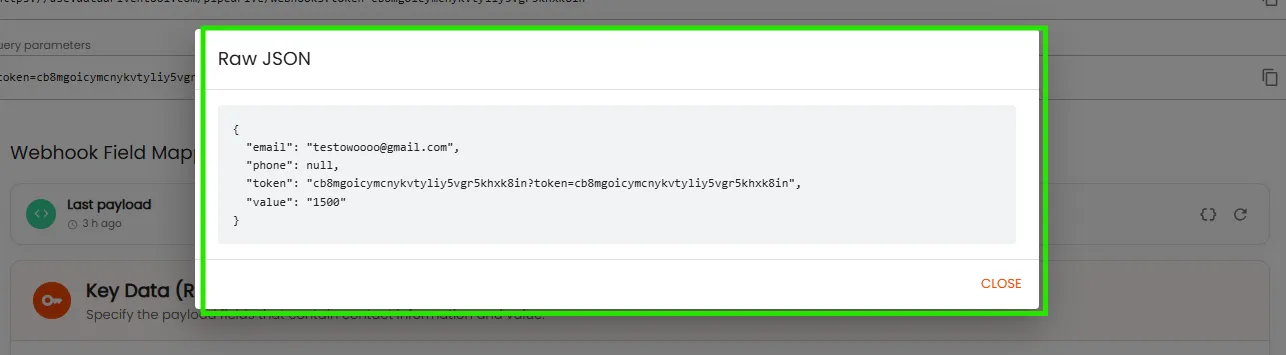
Here, you’ll see exactly what data your CRM sent to adsfox, ready for mapping.
From the screenshot example, you can map:
- Email,
- Phone,
- Lead value (value),
Note: If your CRM doesn’t send a specific field (like a custom label), team up with sales to find an alternative way to tag leads. The key is consistency, ensure everyone handling leads follows the same proven process.
Staying in the same panel, jump to the Key Data tab to map values from your CRM’s sent data to adsfox’s email, phone, and value fields:
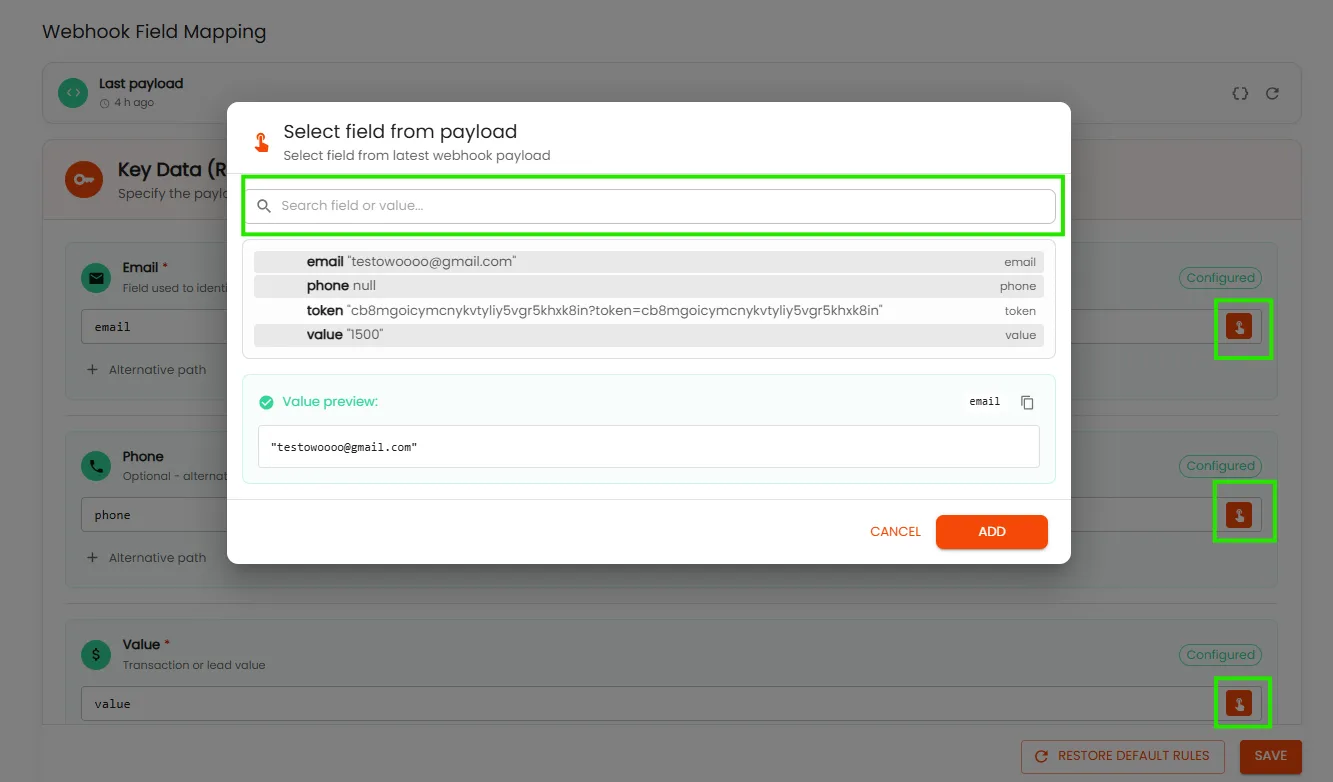
In the highlighted field, search for the column where your entered data from the sent lead is stored, then map it to adsfox’s columns.
After saving, all data coming through the webhook will slot perfectly into those fields in adsfox.
With fields mapped, define the logic for tagging lead statuses sent to all your connected ad accounts. Here’s a sample logic to get you started:
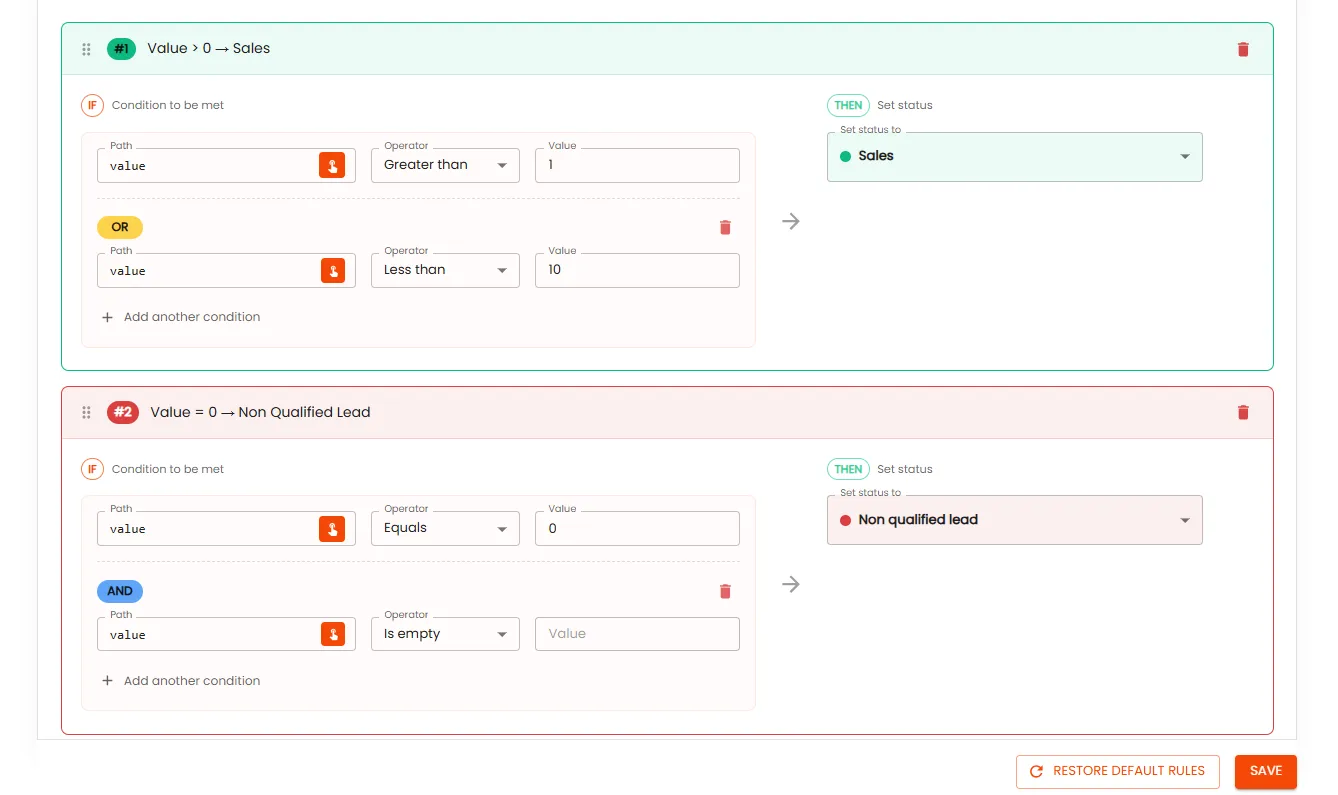
Step 4. Marking Leads in CRM = Signals Sent to CAPI
Every status change in your CRM should fire off a webhook.
adsfox then auto-sends events (based on your predefined logic):
- New lead,
- Qualified lead,
- Non-qualified lead,
- Sales,
- Lost,
These signals go out in parallel to:
- Meta,
- Google Ads,
- LinkedIn,
- TikTok,
- GA4,
Feeding algorithms real value data, not just form submissions, for smarter targeting and better lead quality across the board.
Step 5. Testing Integration Correctness
To verify everything’s running smoothly:
On the CRM side:
– Update the status or value of a lead,
On the adsfox side:
– Go to Retrieved Contacts.
– Check if the lead is tagged correctly.
Summary
Connecting your CRM to adsfox follows this simple blueprint every time:
– adsfox generates a webhook and token.
– Your CRM sends data (status, email, phone, value) to it.
– adsfox maps fields and converts them into CAPI events.
– Events stream simultaneously to: Meta, Google, TikTok, LinkedIn, GA4.
The whole integration is a breeze and takes about 5 minutes, unlocking seamless CRM integration, conversion optimization, and ad platform integration to supercharge your lead generation and sales performance.
What’s next?
Once the configuration described above is complete, the next step is to consistently and deliberately tag your leads, regardless of whether they come from Meta, Google, or other acquisition channels. The way leads are qualified and labeled directly impacts how advertising algorithms learn and optimize campaigns toward real business value — not just form submissions.
To fully leverage the benefits of the integration, move on to lead tagging best practices in adsfox. There you’ll find clear guidelines, practical scenarios, and proven workflows for qualifying leads, assigning values, and aligning sales and marketing teams around the same data.
Learn more: Lead tagging in adsfox