
How to connect adsfox to WordPress

Preparing Access
Before you begin, ensure you have access to the WordPress admin panel and the ability to install and manage plugins. This is where you’ll paste the script that connects your site to the CRM.
Downloading the Script from adsfox
To connect your website with the tool and enable lead tagging, you first need to download the script. Start by:
Logging in to your adsfox account.
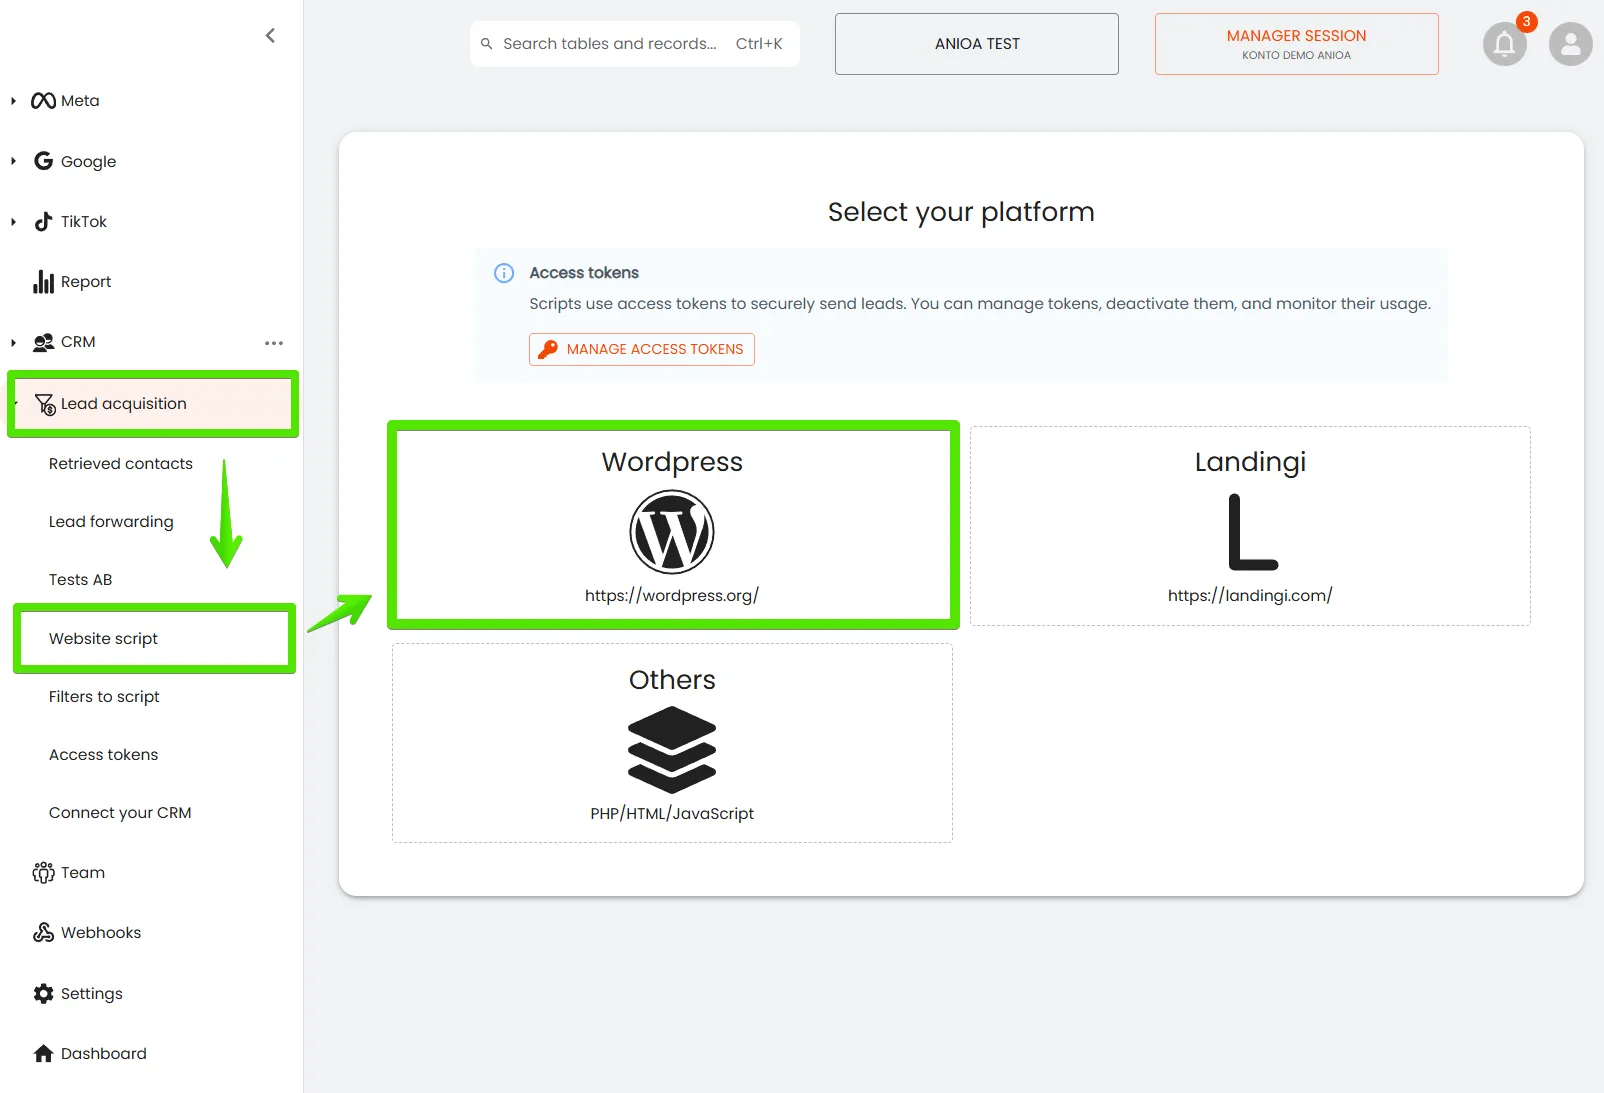
Navigating to the Lead acquisition → Website Script.
Clicking the WordPress button to generate the code.
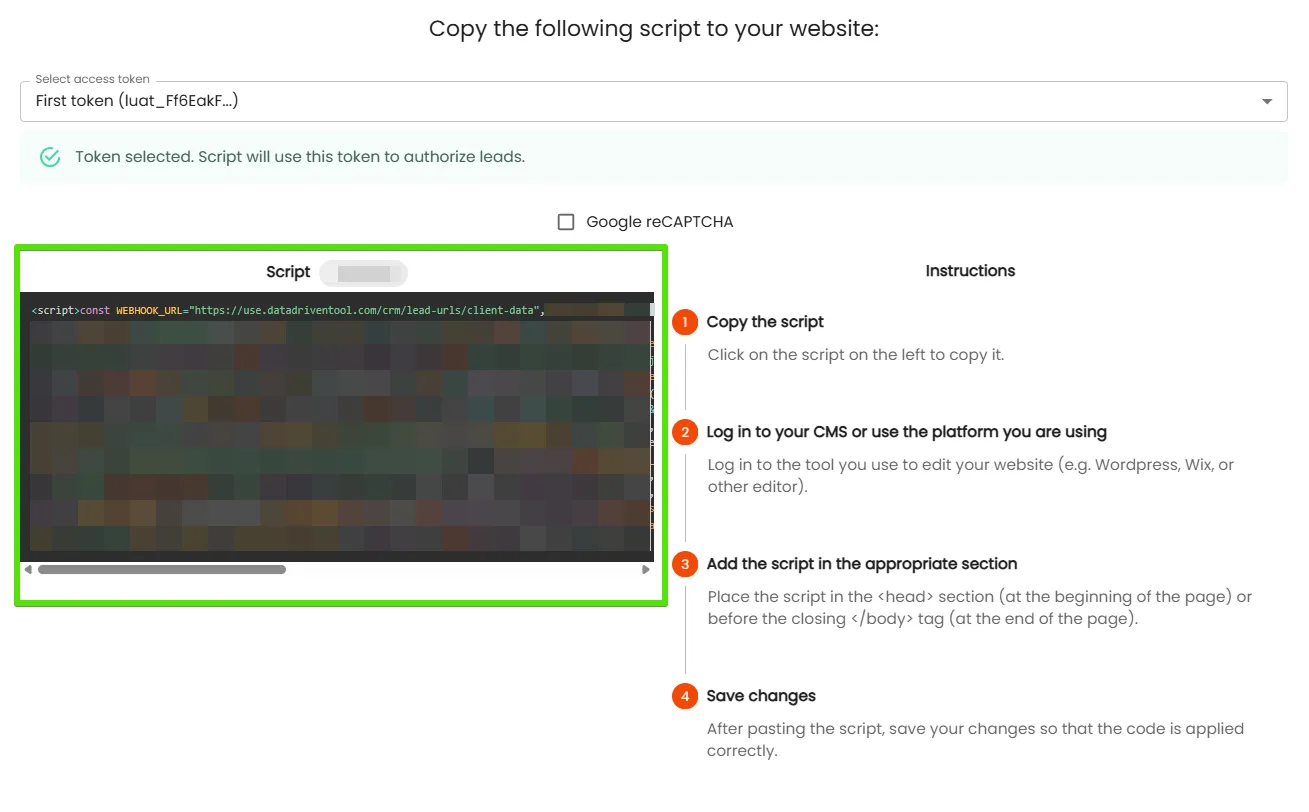
Copying the displayed script by clicking in the code field.
adsfox stands out with its seamless CRM integration and ad platform integration, allowing you to tag and optimize leads based on their value. This conversion optimization ensures you’re focusing on high-quality leads that drive real revenue.
Adding the Script in WordPress
The next step is adding the script in the WordPress panel:
Go to the HFCM (Header Footer Code Manager) tab.
Create a new Snippet, for example, “Lead Submission.”
Paste the copied code into the appropriate field.
Click Update to save the changes.
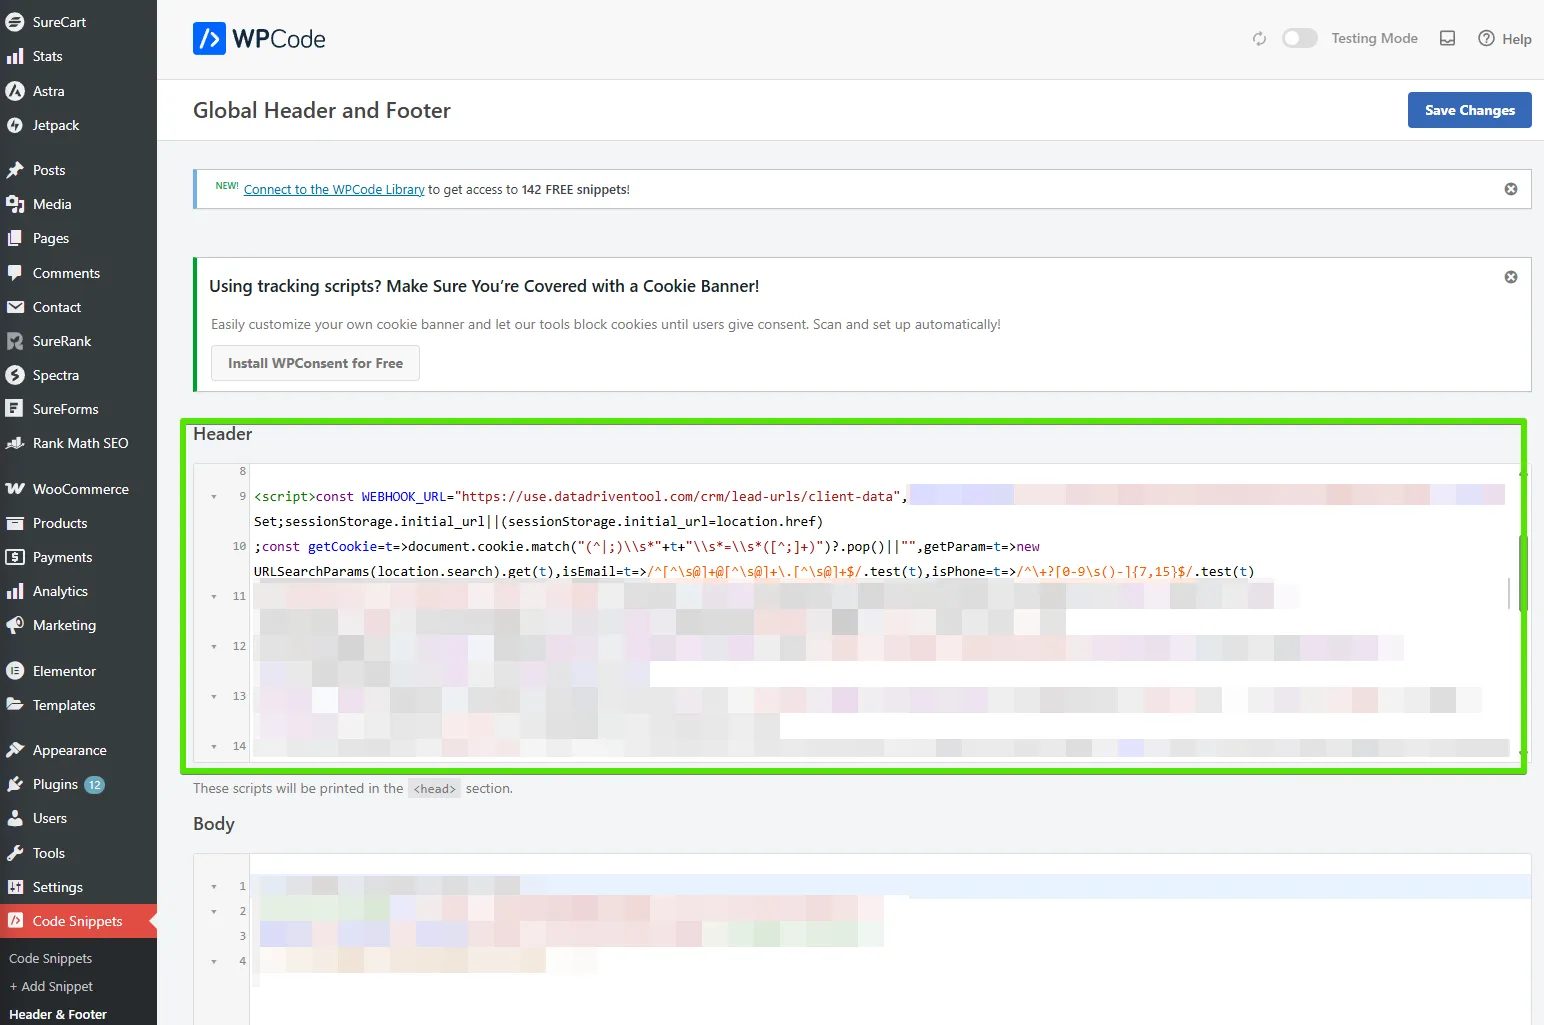
👉 If you don’t have the HFCM plugin yet, you can easily install it in the “Plugins” tab → Add New and search for “Header Footer Code Manager.”
This integration addresses key pain points for performance marketers, agencies, and businesses reliant on lead generation campaigns, such as improving lead quality, enhancing campaign reporting, and streamlining CRM integration.
Remember About Caching
After adding the script, be sure to:
- Reload the site’s cache,
- Clear the browser’s cache.
Without this, the integration may not work immediately, even if the code was uploaded correctly.
What Next?
After connecting your site to your CRM, it’s worth learning how to Connect adsfox with Meta. This way, all leads from advertising campaigns will automatically go to your tables in adsfox.
In the next post, you’ll learn how to configure this integration step by step.