How to Connect adsfox with Google (Google Ads)?

Step 1. Kickstarting the Integration
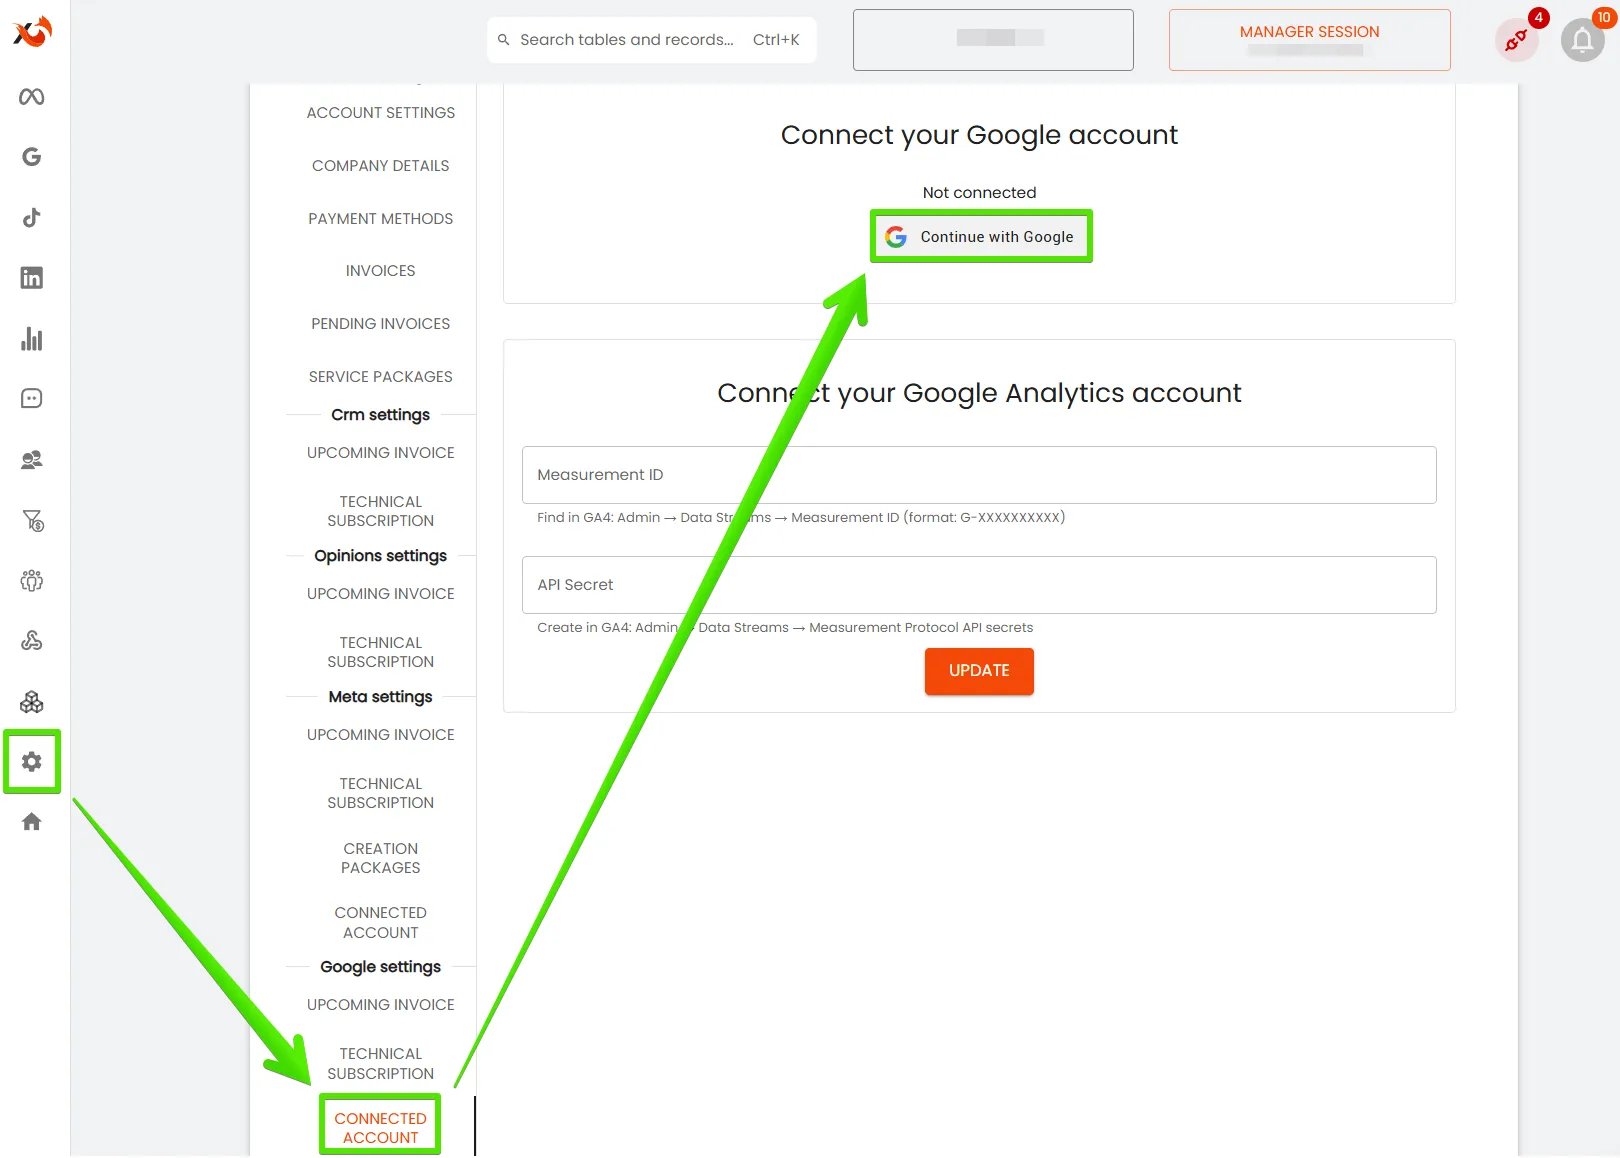
- Head to Google settings in your adsfox dashboard.
- From the left-hand menu, select: Google Settings → Connected Accounts.
- You’ll see a prompt: “Connect your Google account.” Hit the Continue with Google button.
Step 2. Selecting the Account and Granting Permissions
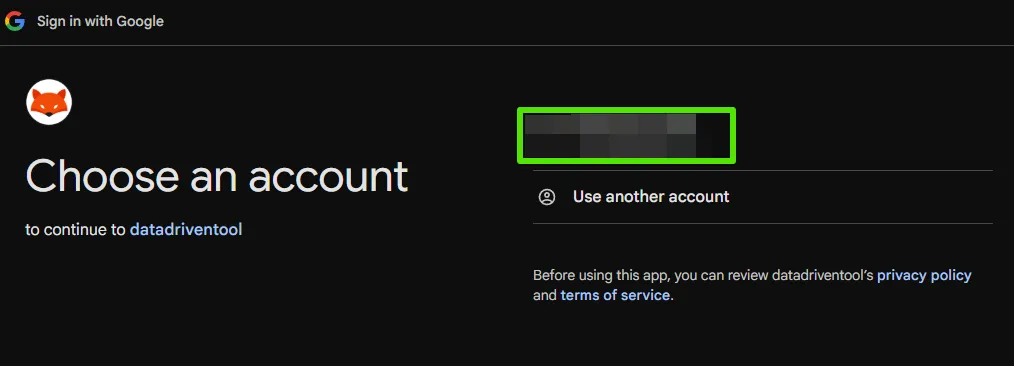
- Start the login process.
- Pick the Google account with access to your Google Ads account.
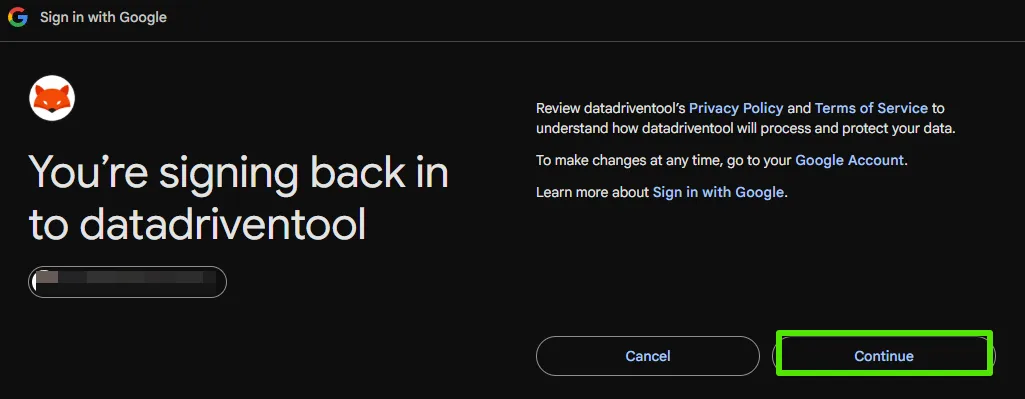
2. Accept the terms.
- A window pops up for agreeing to the Privacy Policy and other consents.
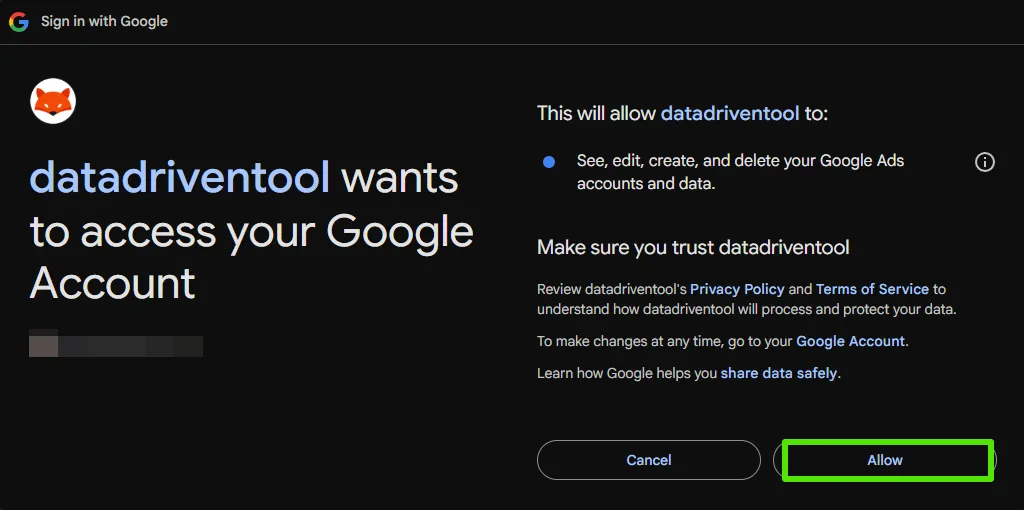
3. Grant permissions.
- Google lists the permissions requested by the app/dashboard.
- Click Allow to confirm the link.
4.Choosing Your Ad Account
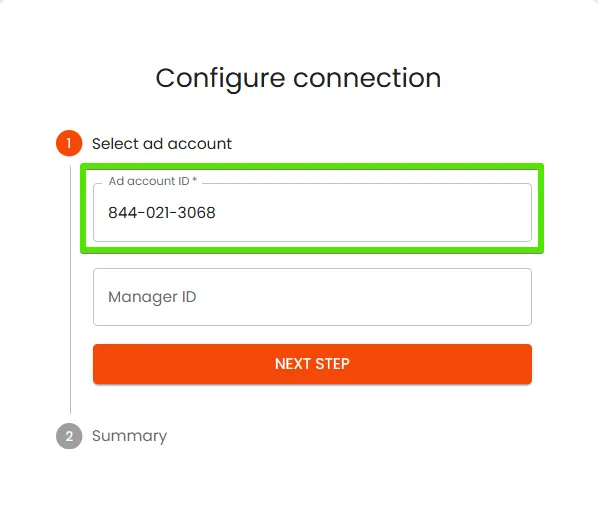
1. After logging in and granting access, the system redirects you to the Configure Connection screen.
2. In section 1: Select ad account, check the account you want to link (e.g., For Szymon). Click Next step.
5.Review the Summary
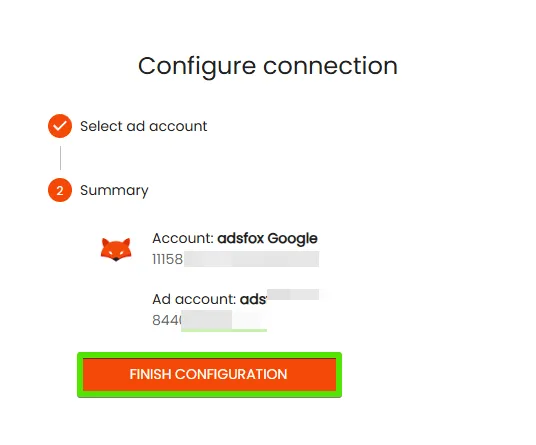
- On the Summary screen, you’ll spot:
Google Account – e.g., Romuald Nowakowski with its ID.
Ad Account – e.g., For Szymon with its ID number.
6.Finalize the Setup
- If everything checks out, click Finish Configuration.
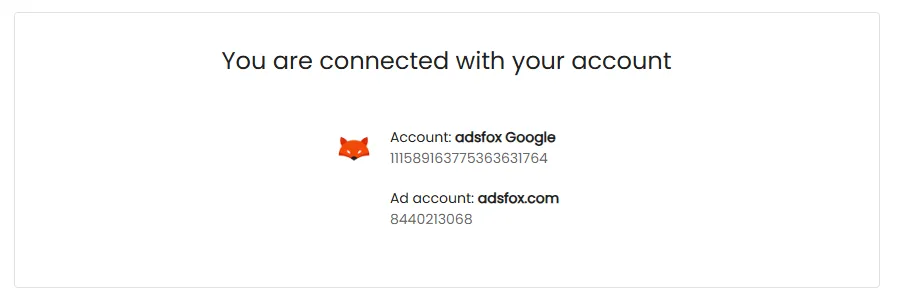
The system saves your settings and links your Google account to the selected ad account.
Step 3. Adding the URL Template
For the integration to run smoothly, approve the URL schema for conversion tracking.
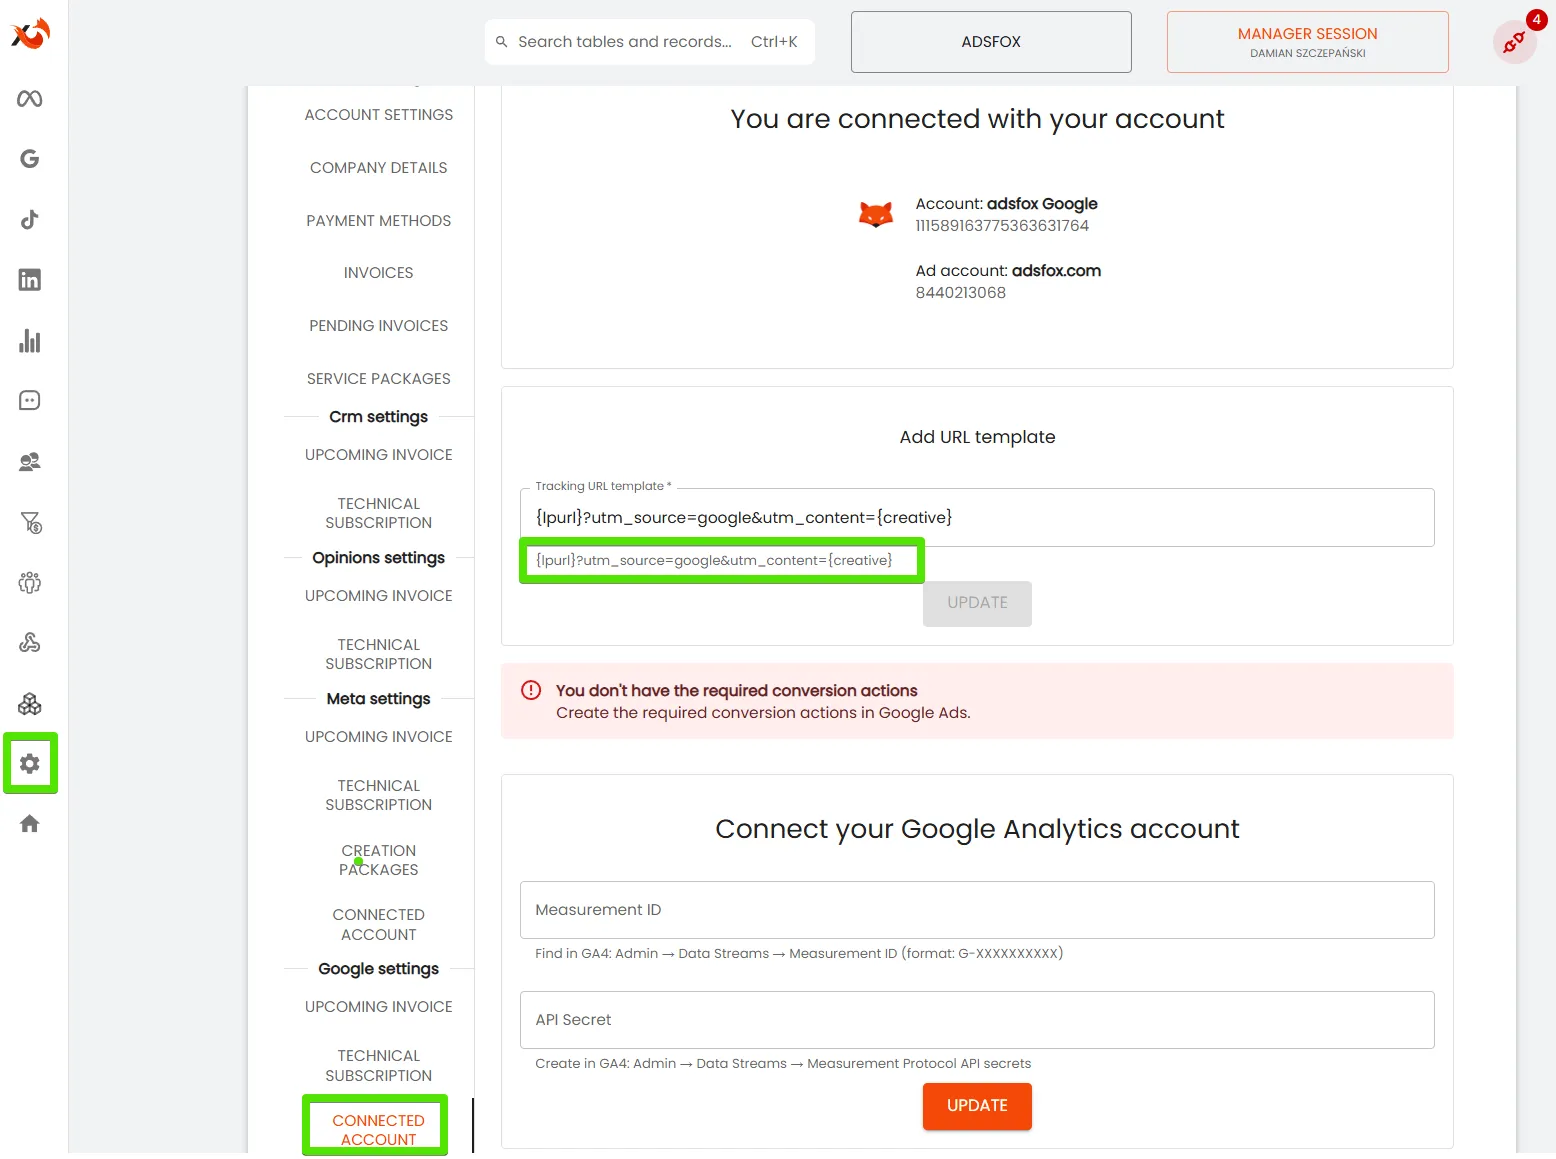
In adsfox, navigate to: Settings → Google Settings → Connected Accounts.
In the Add URL Template section, paste the URL template right below the input field.
Step 4. Setting Up the Schema in Google Ads
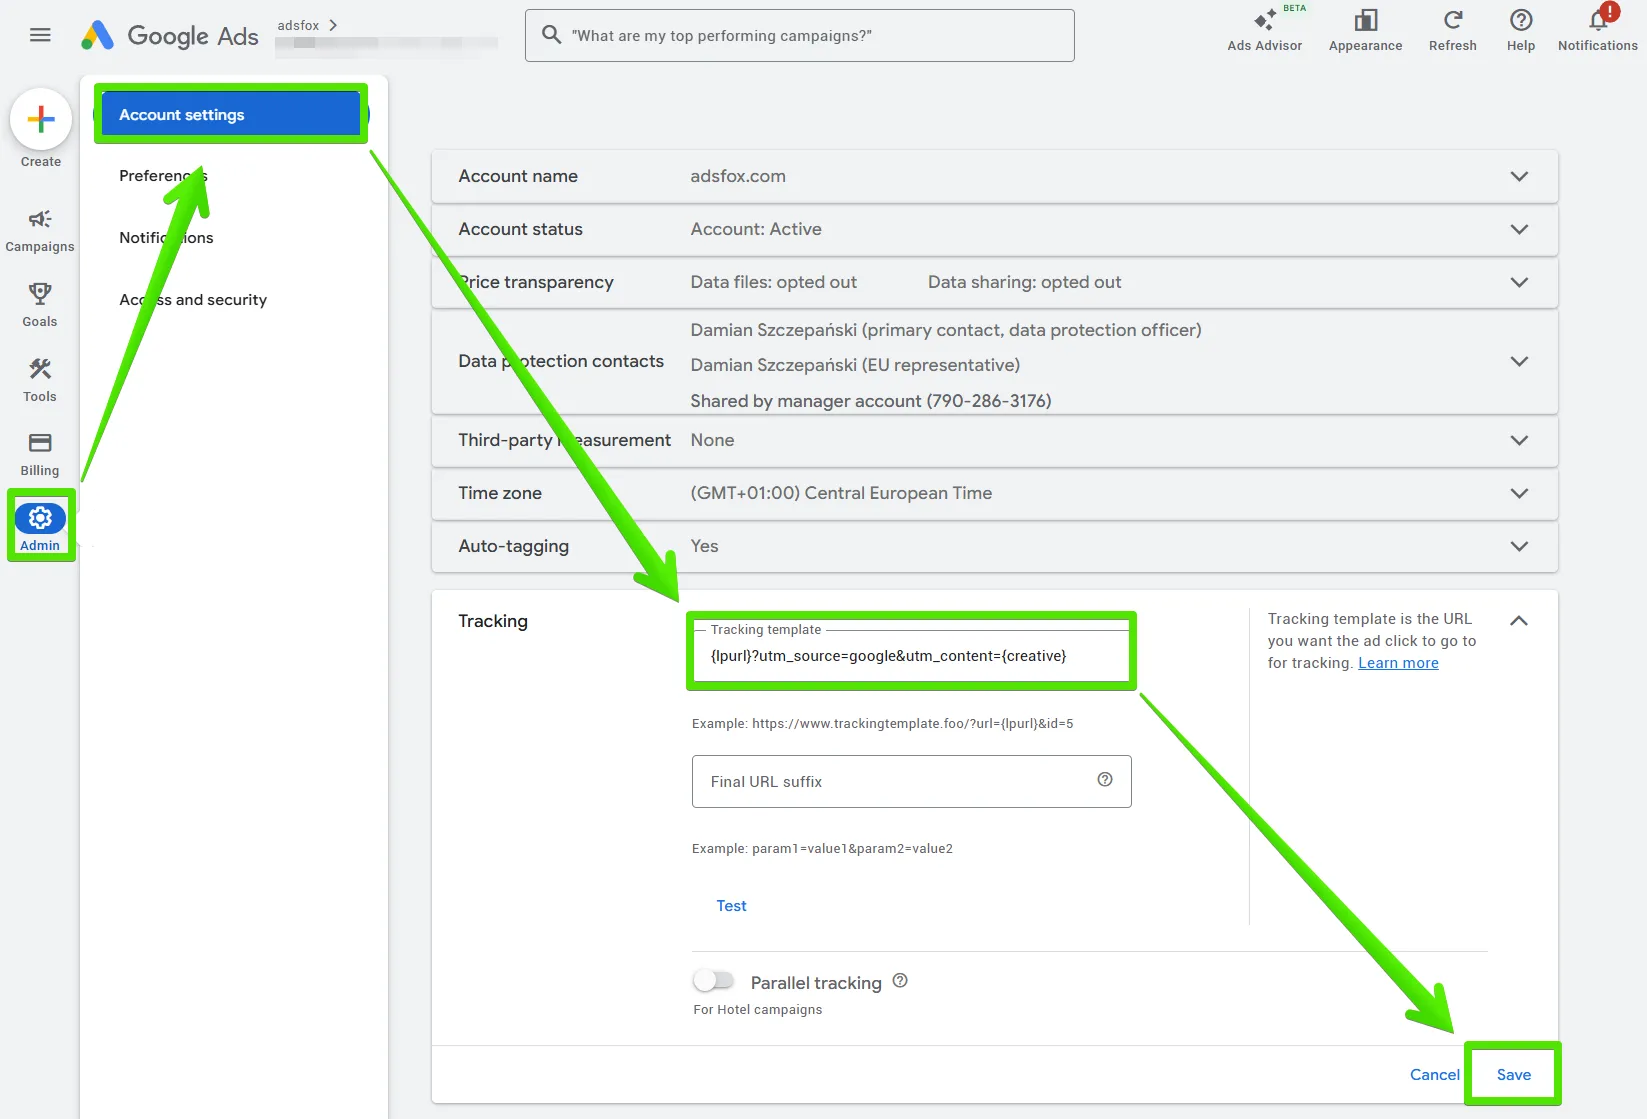
Jump to your Google Ads account → Admin (Account Settings) → Tracking.
Verify the URL template has updated and matches the one entered in adsfox.
Step 5. Creating Conversion Actions
Next up: Set up conversion actions in Google Ads.
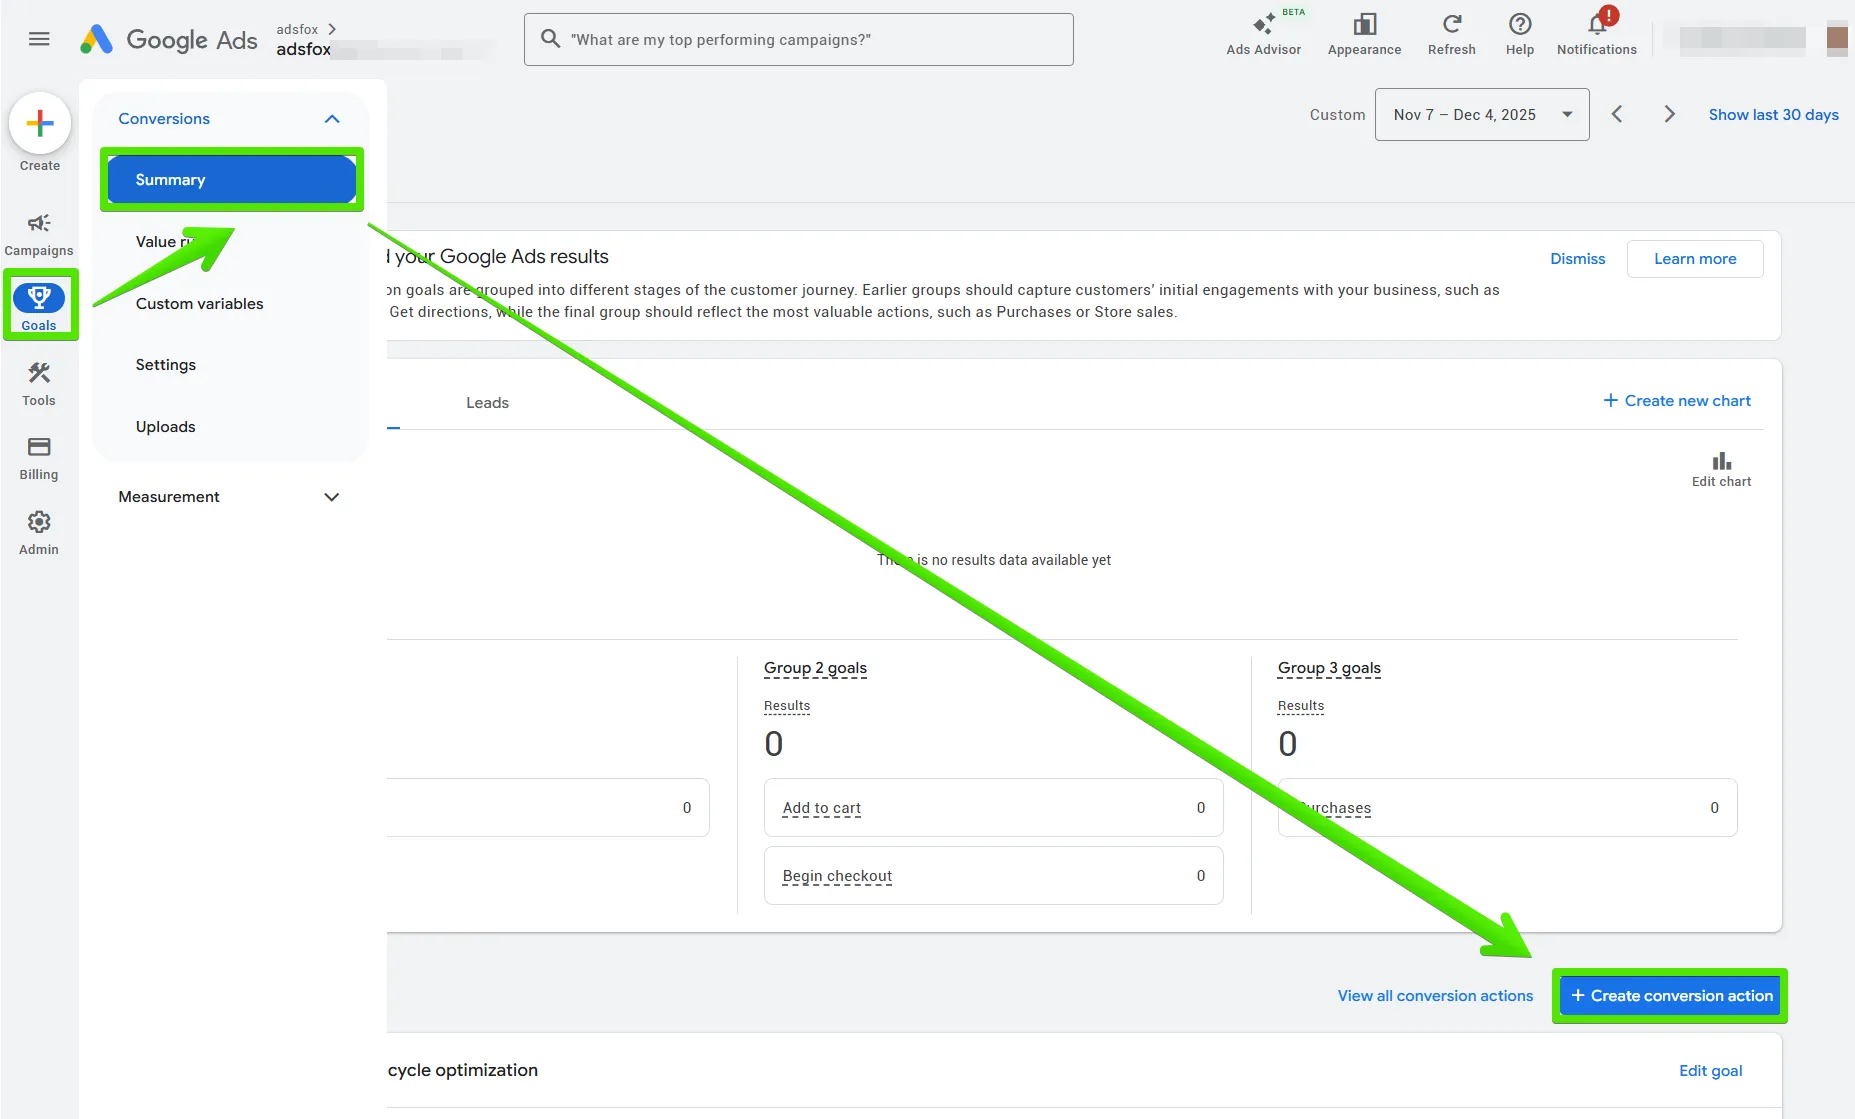
- Go to your Google Ads account under Goals → Summary, then click Create a conversion action.
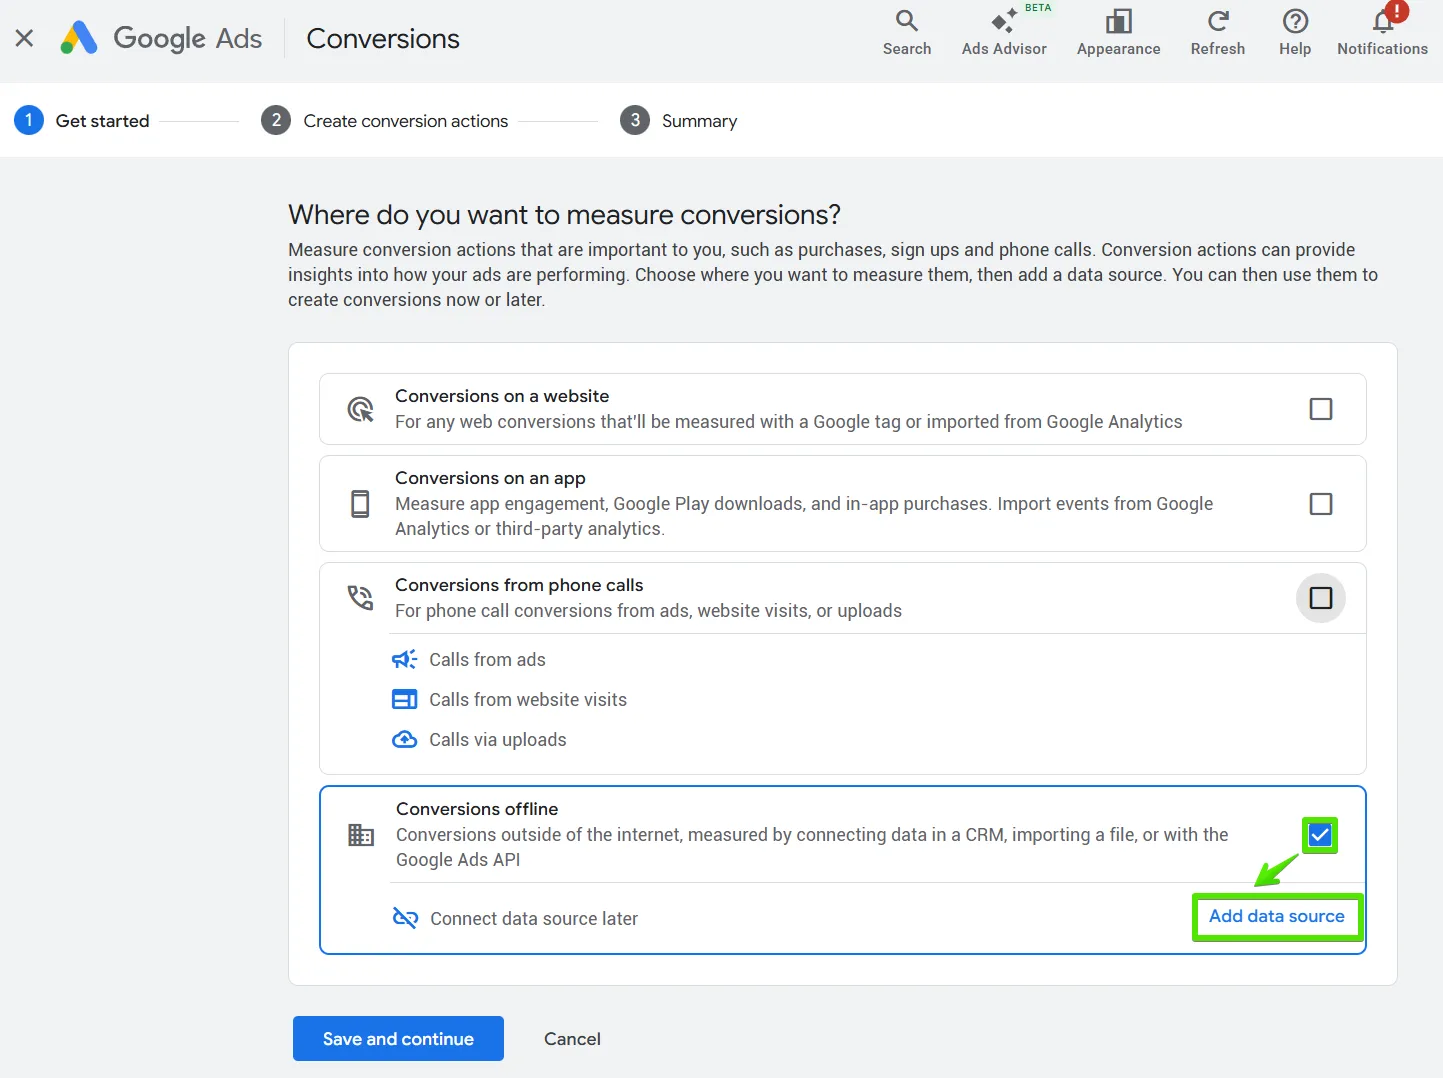
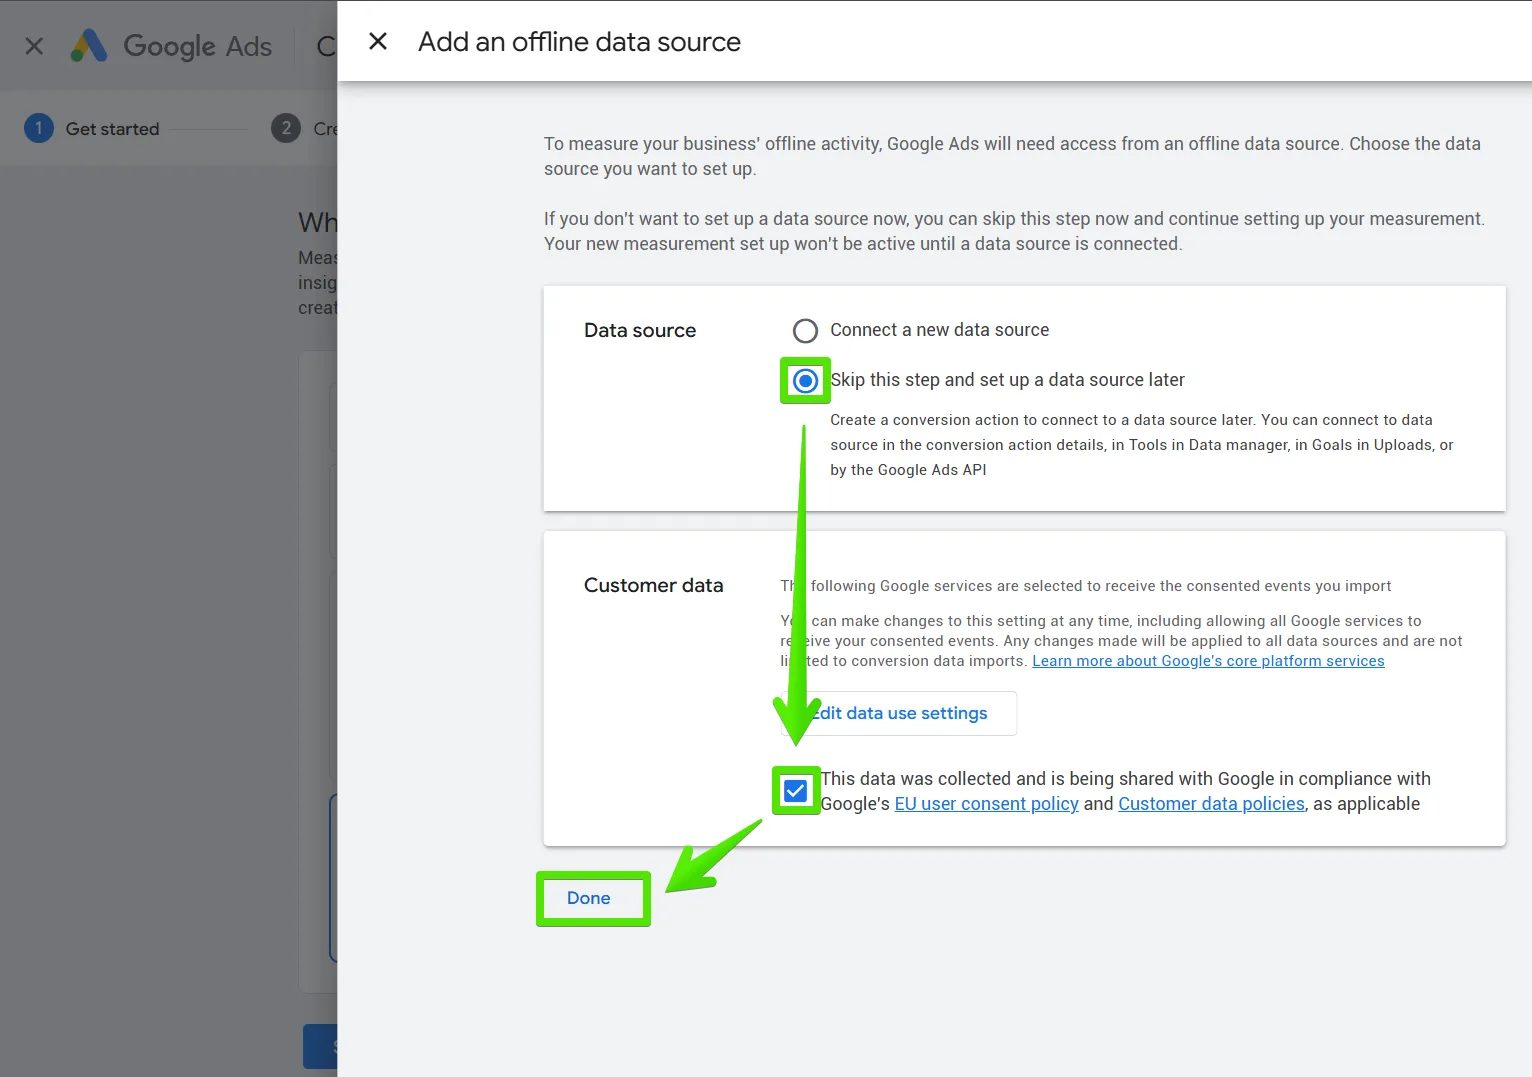
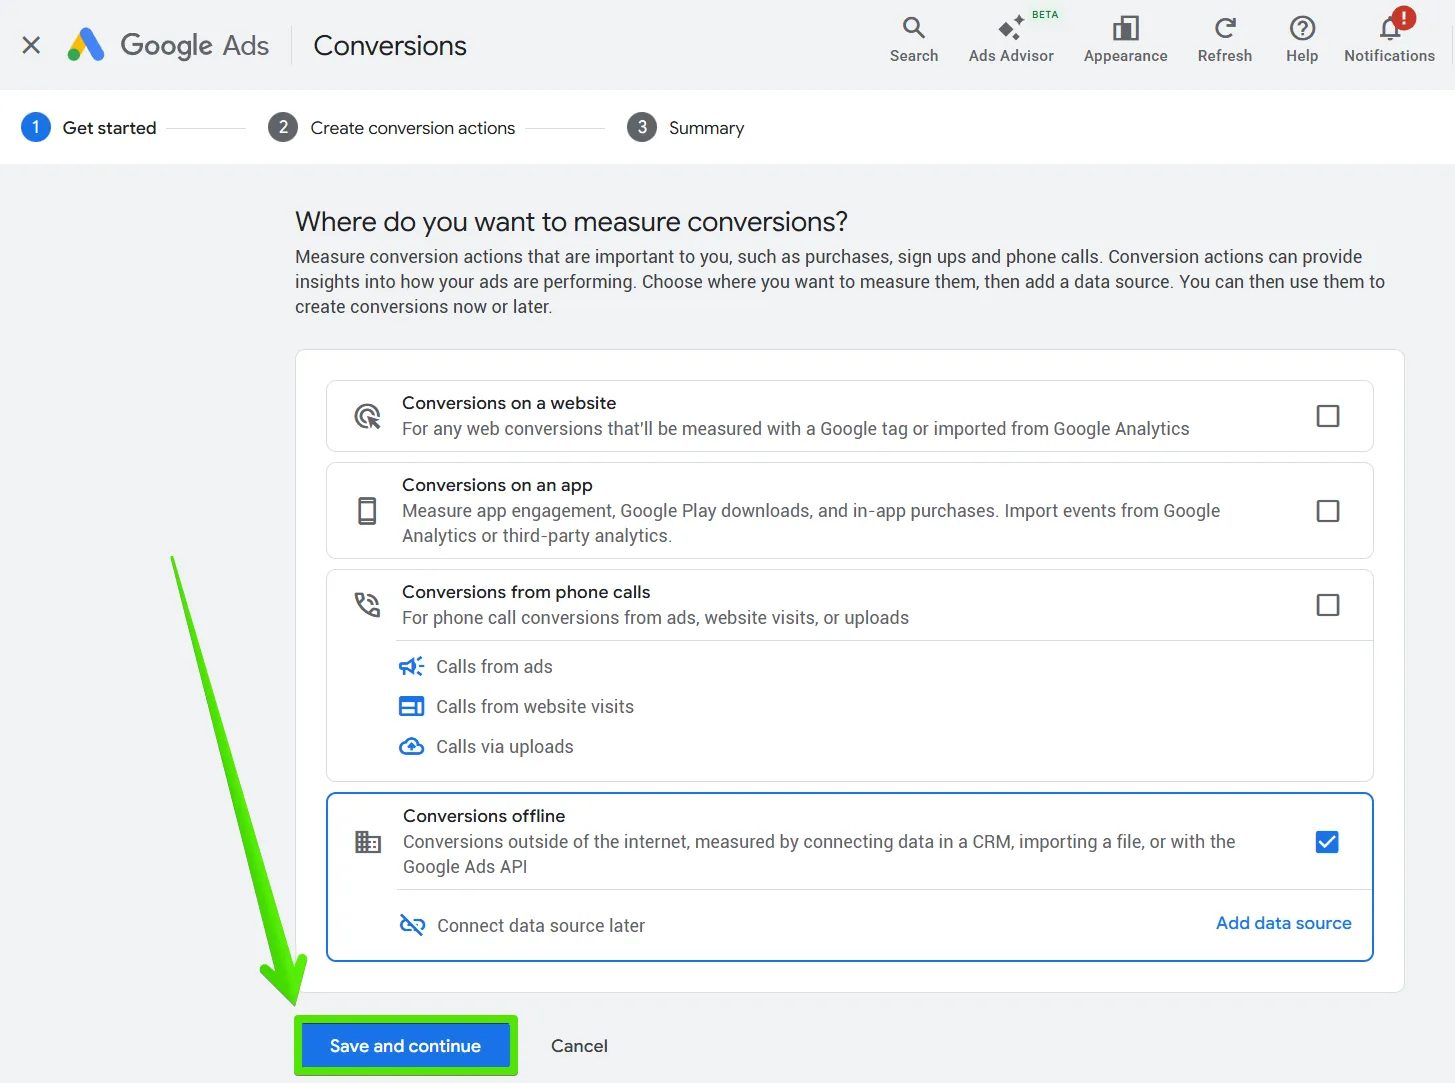
2. In the configurator, select Offline conversions and click Add data source.
3. In the “Add offline data source” window, under Data source, check Skip this step and configure the data source later. Under Customer data, confirm your data collection complies with Google’s policies.
Approve by clicking Done.
4. Then, click Next.
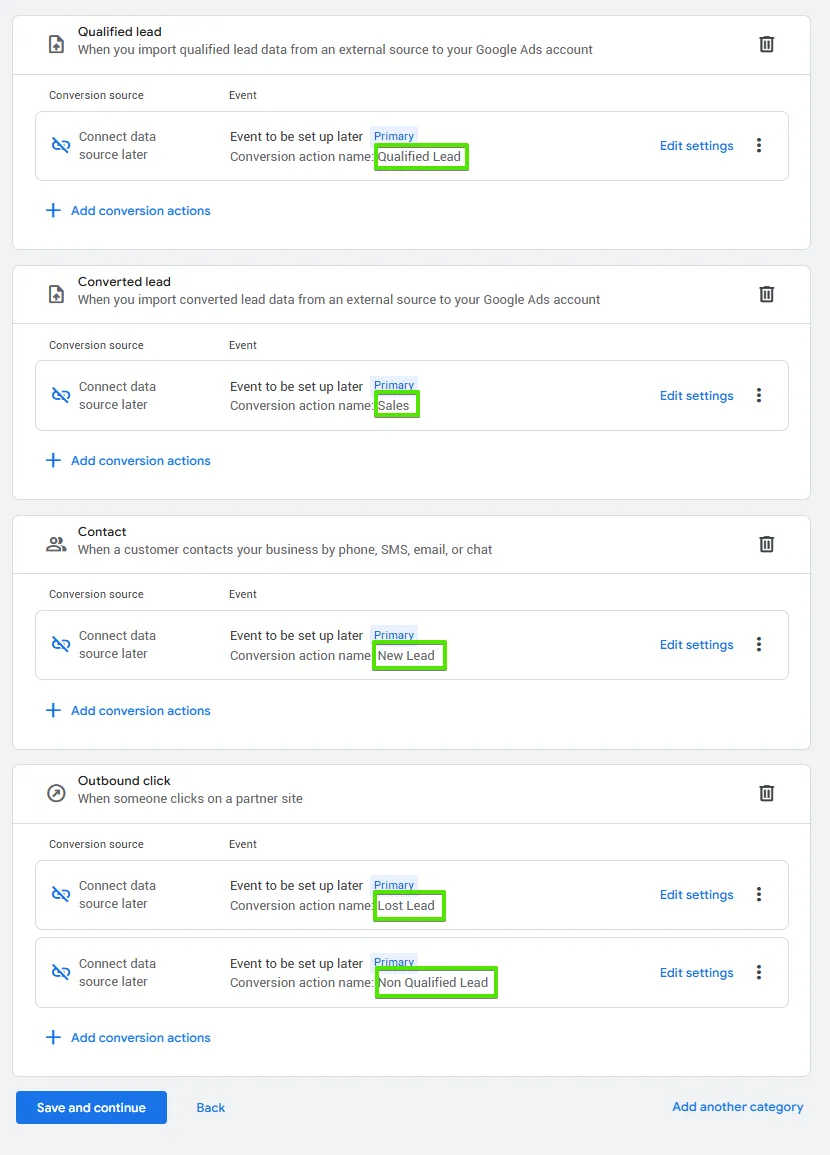
5. Now, configure these events. Make sure the conversions are named exactly like this:
- New Lead
- Non Qualified Lead
- Qualified Lead
- Sales
- Lost Lead
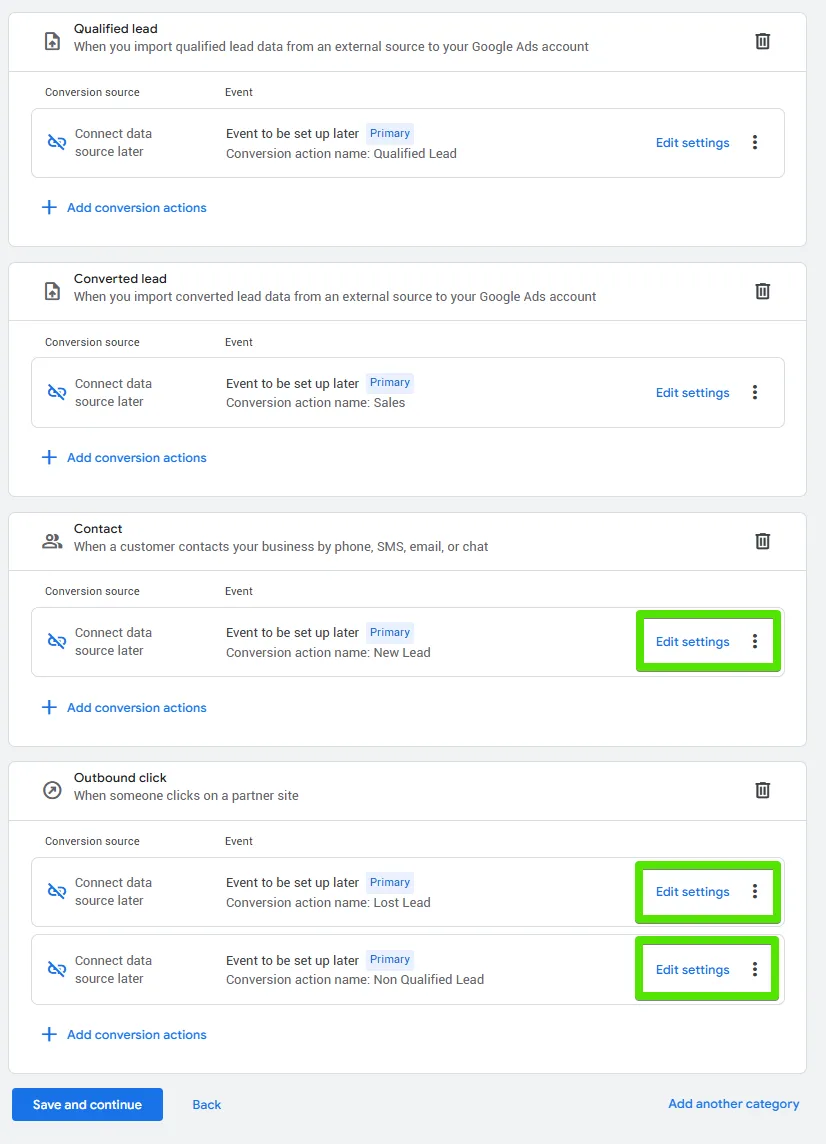
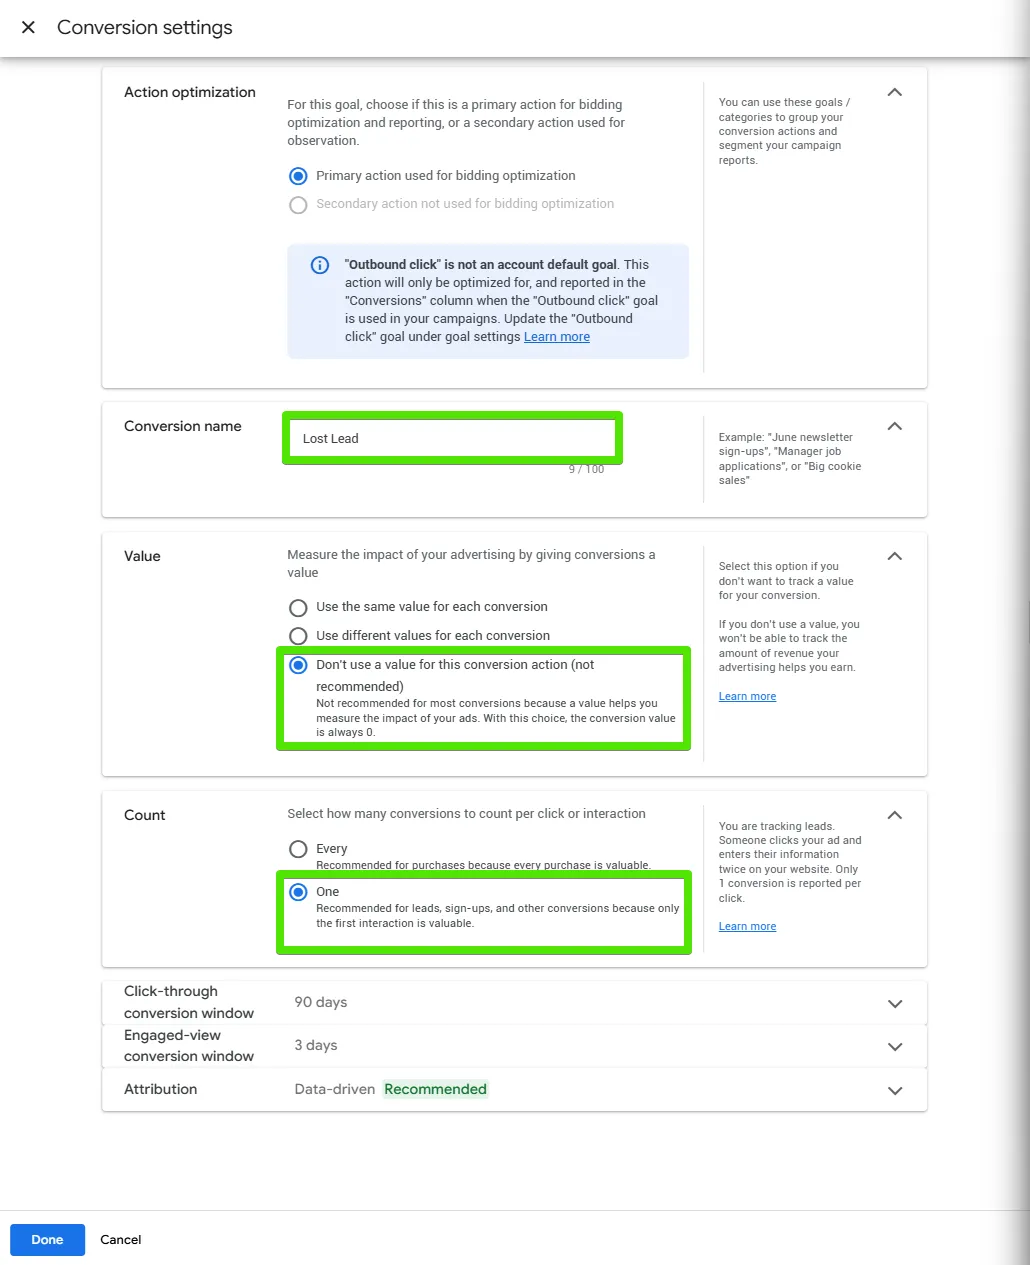
6. The final step is entering each Conversion goal’s settings, selecting the following options, and saving them:
For conversions:
a. New Lead
b. Non Qualified Lead
c. Lost Lead
d. The following settings:
For conversions:
e. Qualified Lead
f. Sales
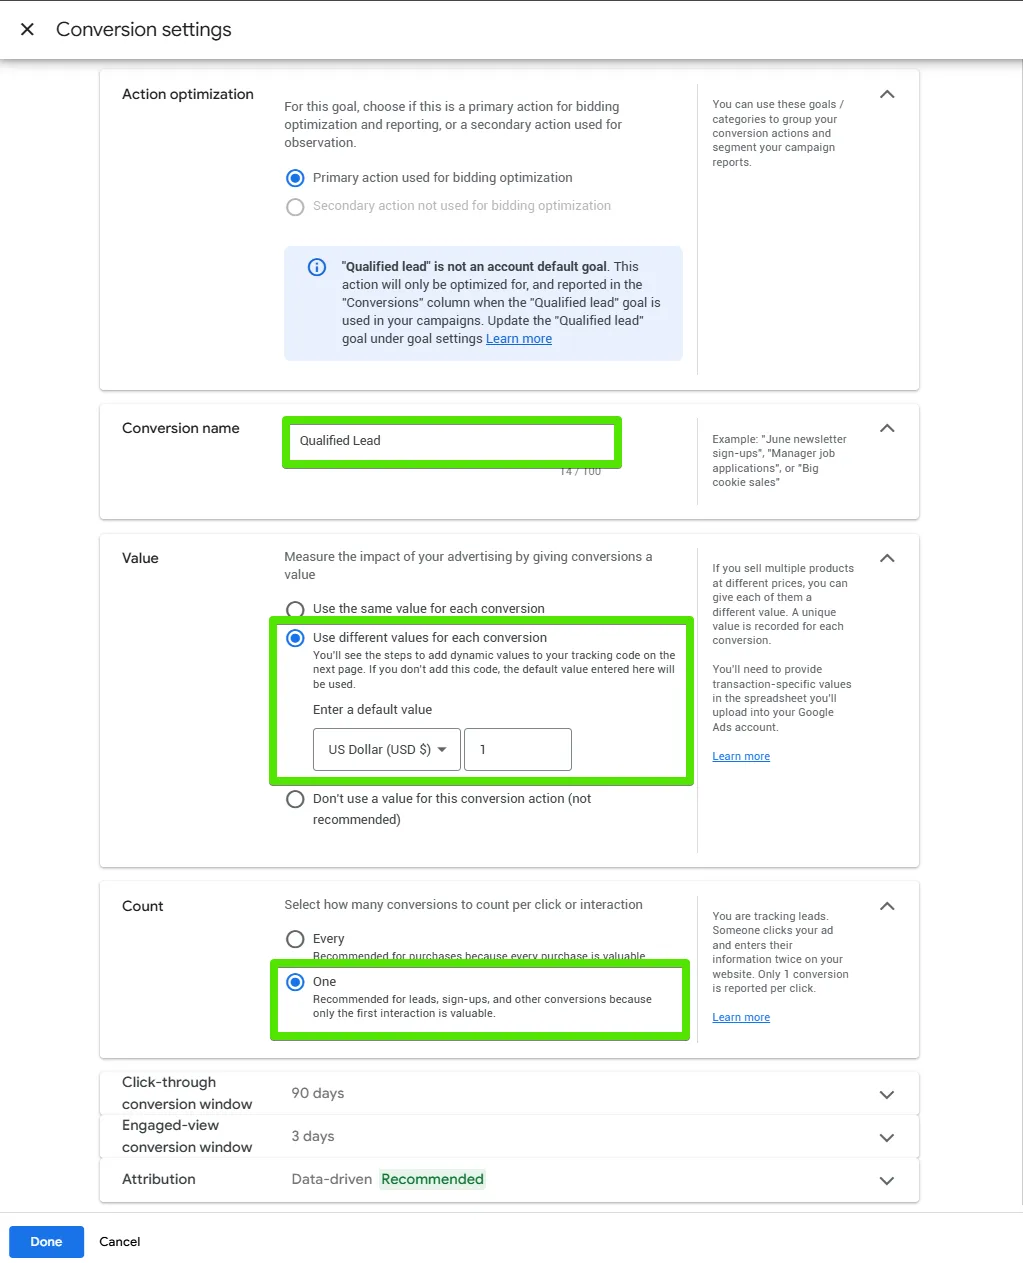
(Adjust the currency to match your operational region, of course)
7. Wrap up adding Conversion goals by clicking Save and continue.
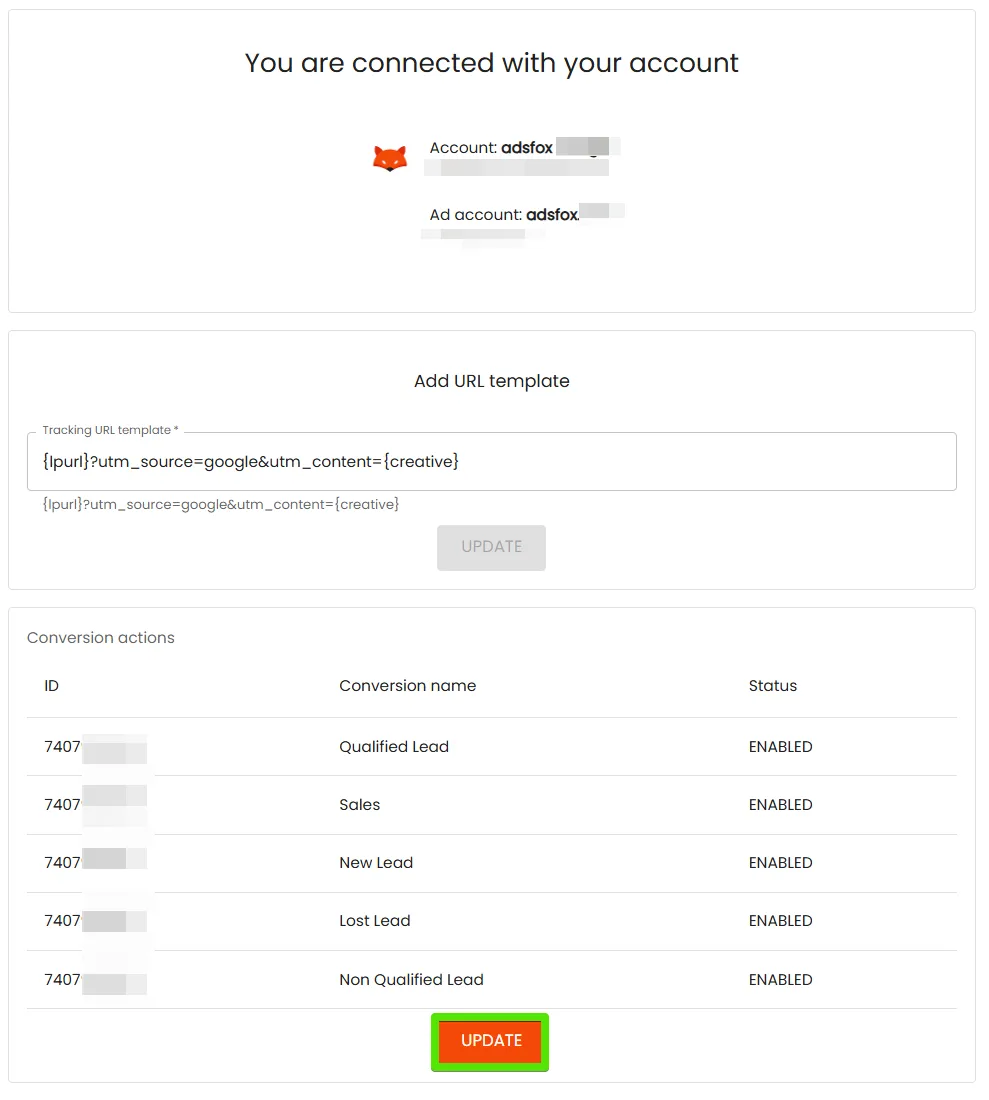
Step 6. Updating in adsfox
After creating conversion actions in Google Ads, head back to CRM settings in adsfox and refresh the configuration. This ensures the system accurately recognizes your new conversions.
What’s Next?
With adsfox CRM seamlessly linked to Google Ads, your campaigns can now leverage real-time lead and conversion data straight from the CRM. It’s a massive boost for optimizing ad performance.
Ready to level up? Learn how to craft a Meta campaign targeting your website via Meta’s Ads Manager.