
How to set up a Meta campaign (Contact Form objective) that drives traffic to your website in Ads Manager?

After successfully connecting your Meta account and implementing conversions as described here:
How to Connect adsfox with Meta (Facebook Ads)?
you can jump into building your new campaign.
Step 1: Choose Your Campaign Objective
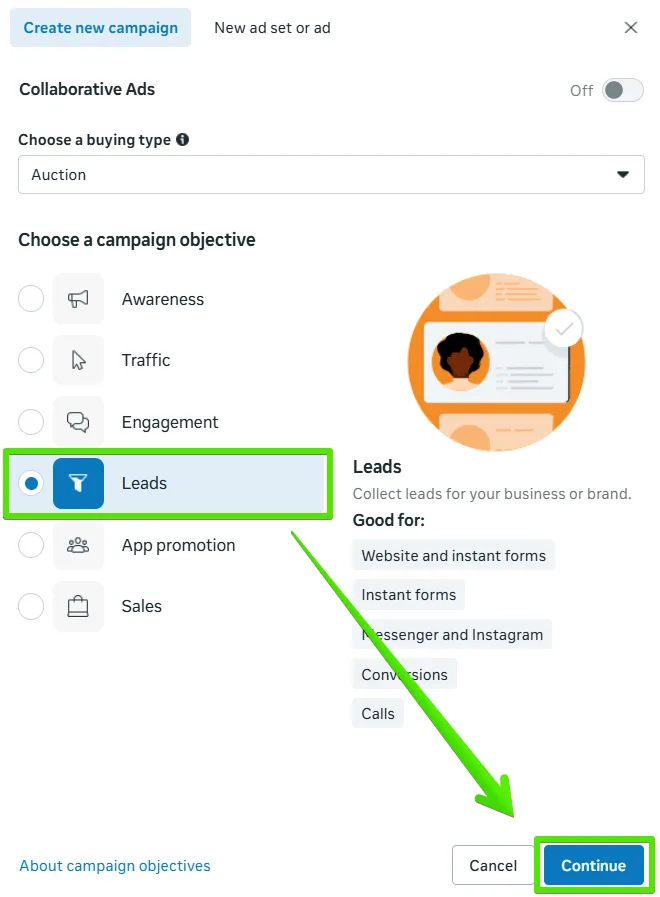
In Ads Manager, select “Leads” as your campaign goal.
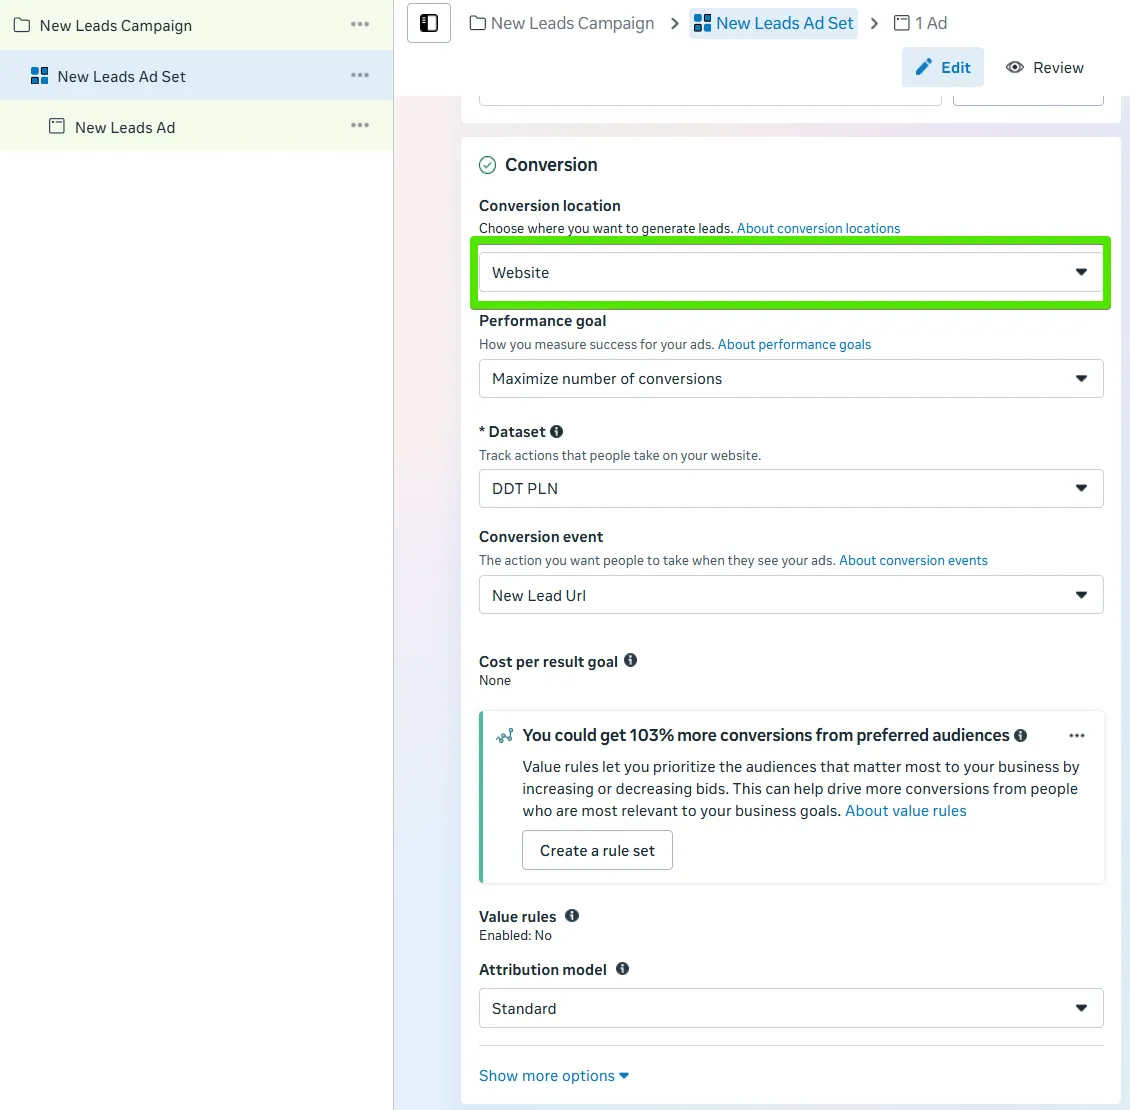
At the ad set level, set the conversion location to Website.
Step 2: Select Conversion Events
With your setup complete, the Conversion Events section will display the goals you created in adsfox and approved in Meta (e.g., New Lead, Qualified Lead).
These will help you measure true campaign effectiveness.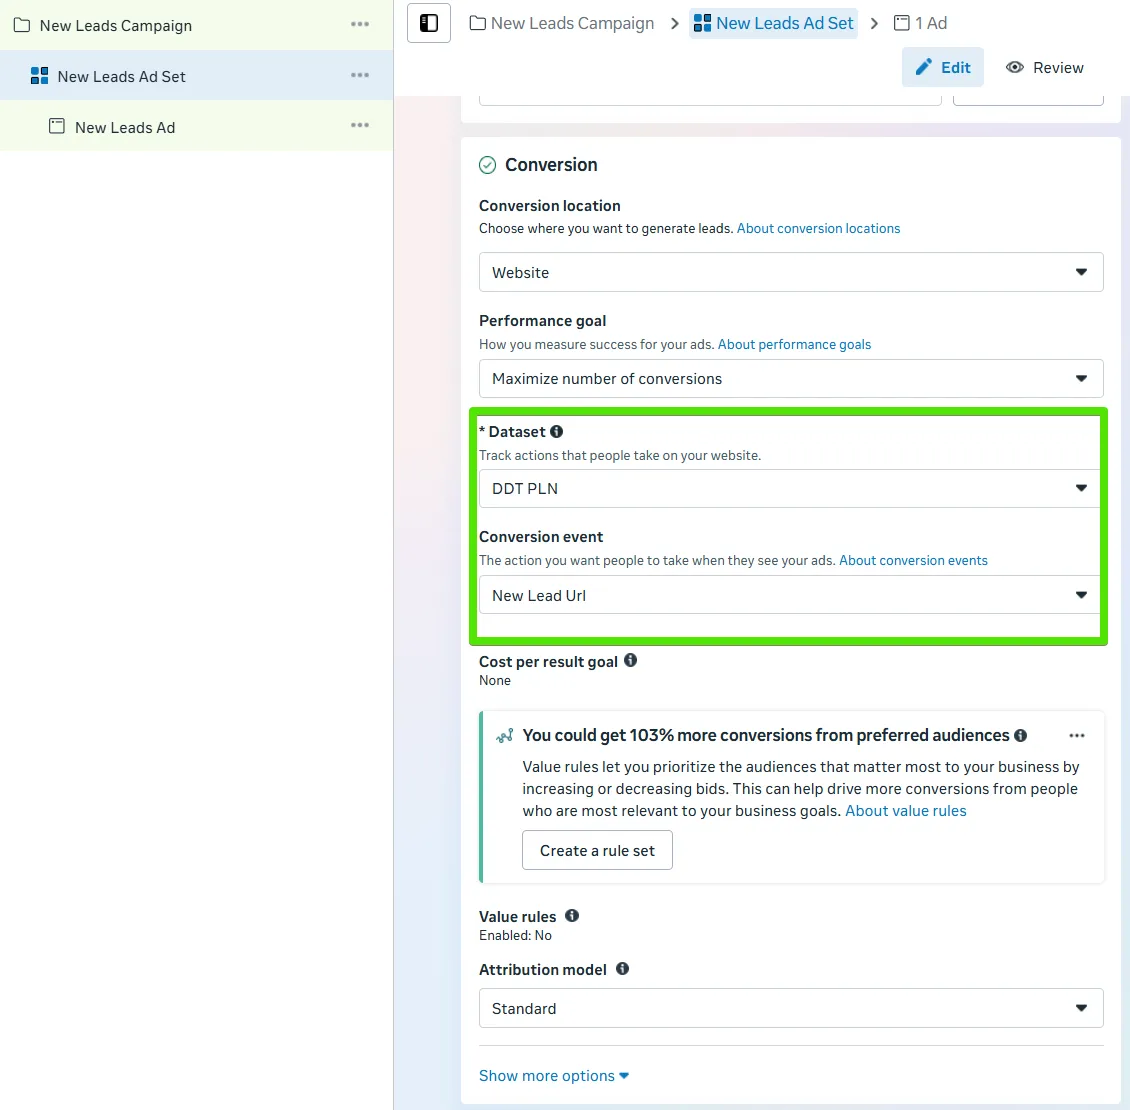
Step 3: Create UTM Parameters for Your Ads
To properly attribute leads back to specific ads and sources, add tailored UTM parameters to every link.
This ensures the system knows exactly where each lead came from.
In adsfox, go to: Tracking → URL Parameters.
Click Build URL Parameter.
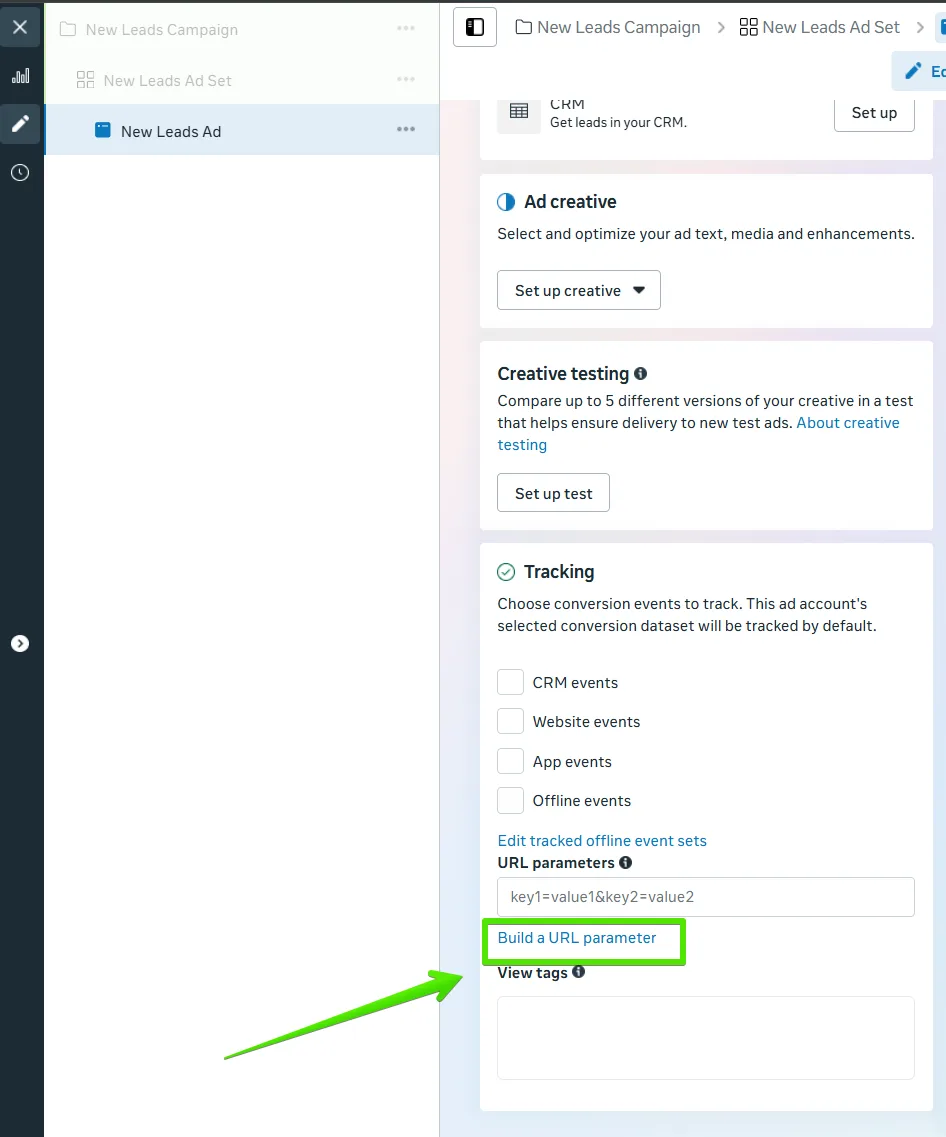
Fill in the form fields following this template. Enter Campaign Source, Campaign Medium, and Campaign Name manually, while selecting Campaign Content from the dynamic options (click the empty field and choose the indicated parameter).
Click Apply to save.
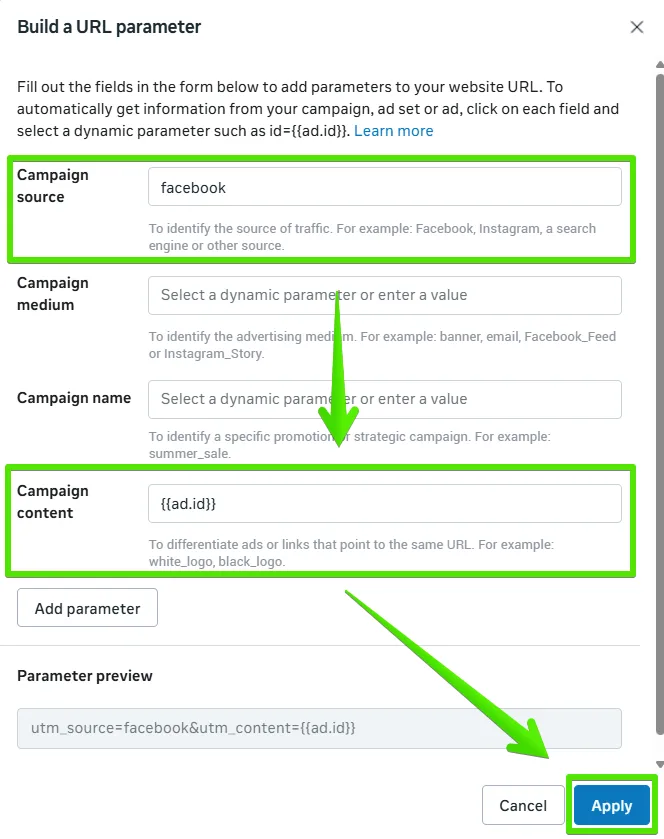
A correct UTM should look like this:
utm_source=facebook&utm_medium=adsfox&utm_campaign=facebook-ads&utm_content={ad_id}
Step 4: Configure Your Pixel
Wrap up by selecting the same pixel in the Tracking tab that you used for CRM event setup.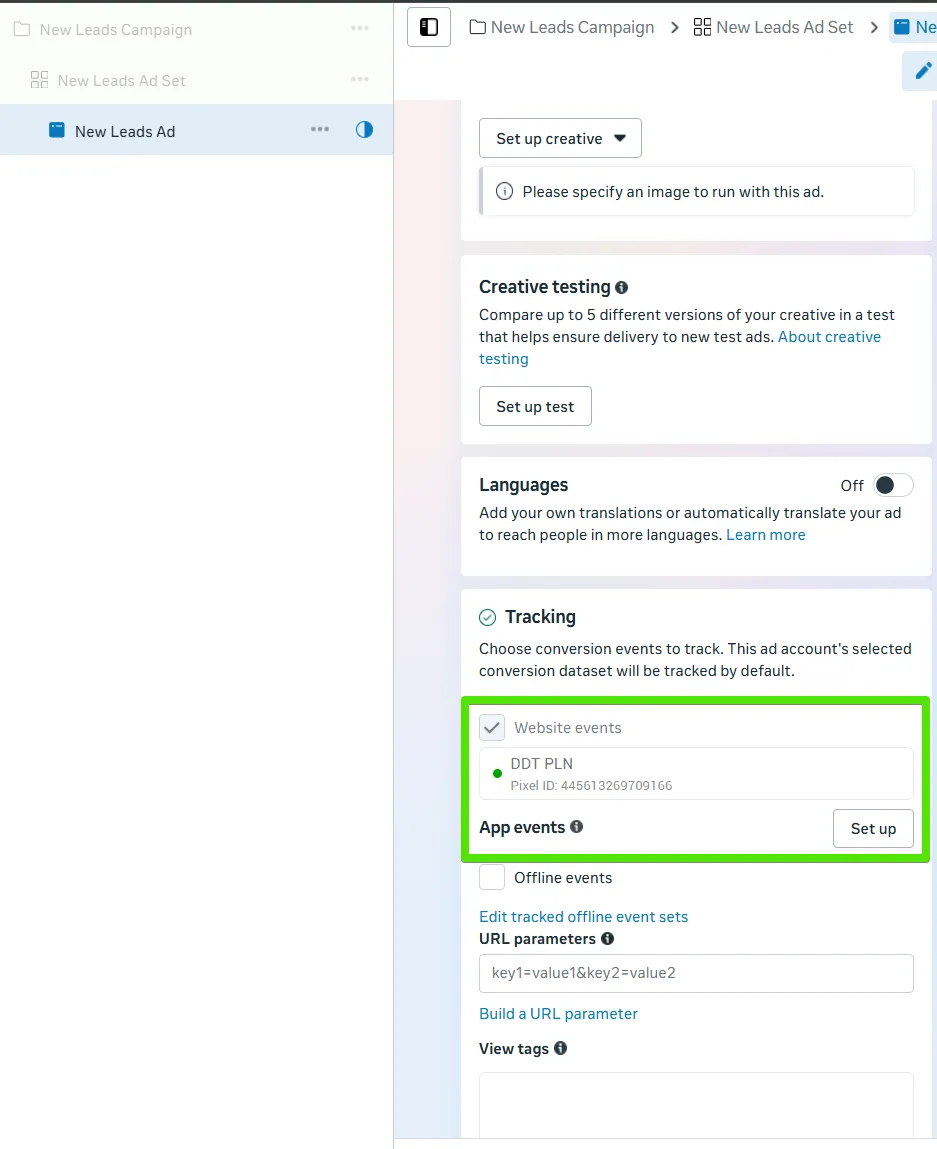
Then, publish your ad, from this point, all events will be logged and linked to the right leads in adsfox.
Advanced Optimization for High-Value Leads
Once you’ve gathered enough precise data via the New Lead URL event, you can level up your optimization. This teaches Meta’s algorithm to target users similar to those your team marks as valuable in CRM, not just anyone who submits a form.
How it works and why it’s powerful:
● The Mechanism: When a lead is tagged as “qualified” (valuable) in your CRM panel, adsfox sends a dedicated event like Qualified Lead URL to Meta via Conversion API. This signals that the user was a high-quality contact. Over time, the algorithm learns the common traits of users who convert into valuable leads.
● Key to Success: For optimal results, the algorithm needs solid data volume. We recommend switching optimization goals once your campaigns consistently deliver at least 5 qualified leads per day over the last two weeks.
What options do you have once you hit that threshold?
Optimize for Qualified Lead URL Events: Shift your campaign optimization directly from New Lead URL to Qualified Lead URL. This way, Meta focuses on acquiring leads most likely to qualify as valuable.

Pro Tip for Getting Started: Launch campaigns optimized for New Lead URL events first. This initial phase builds essential baseline data, giving Meta enough signals about what makes a lead “qualified.” Jumping to quality optimization too early, without the data foundation, won’t yield results.
Important before you start
Before you create a Meta Lead Ads campaign, make sure adsfox is properly connected to Meta and that your adsfox events are marked as “Active” in Ads Manager (available to select and added as columns).
This is essential to fully unlock the potential of adsfox: sending lead-quality signals to Meta (for example Qualified Lead, Unqualified Lead) and having them visible in your dashboard.
You can find instructions on how to add the right columns in Meta in this article, in step 5: How to integrate adsfox with Meta (Facebook Ads)?
What’s Next?
Your Meta campaign directing to the website is live and tracking conversions in adsfox.
But this is just the beginning of streamlining lead acquisition and qualification.
In upcoming posts, we’ll show you how to tag acquired leads in adsfox, so you can pinpoint which campaigns and sources deliver your highest-value customers.
Lead Tagging in adsfox