
How to Create Meta Lead Ads Campaigns via Meta Ads Manager?

Once you’ve connected your Meta account and set up conversions as outlined here:
How to Connect adsfox with Meta (Facebook Ads)?
you’re ready to dive in and create your campaign.
Step 1: Choose Your Campaign Objective
- Head to Ads Manager and select “Leads” as your campaign goal.
This sets the stage for collecting high-quality leads efficiently.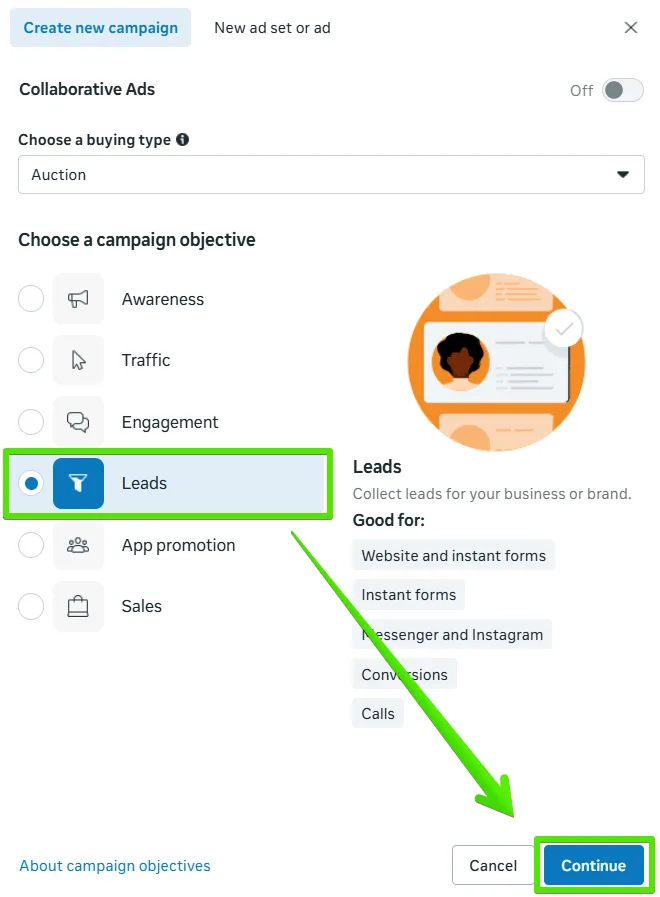
2. At the ad set level, set the conversion location to Instant Form.
This quick-fill form keeps users engaged, letting them submit details in seconds right within Facebook or Instagram.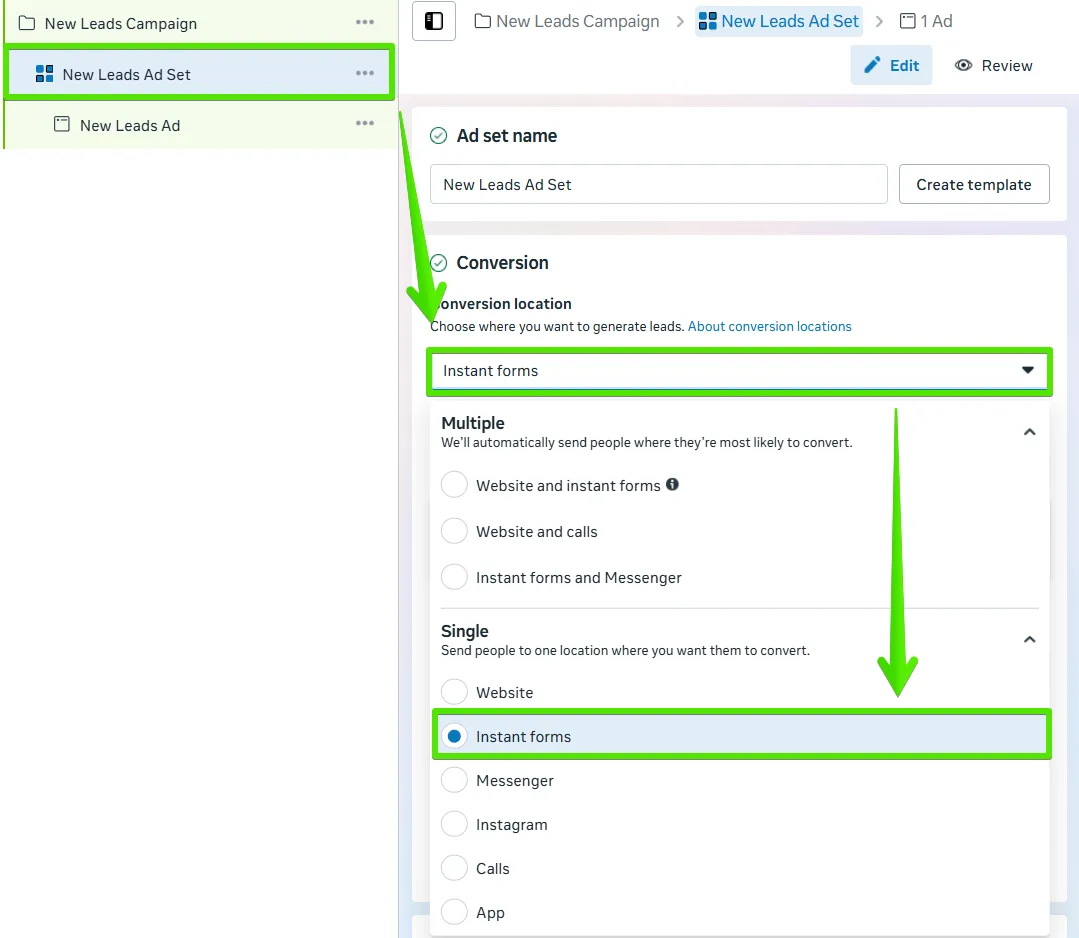
Step 2: Select Your Page and Conversion Goal
Next, pick the right Facebook Page and the conversion event you want to track.
Thanks to your earlier setup of the events dataset (pixel) focused on valuable conversions, you’ll see options like maximizing leads with conversions and the ability to choose the dataset where you configured everything.
If you haven’t set up your CRM-optimized events dataset yet, follow the steps in this article:
Configuring Your Events Dataset (Pixel) for CRM
Step 3: Build Your UTM Parameters
To ensure lead quality data from your website shows up accurately in Ads Manager, it’s essential to use the right UTM structure in your links.
Every ad link needs a specific tag to identify the source, medium, and exact ad. Here’s how to create those UTMs:
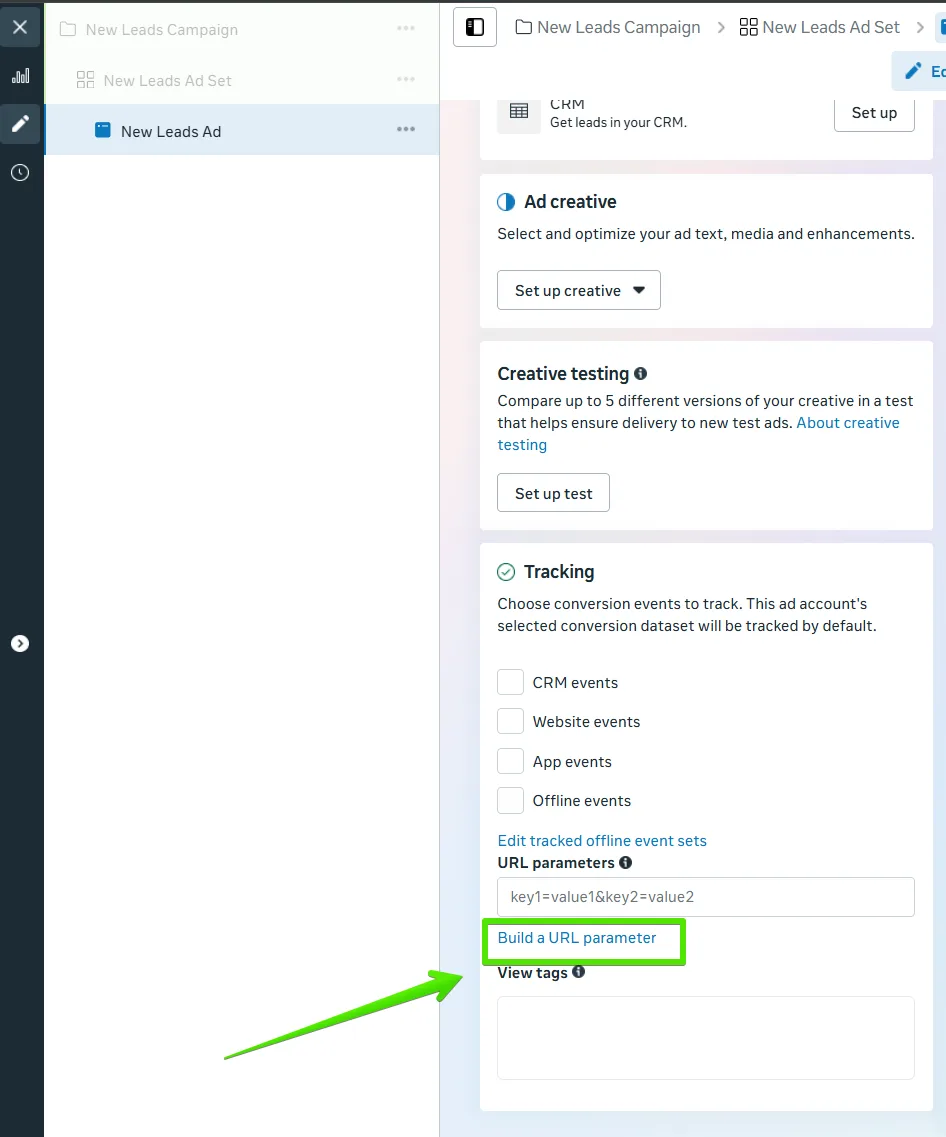
In adsfox, navigate to Tracking → URL Parameters.
Click Build URL Parameter.
Set the required (non-negotiable) parameters exactly as shown, don’t tweak or remove them:
Campaign Source (utm_source): facebook
Campaign Content (utm_content): {{ad.id}}
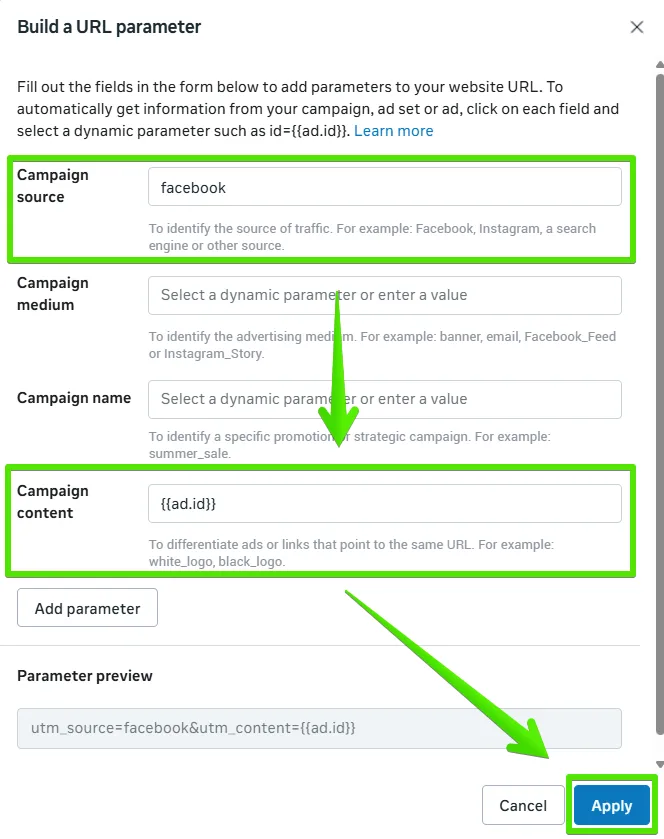
Heads up: Any changes here will break the system’s ability to recognize leads, and quality data won’t flow back to Ads Manager.
4. Fill in the optional parameters (customizable), tailor these to your naming conventions without affecting the integration:
- Campaign Medium (utm_medium): e.g., ads, cpc, meta
- Campaign Name (utm_campaign): e.g., fb_summer_sale_2025
5. Apply and save.
6. Verify your final link, it should include at least the required parameters. Example of a complete link:
utm_source=facebook&utm_medium=adsfox&utm_campaign=facebook-ads&utm_content={{ad.id}}
Step 4: Choose Your Pixel and Launch the Ad
Finally, in the Tracking tab, select the Facebook Pixel you configured earlier for CRM events.
Hit Publish Ad, from here on out, all captured leads will automatically sync to adsfox, with conversions tracked flawlessly.
Important before you start
Before you create a Meta Lead Ads campaign, make sure adsfox is properly connected to Meta and that your adsfox events are marked as “Active” in Ads Manager (available to select and added as columns).
This is essential to fully unlock the potential of adsfox: sending lead-quality signals to Meta (for example Qualified Lead, Unqualified Lead) and having them visible in your dashboard.
You can find instructions on how to add the right columns in Meta in this article, in step 5: How to integrate adsfox with Meta (Facebook Ads)?
What’s Next?
With your Meta Lead Ads campaigns up and running, check out How to Create Meta Campaigns Directing Traffic to Your Website via Ads Manager.
How to Create Meta Campaigns Directing Traffic to Your Website in Ads Manager
In our next post, we’ll guide you through that process step by step.