
How to Integrate adsfox with Meta (Facebook Ads)

adsfox is a lead generation optimization tool that helps users integrate their CRM systems with ad platforms like Meta, Google, LinkedIn, and TikTok. It enables companies to track leads, optimize campaigns, and improve sales without increasing their ad budget.
Step 1. Connecting Your Account with Facebook
Each user account in adsfox must be individually connected to a Facebook page. To do this:
Log in to your adsfox account.
Click the “Connect Account” button.
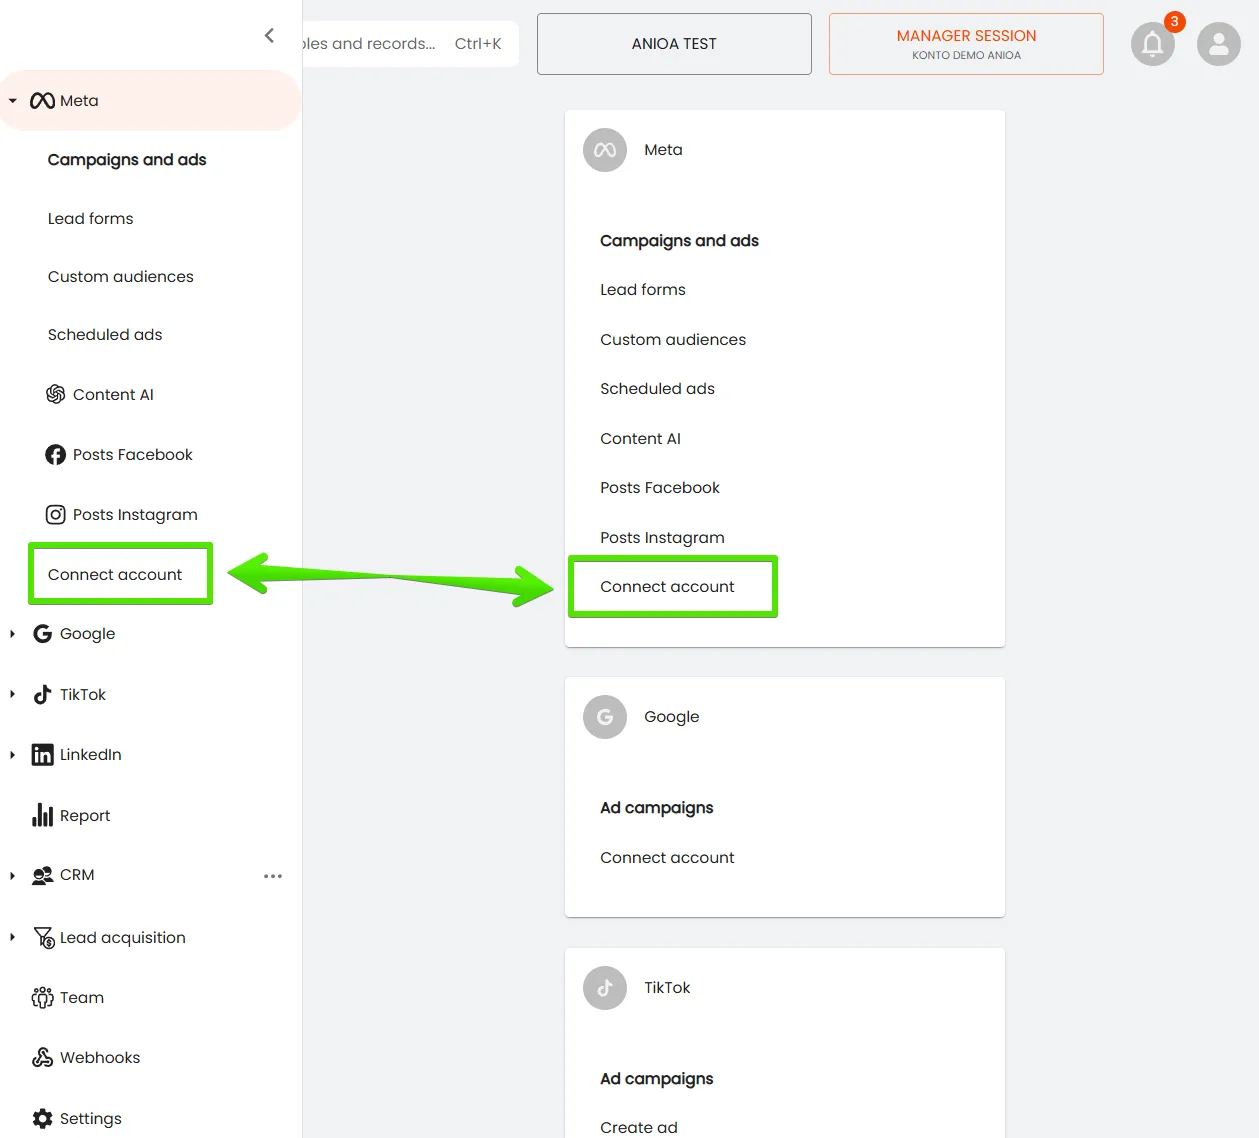
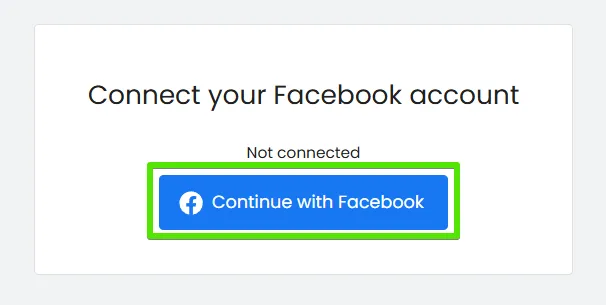
Select the option to Continue with Facebook.
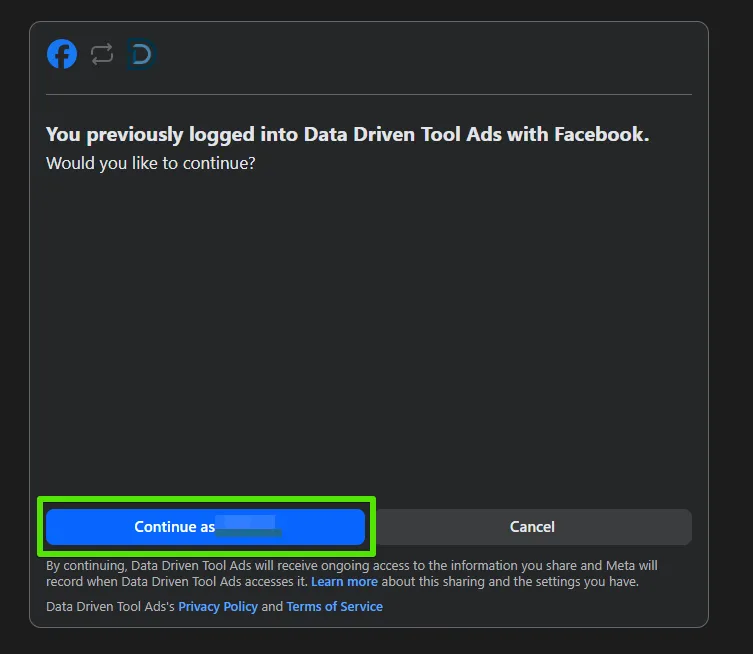
Log in to the Data Driven Tool Ads via Facebook.
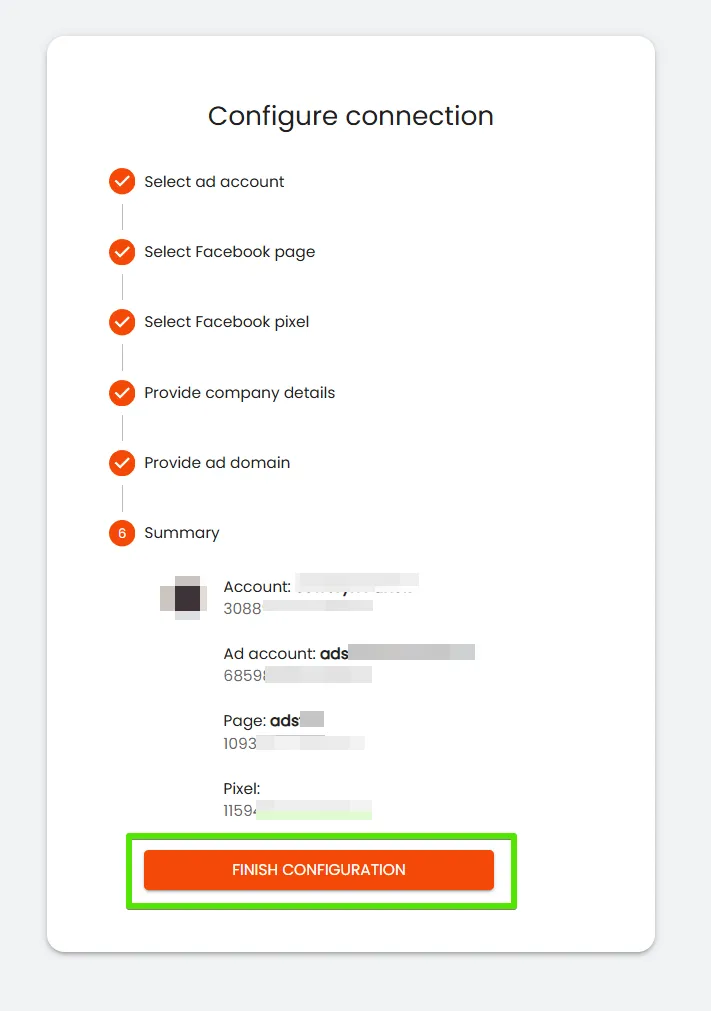
The next stage involves selecting:
The advertising account,
The Facebook page,
The Facebook Pixel, and indicate the ad beneficiary. Optionally, you can also provide the website domain.
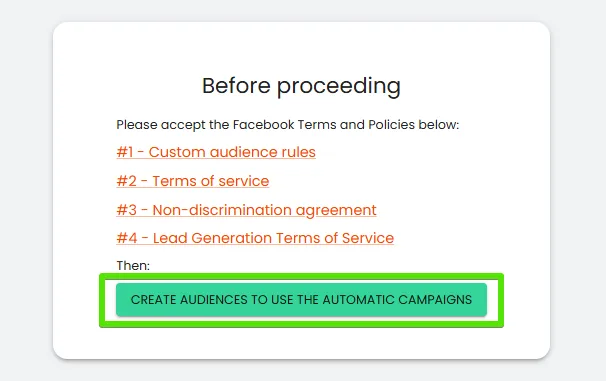
5. Accept the Required Facebook Permissions
To fully link your adsfox account with Facebook and wrap up the integration process, you’ll need to approve all the necessary permissions.
- Click through each link from #1 to #4 in order.
- Once each one opens, review the details and accept the terms.
After confirming all permissions, hit the “Create audiences to use the automatic campaigns” button to move forward.
This ad platform integration with adsfox ensures seamless CRM integration, allowing you to tag and optimize leads based on their value for superior conversion optimization.
Step 2. Adding the Script and Event Token
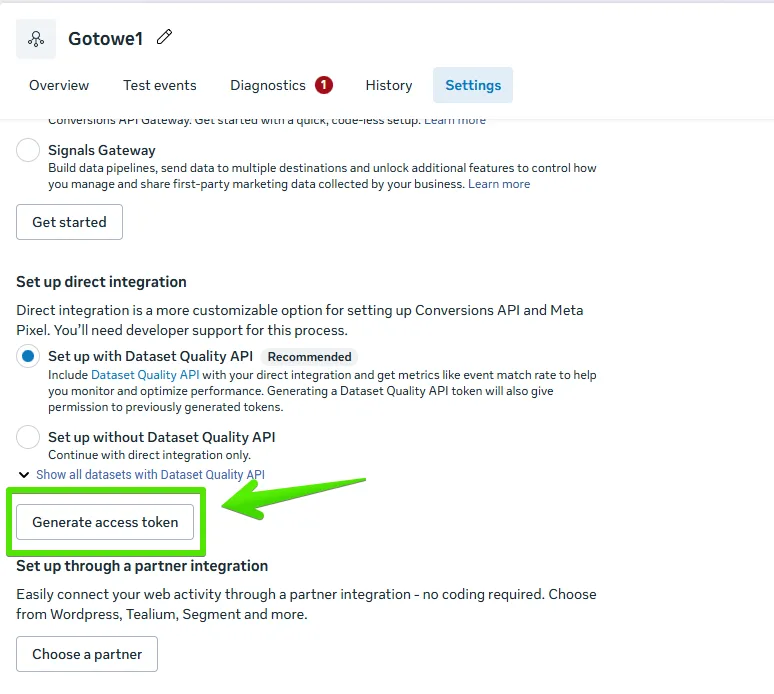
To add the script, you need to obtain an Event Access Token,a special token (key) used when working with the Facebook Graph API, which allows reading or managing data related to a specific event on Facebook. To do this:
- Go to Meta Business Manager → Events Manager.
- Select Data Sources → [Pixel Name] → Settings.
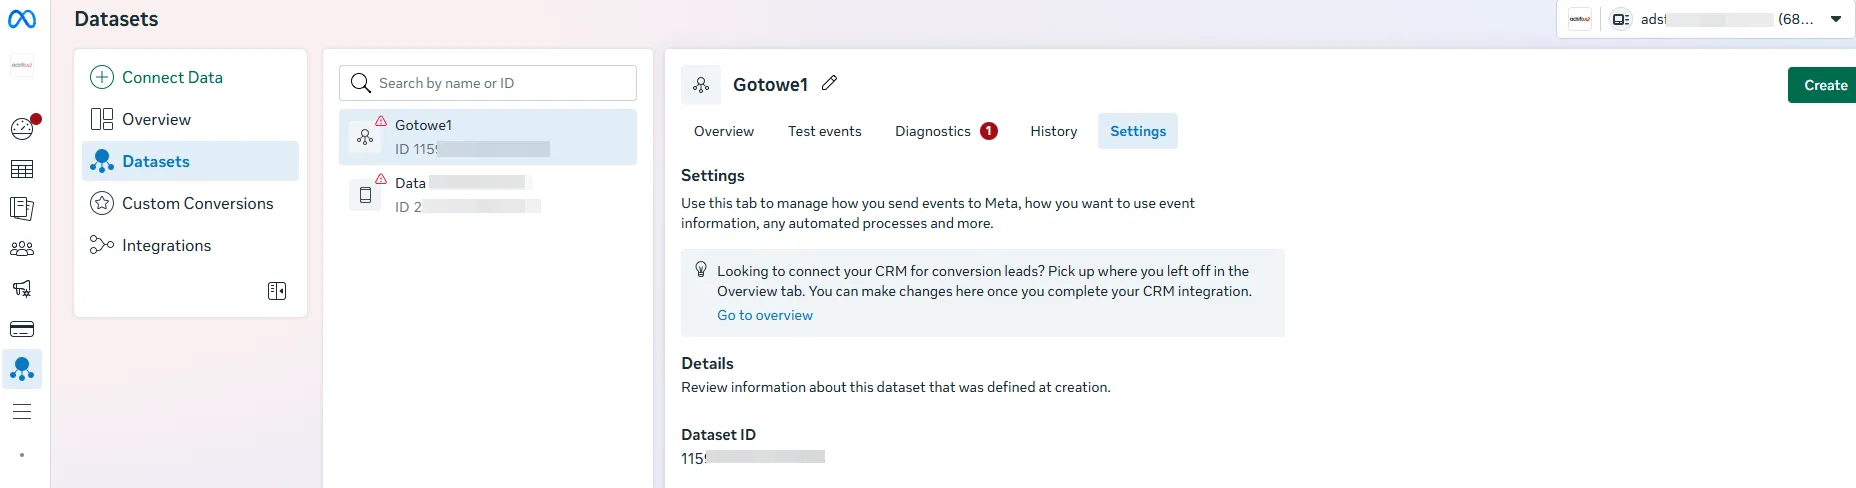
Scroll to the Conversions API section and click Generate Access Token.
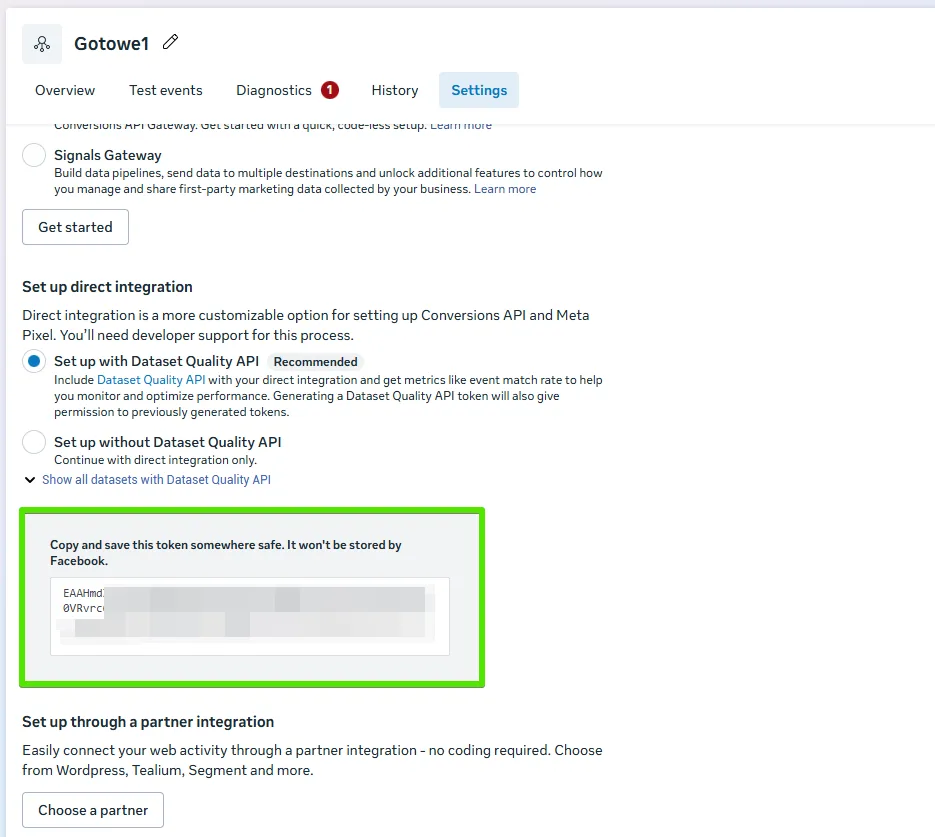
Then, in adsfox, go to Settings → Meta Settings – Connected Account and paste:
Pixel ID,
Access Token.
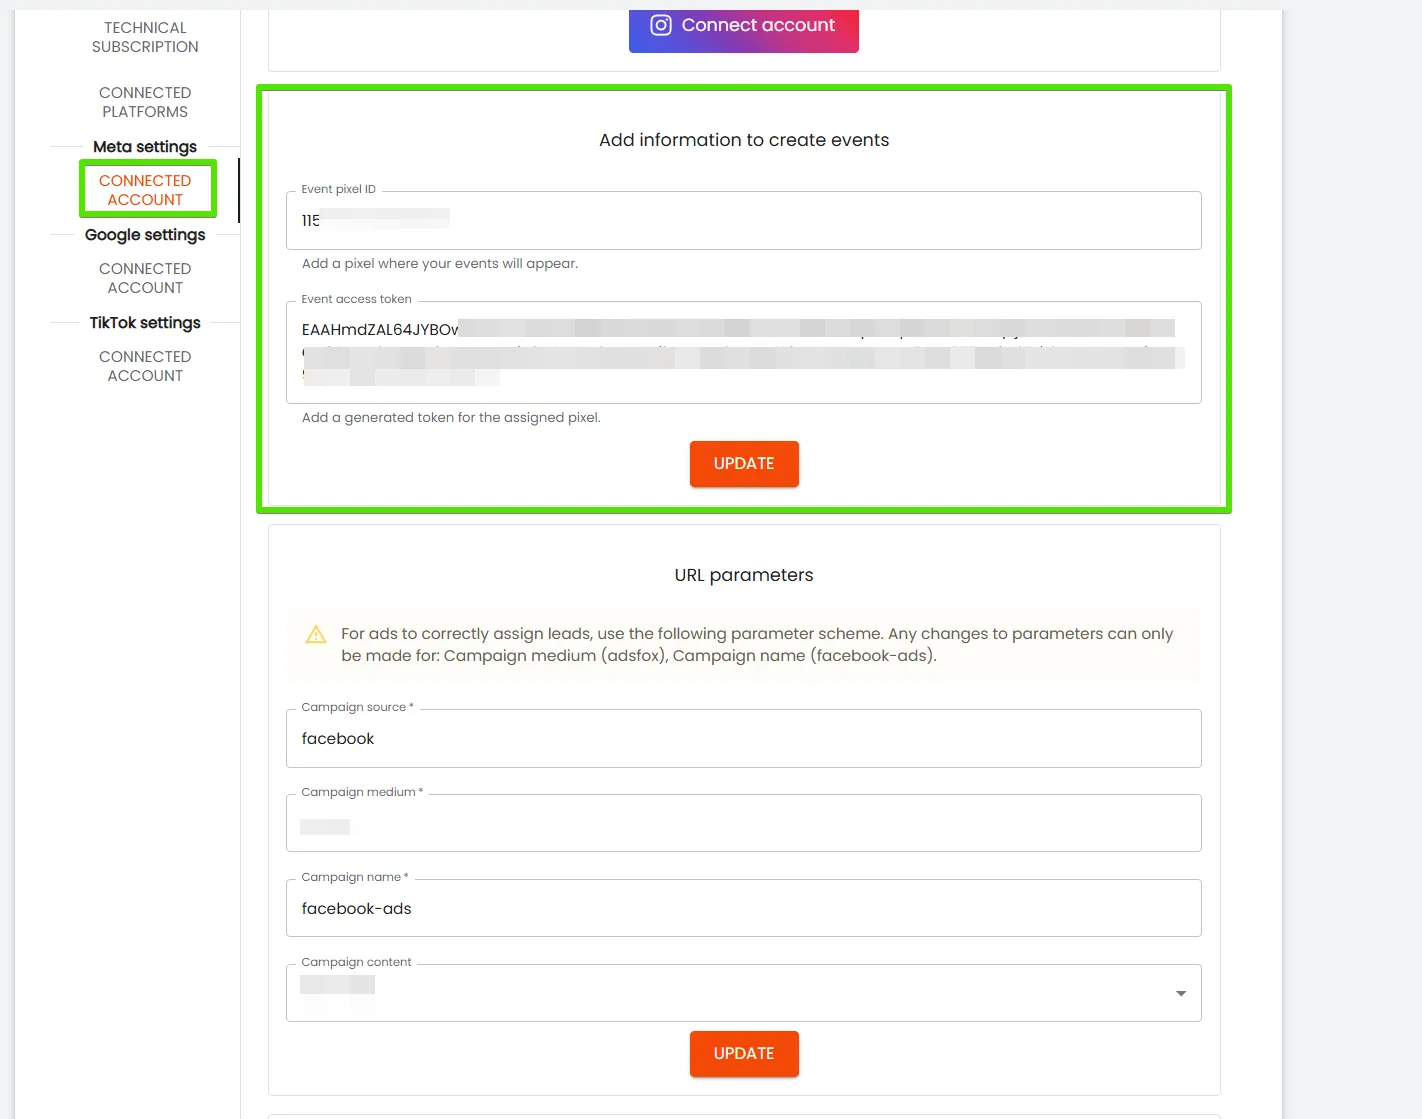
After everything, click Update.
Step 3. Sending Test Leads
The next stage is to send a few sample leads to determine the events sent to Facebook from the tool:
Go to Ads Manager and display a preview of the lead ad.
Fill out the form so that leads appear in the Contacts from Site tab.
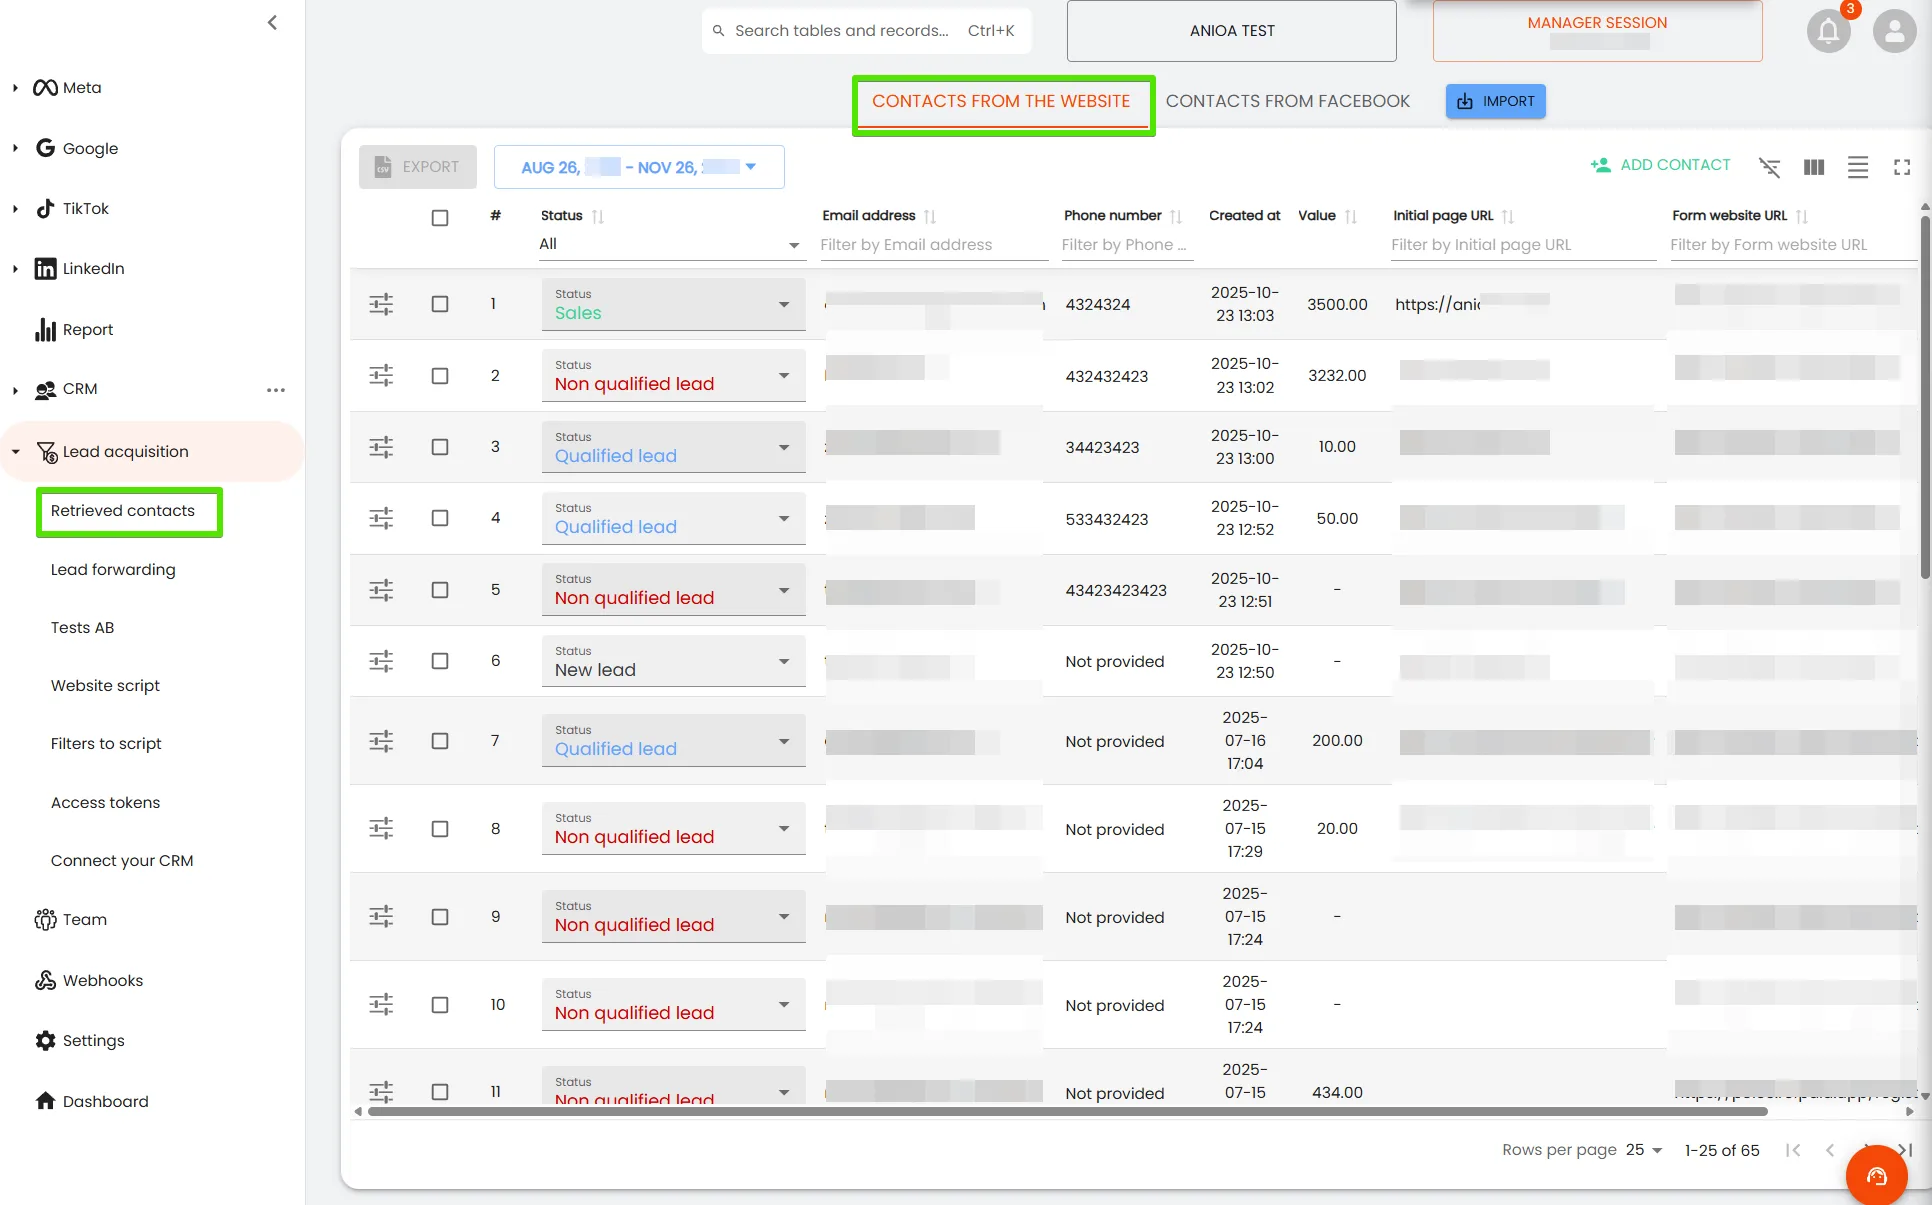
Assign a status to each sample lead,events will be sent to Facebook, which then need to be confirmed.
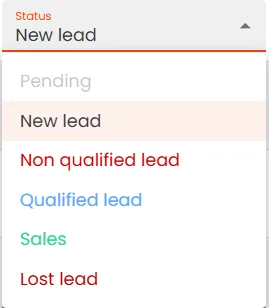
This process highlights adsfox’s competitive advantages in lead tracking and campaign reporting, addressing pain points for performance marketers by ensuring high-quality leads are prioritized.
Step 4 Approving Events in Meta
Next, in Meta Business, you need to approve these events.
Go to Meta Business Manager → Events Manager and click Review to accept the new events sent from adsfox.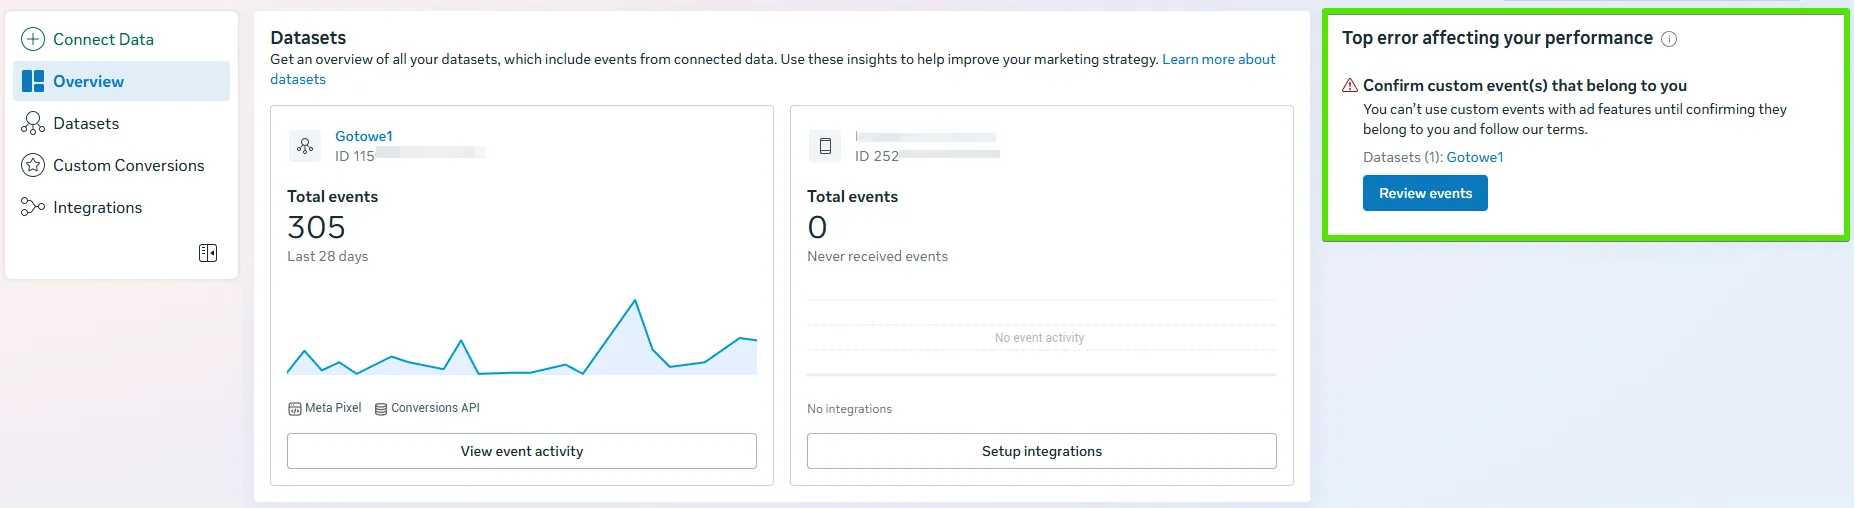
Remember: you must approve every event, including Unqualified Lead. Only after approval will all events be available in the system.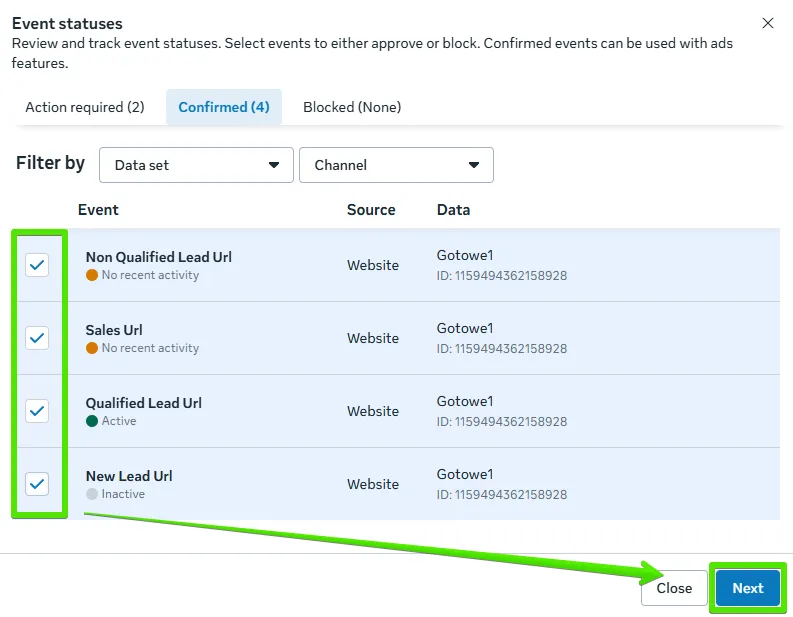
Now you can select these events in your campaigns: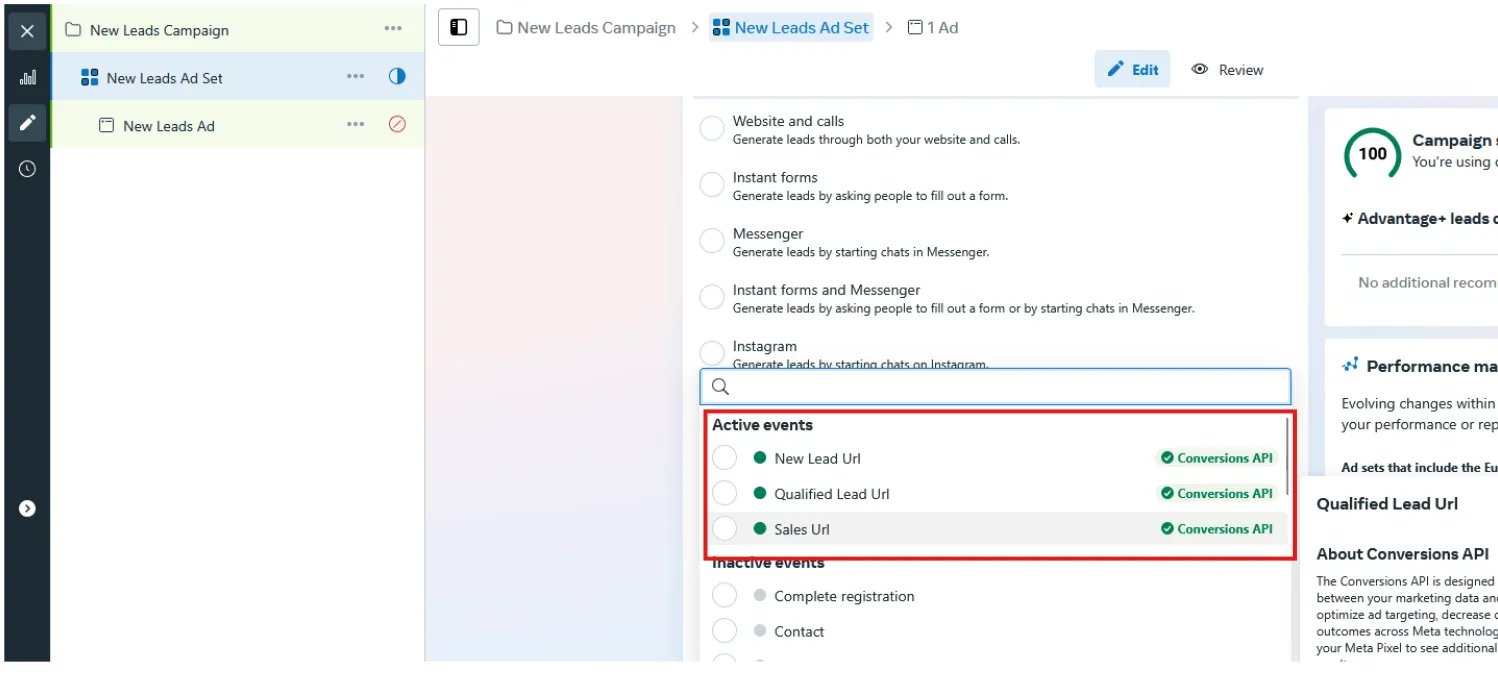
New Conversion Events for Optimization
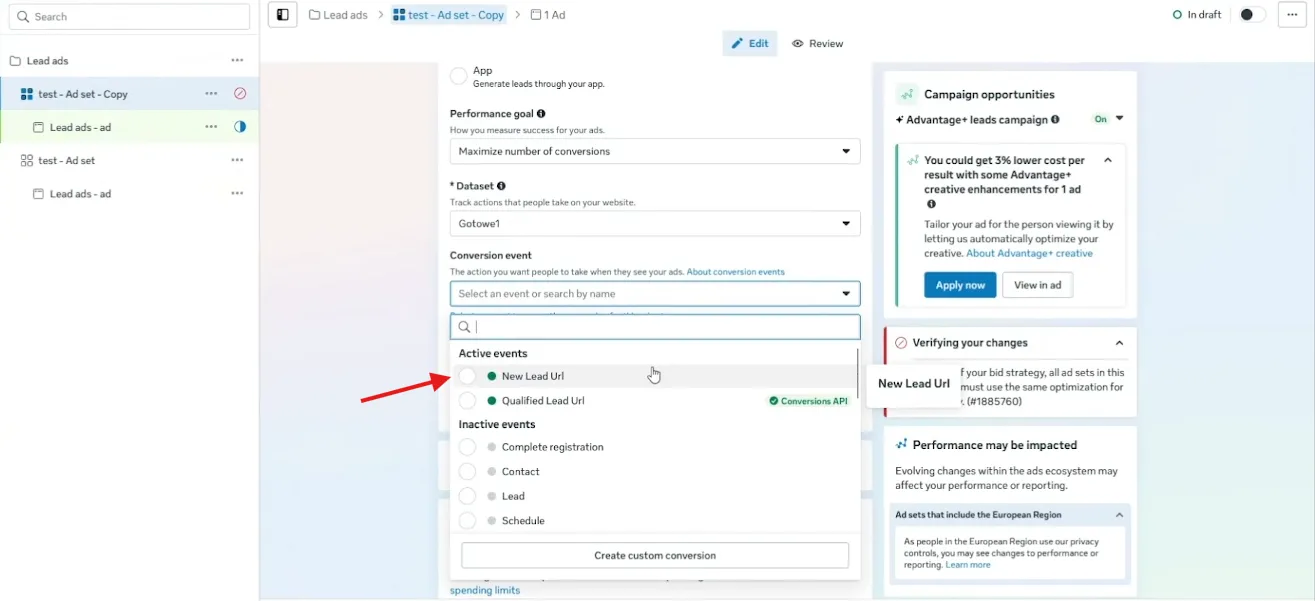
Integrating the CRM system with Facebook creates new, custom conversion events that become available for selection in your campaigns. One of them is New Lead URL, which we recommend using in campaigns directing traffic to your website.
Where does this event come from, and how does it differ from standard tracking?
- Standard Method: Typically, a conversion (lead acquisition) is measured using a script (Facebook Pixel) placed on the thank-you page. This script triggers every time someone loads that page, regardless of whether their data was correctly saved in the system. This leads to frequent discrepancies where Ads Manager shows more leads than the client actually received.
- New Method (via CRM): The New Lead URL event works differently. It is not triggered by a script on the page. Instead, it is sent from our CRM system’s server directly to Facebook’s server (via the Conversion API) and only occurs when the lead actually arrives and is properly registered in the CRM system.
Key Benefits:
Accuracy: This method ensures nearly 100% data consistency between the number of leads reported by Facebook and the actual number of contacts in the client’s database.
Naming: The “URL” suffix in the event name is intentional. It distinguishes events coming from cAPI on the website (URL) from those originating from other sources via our API, such as lead ad campaigns within Facebook (Lead Ads) or manually added leads in the CRM by the client (e.g., from a phone call to the company).
With adsfox, you gain a complete view of the customer journey, from ad spend to signed contracts, making it a powerful tool for performance marketing.
Step 5: Configuring Test Campaigns
Simply approving the events is not enough.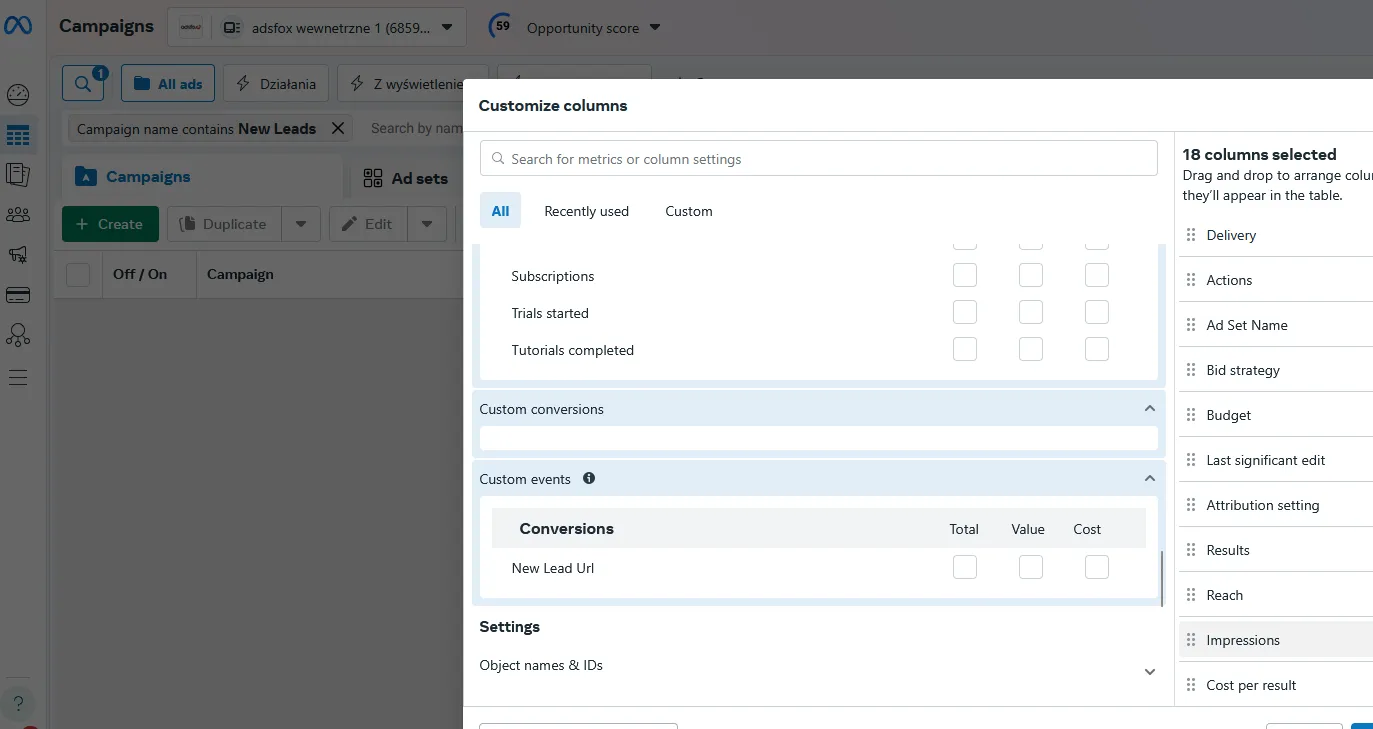
To have the system display all our conversions from the tool, such as Qualified Lead URL, it is necessary to create a separate campaign (or ad set) assigned to each of them,even if you don’t plan to actually promote that goal.
You can delete the campaigns (ad sets) right after, but because they were created, we’ll have access to their statistics.
To carry this out:
Duplicate an existing ad set.
Select a different conversion event (e.g., Qualified Lead URL).
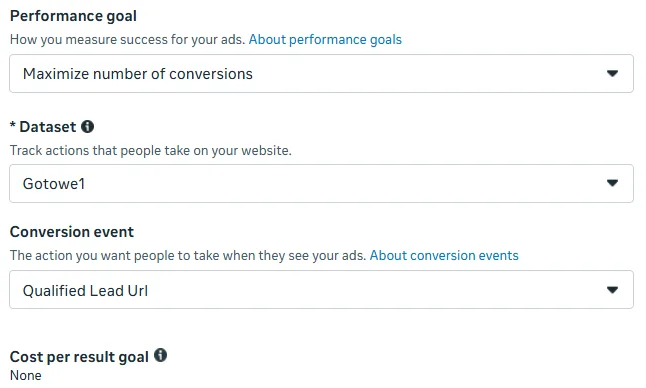
Publish the ad.
After a moment, you can pause the campaign,the event will still be saved in the system.
Repeat for each new conversion.
This way, the events will be visible in the statistics and columns of Ads Manager.
Step 6 Checking Results
New Columns and Data in Ads Manager
Thanks to the CRM integration with Facebook and the proper use of UTM parameters, new, custom data will appear in your Ads Manager. This allows for analysis of campaigns at a much deeper level, going beyond standard metrics like cost per click or cost per lead.
How and where do these data appear?
The new data is a direct result of actions your client takes in their CRM system. When the client tags an acquired contact (e.g., as “qualified,” “unqualified,” or notes a sale), our system automatically sends this feedback to Facebook. Facebook processes these signals and makes them available in your advertising panel as new, custom columns that can be added to the reporting view.
What new information will you see?
You’ll be able to analyze ad effectiveness based on their real business value to the client. Available data will include:
Qualified Leads: This allows you to see which campaigns, ad sets, and specific creatives generate contacts deemed valuable and promising by the client.
Unqualified Leads: This enables identification of ads that attract mismatched or low-quality contacts, allowing you to disable them and optimize your budget.
Value of Qualified Leads: If the client also assigns a specific financial value to leads in the CRM, this information will appear in your panel as well. This enables precise measurement of return on investment (ROAS) for individual advertising actions.
Strategic Benefit: Access to this data allows you to shift from optimizing campaigns for quantity of cheap leads to optimizing for quality and real business results. You can make informed decisions about scaling budgets for ads that bring the client the most valuable leads, while eliminating those that only generate costs.
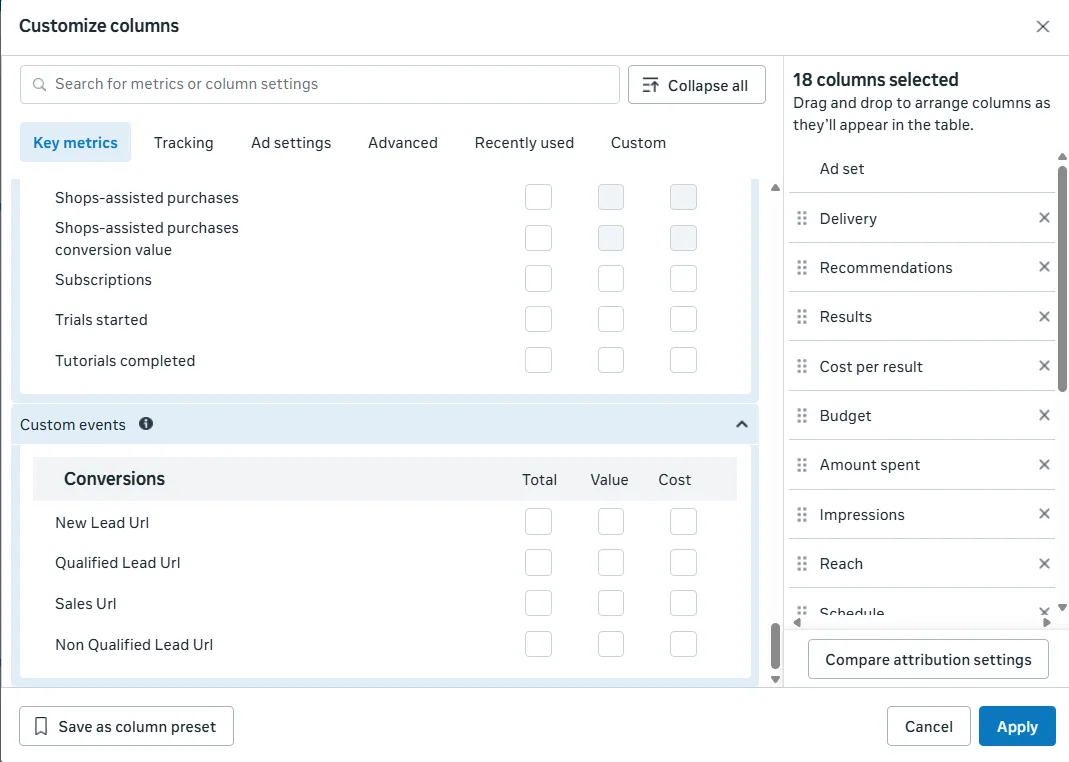
In Ads Manager, customize the columns and select the appropriate events, e.g., Qualified Lead URL. Click Apply and check if the system shows the number of events.
Remember that the first data may appear with a delay,from a few minutes to a few hours.
This integration addresses key pain points for performance marketers, agencies, and businesses reliant on lead generation campaigns, such as improving lead quality, enhancing campaign reporting, and streamlining CRM integration.
What Next?
After integrating adsfox with Meta Ads, you can fully leverage the potential of lead campaigns,data will flow directly to the CRM, making your campaigns even more effective.
In the next post, you’ll learn How to Connect Google with adsfox.