Integrating Zoho with adsfox (Webhook)
At its core, the webhook acts as a secure URL endpoint where Zoho sends POST requests with JSON payloads from mapped fields (think “Deals” module). This cuts out manual data transfers, slashes delays, and supercharges your campaign optimization.
What can you achieve? Real-time tweaks based on genuine sales signals—qualifying leads as SQLs, high-value opportunities, or revenue drivers. Handle leads from every source, not just lead ads: website forms, SEO traffic, direct visits, you name it. Cross-train algorithms across platforms (e.g., Facebook data sharpening TikTok or Google targeting). Get full-funnel visibility in GA4, from initial click to signed contract. And for custom CRMs? Fall back to CSV uploads without missing a beat.
No need for extra tools like Stape, Zapier, or Make—just a quick 5-minute CAPI snippet setup links your existing CRM to ad accounts and your site, minimizing tech hurdles. It’s a powerhouse for systems handling 200+ leads monthly, letting algorithms learn from at least 5 daily signals, though you’ll see ROI boosts from the very first tagged leads. Follow this step-by-step guide to configure the webhook, Zoho automations, and field mapping in adsfox for a rock-solid connection that auto-classifies leads for maximum ROI.
How It Works in Action
Lead values captured in Zoho CRM get auto-synced to adsfox. From there, our API integrations relay them to your ad platforms, optimizing campaigns around high-performing leads and boosting ROI effortlessly.
Step 1. Configuration in adsfox
- Log into adsfox at https://use.datadriventool.com/, making sure it’s linked to your ad accounts.
- Head to the “Connect your CRM” tab.
- From the “service” dropdown, pick “Zoho”.
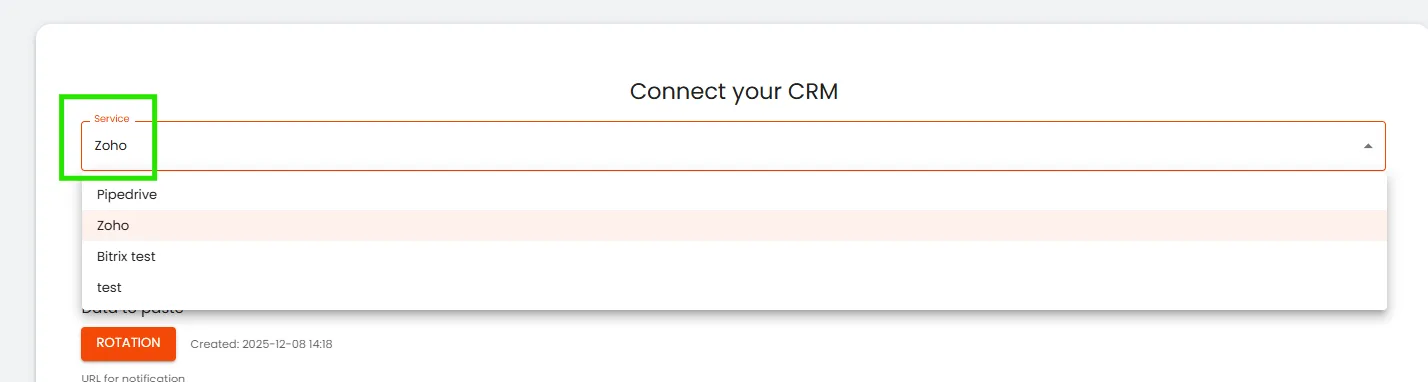
4. Below, you’ll find the generated webhook URL and JSON details. Copy and save them—they’re key for the upcoming integration steps.
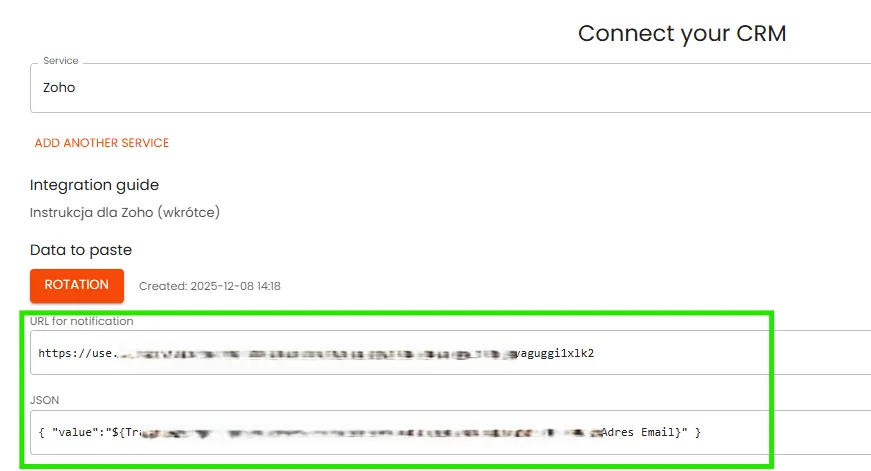
Pro tip: The “Rotation” button in the screenshot refreshes the webhook data and token, revoking the old one.
Step 2. Configuration in Zoho
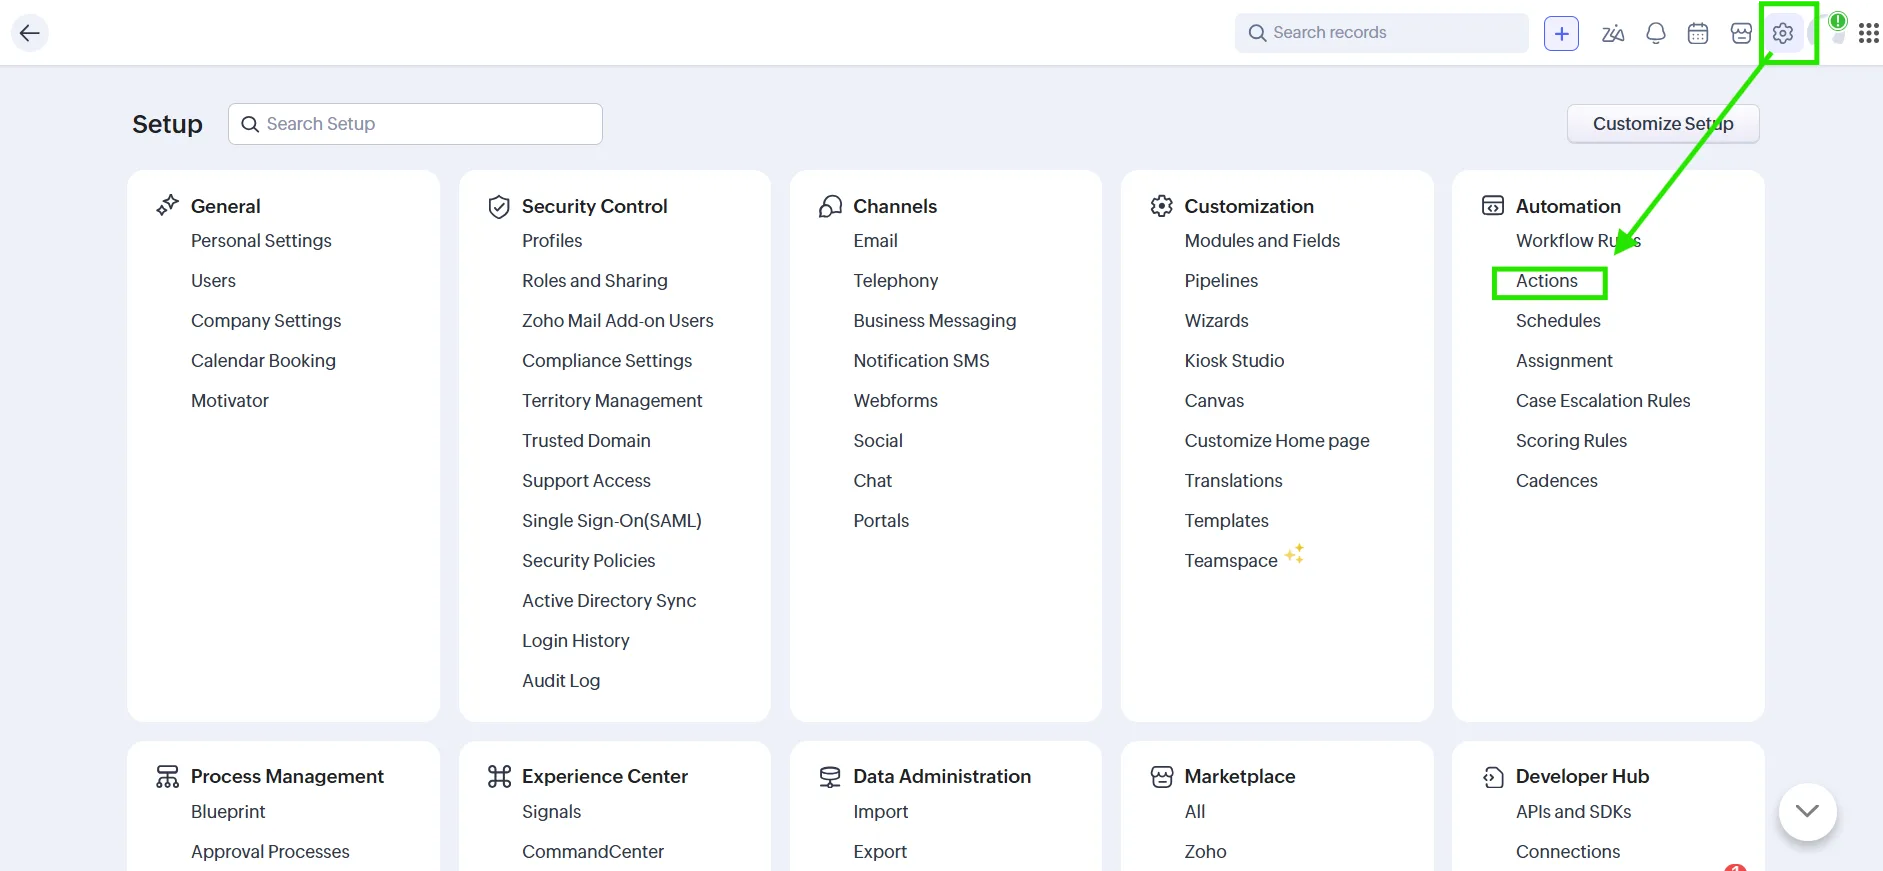
- Once logged in, jump to settings.
- In the “Automations” tab, select “Actions”.
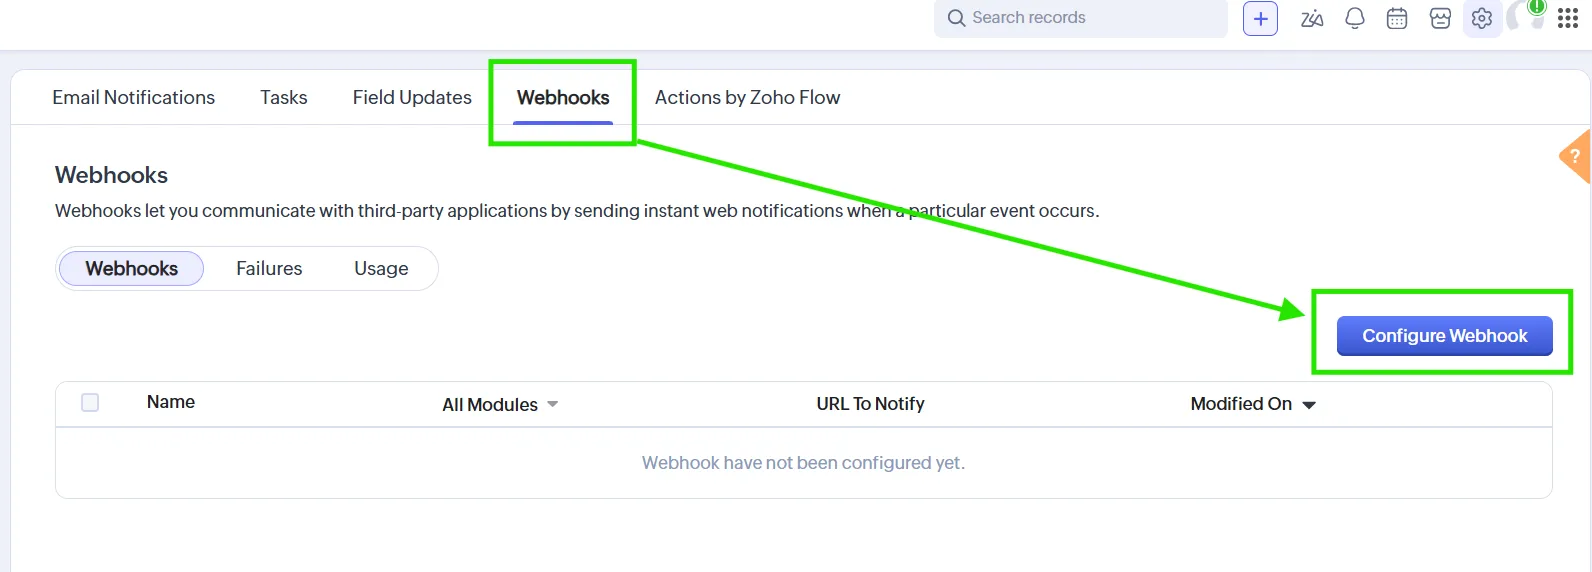
3. Navigate to “Webhooks“.
4. Click “Configure Webhook“.
5. Name it anything you like, we’re using “adsfox” in this example.
6. Description? Skip it if you want.
7. Method, set it to “Post“.
8. Notification URL, paste in the webhook you created.
9. Module, choose “Deals“.
10. Type, switch to “Form Data” and enter the details as shown below:
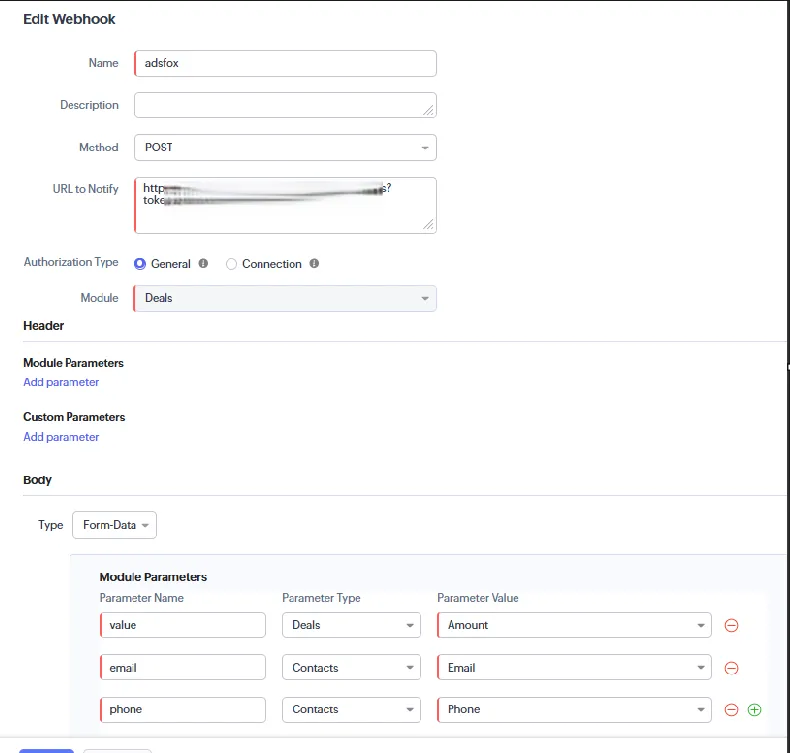
11. Save your changes.
12. Next, from the left-side settings menu, select “Workflow Rules”.
13. Then, hit “New Rule”.
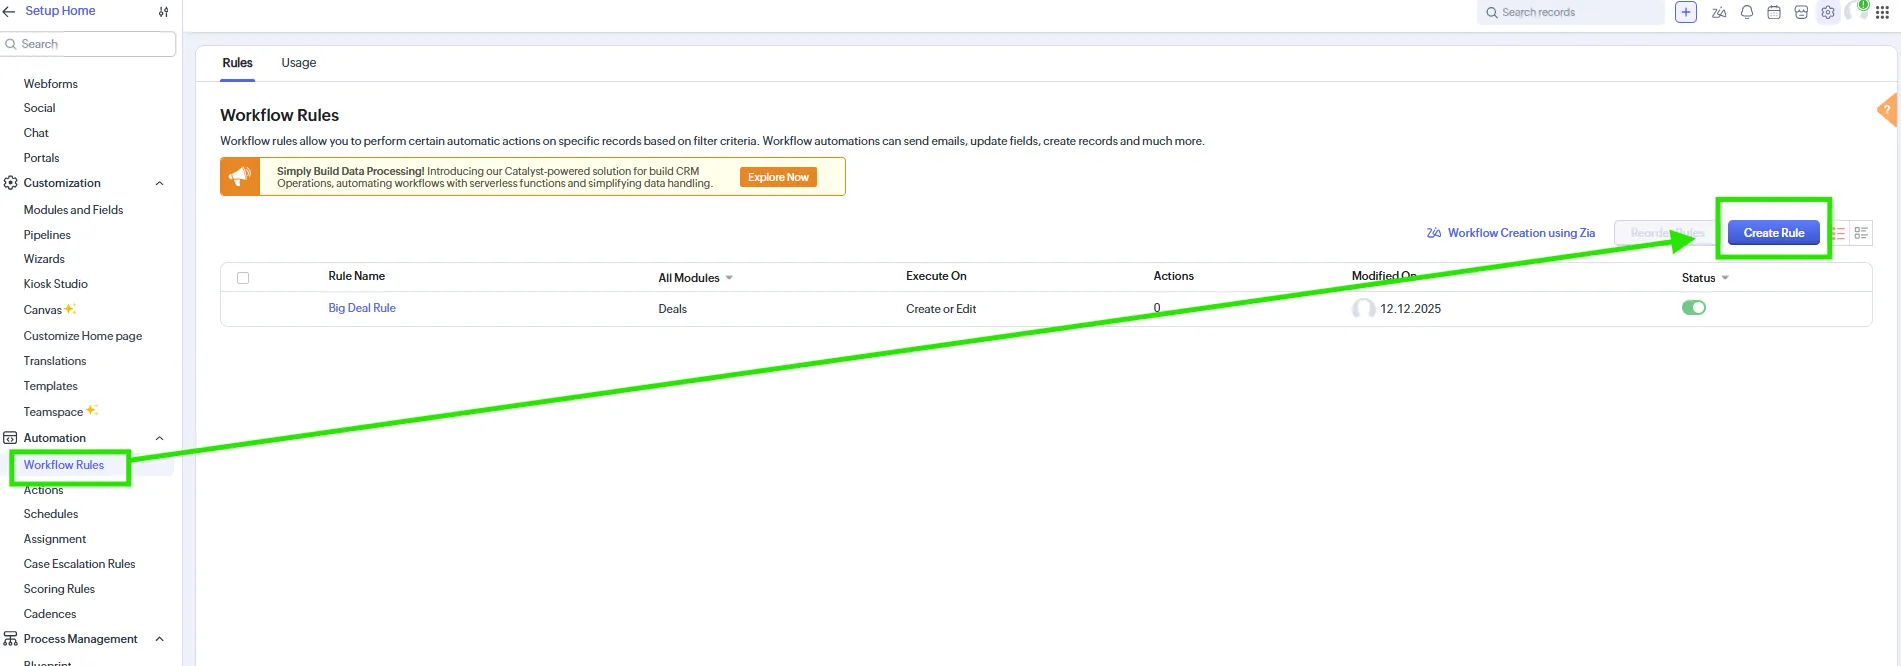
14. Module, select “Deals“.
15. Rule Name, pick any; ours is “adsfox“.
16. Description, leave it blank.
17. Click “Next“.

18. Execute this workflow rule based on select the Save action, then choose Create below, confirm with “Done”.
19. Which deals do you want to apply this rule to? go with “All deals”, confirm with “Done”.
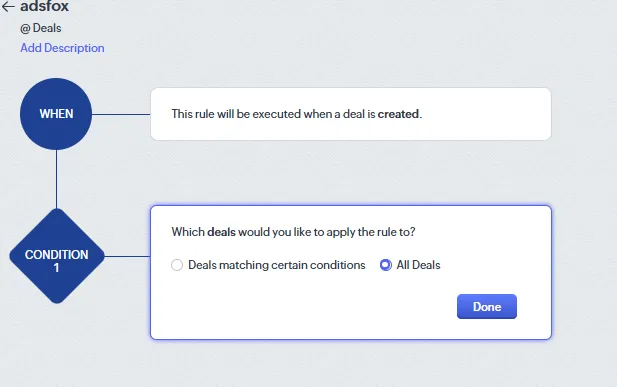
20. In the next step, choose “Webhook“.
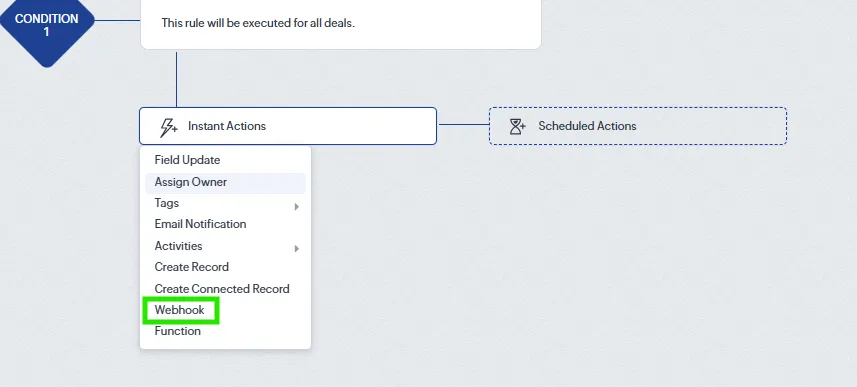
21. From the list, select the webhook you set up earlier in our case, “adsfox”.
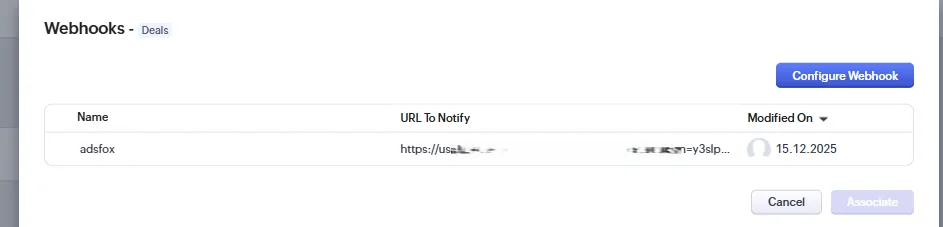
22. After saving, add a test deal and check adsfox to confirm the payload came through.
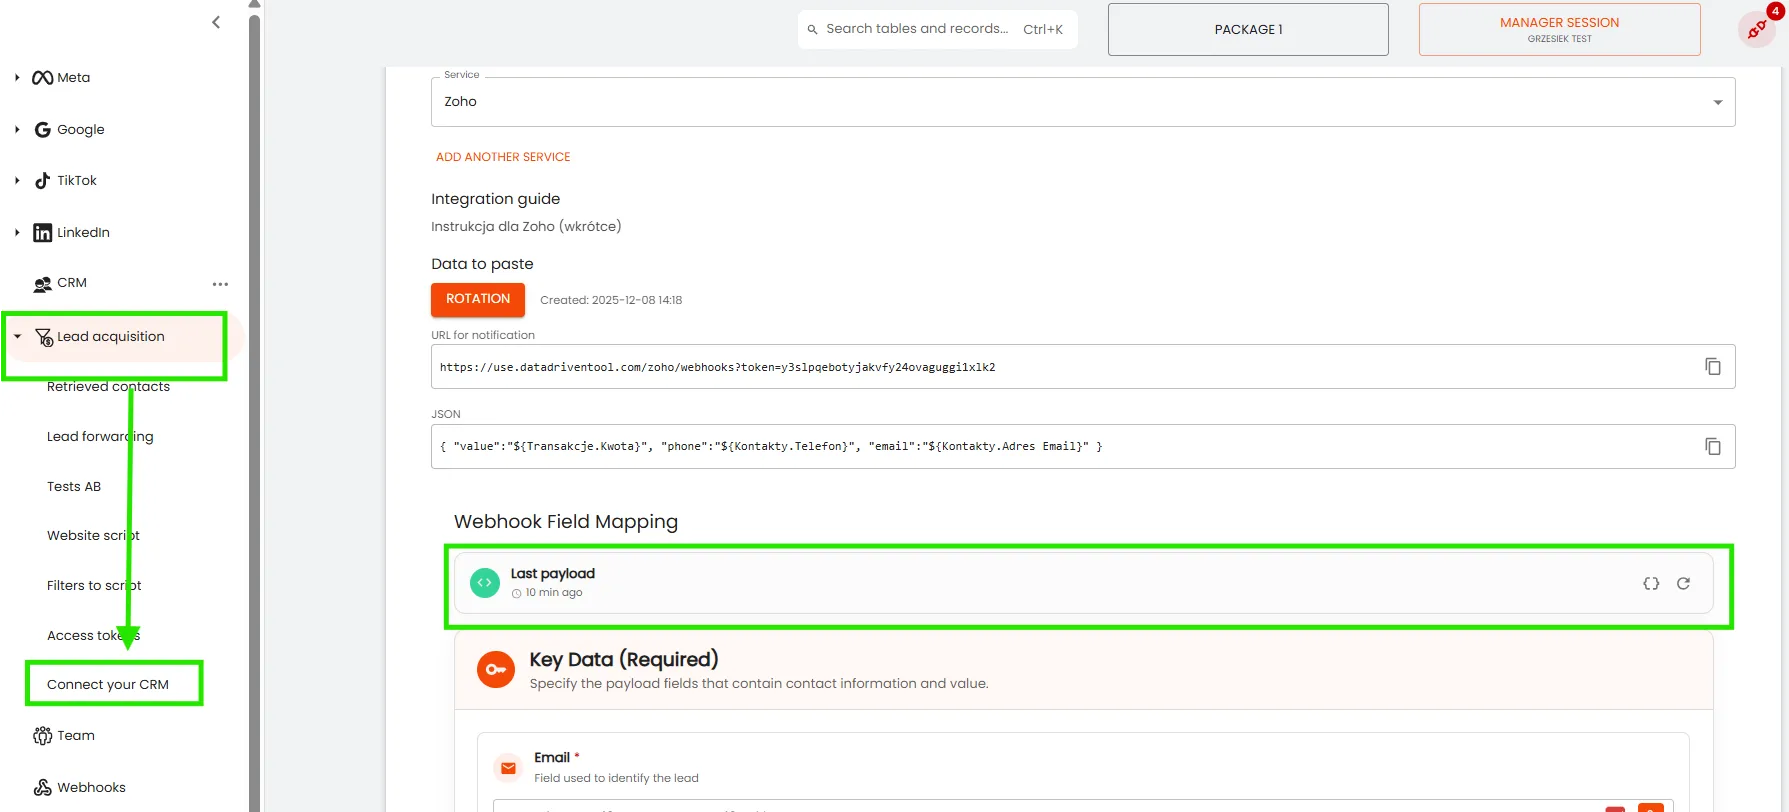
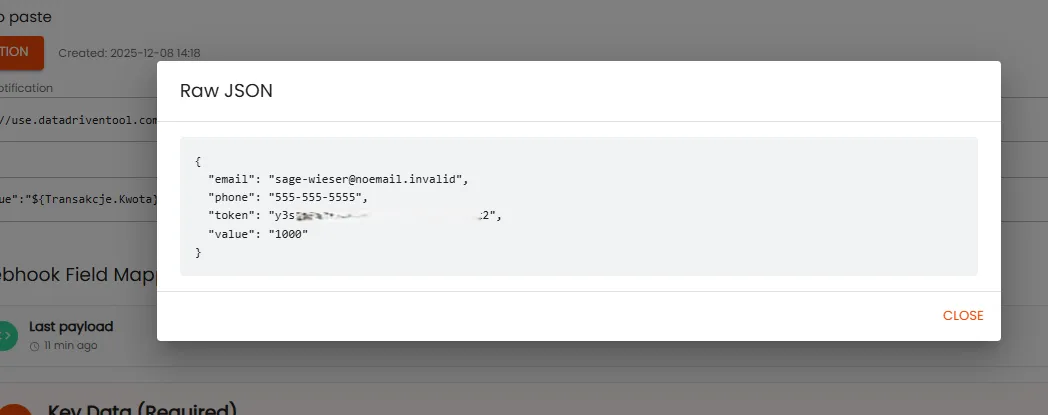
23. Now, map the incoming data to adsfox fields and define your lead tagging logic. Scroll down to the “Key Data” section, then for each data column, click the button on the right (as shown in the screenshot). Use the search to find the data from your test lead and select it. Here’s an example mapping for the email address column:
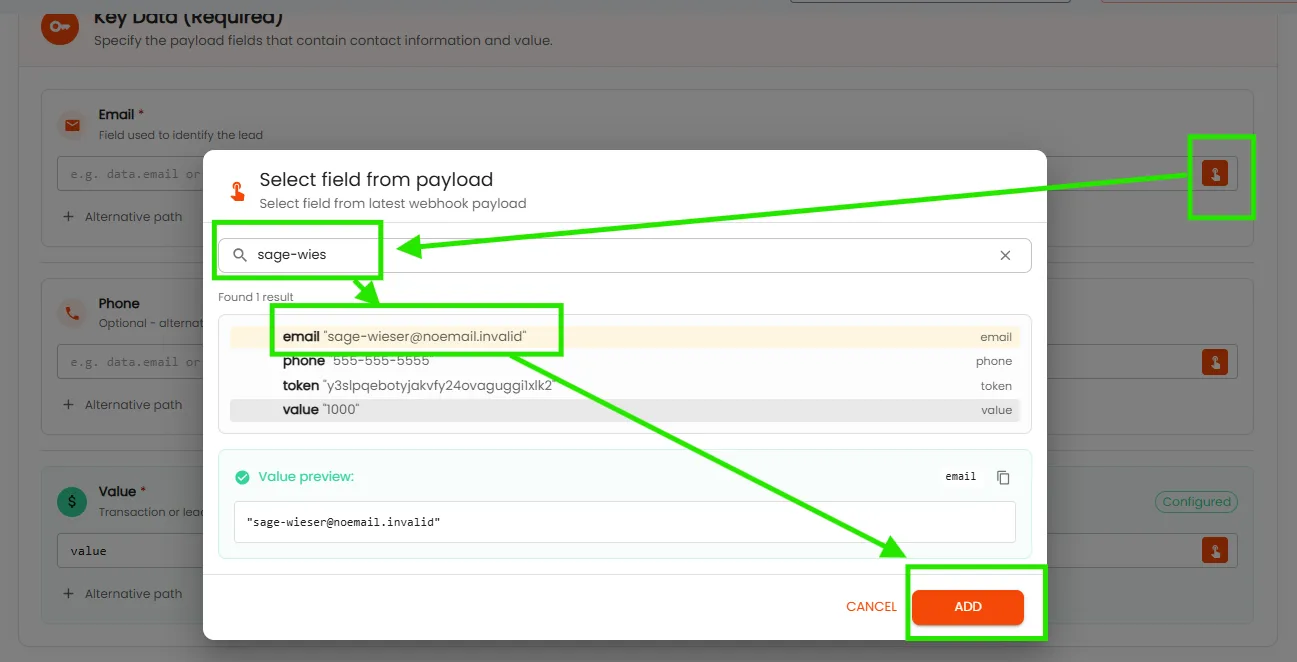
Repeat this for the remaining columns: Phone and Value.
24. Finally, set up conditions for lead qualification. Example below:
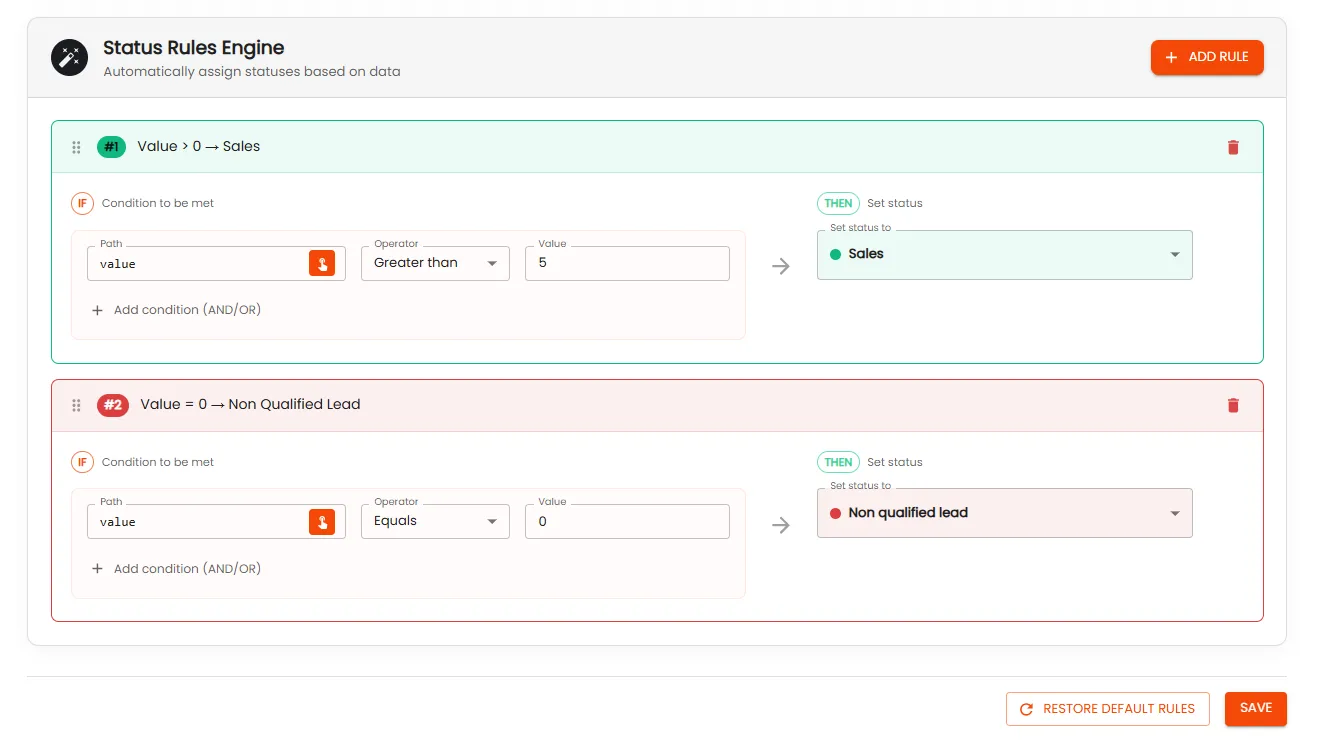
Congratulations!
You’ve nailed it! With every step complete, from webhook setup in adsfox to automations in Zoho, field mapping, and payload testing, your integration is live. Now, lead values (like emails, phones, and deal amounts) auto-flow to your ad platforms, shifting optimization from mere form fills to real sales signals, including qualifications and revenue.
For peak performance, aim for at least 200 leads per month so algorithms can train on 5+ daily signals, but you’ll spot gains right from your first tagged leads. Sharing access with agencies? Anonymize lead data for added security. adsfox stands out with its low-friction integrations, support for leads from any channel (beyond just lead ads), and comprehensive GA4 views, from click to contract close.
Got questions? Dive into our FAQ or reach out to support. Start optimizing for revenue today and watch your campaigns get smarter and more profitable!
What’s next?
Once the configuration described above is complete, the next step is to consistently and deliberately tag your leads, regardless of whether they come from Meta, Google, or other acquisition channels. The way leads are qualified and labeled directly impacts how advertising algorithms learn and optimize campaigns toward real business value — not just form submissions.
To fully leverage the benefits of the integration, move on to lead tagging best practices in adsfox. There you’ll find clear guidelines, practical scenarios, and proven workflows for qualifying leads, assigning values, and aligning sales and marketing teams around the same data.
Learn more: Lead tagging in adsfox